Drying pineapple in the oven is a simple, cost-effective way to enjoy sweet, chewy fruit snacks year-round. With just a few fresh pineapples and your standard kitchen oven, you can create delicious homemade dried pineapple that’s free of added sugars and preservatives.
Key Takeaways
- Choose ripe, fresh pineapples: Look for golden-yellow skin and a sweet aroma at the base for the best flavor and texture.
- Slice evenly for consistent drying: Uniform ¼-inch thick slices ensure even moisture removal and prevent burning or under-drying.
- Use low oven temperature: Set your oven between 140°F and 175°F (60°C–80°C) to gently dehydrate without cooking the fruit.
- Flip slices halfway through: This promotes even drying and prevents sticking or uneven texture.
- Store properly for longevity: Keep dried pineapple in an airtight container in a cool, dark place for up to 6 months.
- No dehydrator? No problem: Your regular oven works perfectly—just use the lowest setting and crack the door slightly.
- Enjoy as a healthy snack or recipe add-in: Use dried pineapple in trail mix, oatmeal, baked goods, or enjoy it straight from the jar.
Quick Answers to Common Questions
Can I use canned pineapple instead of fresh?
It’s not recommended. Canned pineapple is already cooked and retains extra moisture, which makes it harder to dry evenly and can result in a mushy texture.
How do I know if my oven goes low enough?
Check your oven’s manual or use an oven thermometer. If the lowest setting is above 175°F, prop the door open slightly with a wooden spoon to reduce the temperature.
Can I dry pineapple in a toaster oven?
Yes, if it has a low-temperature setting. Use the same method, but monitor closely as toaster ovens can heat unevenly.
Why is my dried pineapple sticky?
Sticky pineapple means it’s under-dried. Return it to the oven for another hour or two until it’s leathery and no longer moist.
Can I freeze dried pineapple?
Absolutely! Freezing preserves flavor and texture for up to a year. Just store in an airtight container or freezer bag.
📑 Table of Contents
Why Dry Pineapple at Home?
Have you ever bitten into a store-bought dried pineapple only to be hit with a wave of artificial sweetness or a rubbery texture? You’re not alone. Many commercial dried fruits are loaded with added sugars, preservatives, or sulfites to extend shelf life and enhance color. But what if you could make your own—crisp, naturally sweet, and full of tropical flavor—right in your kitchen?
Drying pineapple in the oven is not only simple but also incredibly rewarding. It’s a fantastic way to preserve seasonal fruit, reduce food waste, and enjoy a healthy snack anytime. Whether you’ve got a surplus of pineapples from a summer haul or just want to experiment with homemade preserves, oven-drying is an accessible method that requires no special equipment. Plus, you control the ingredients—meaning no mystery additives, just pure pineapple goodness.
What You’ll Need to Get Started
Before you begin, gather your tools and ingredients. The beauty of this method is its simplicity. You don’t need a food dehydrator or fancy gadgets—just your standard oven and a few kitchen basics.
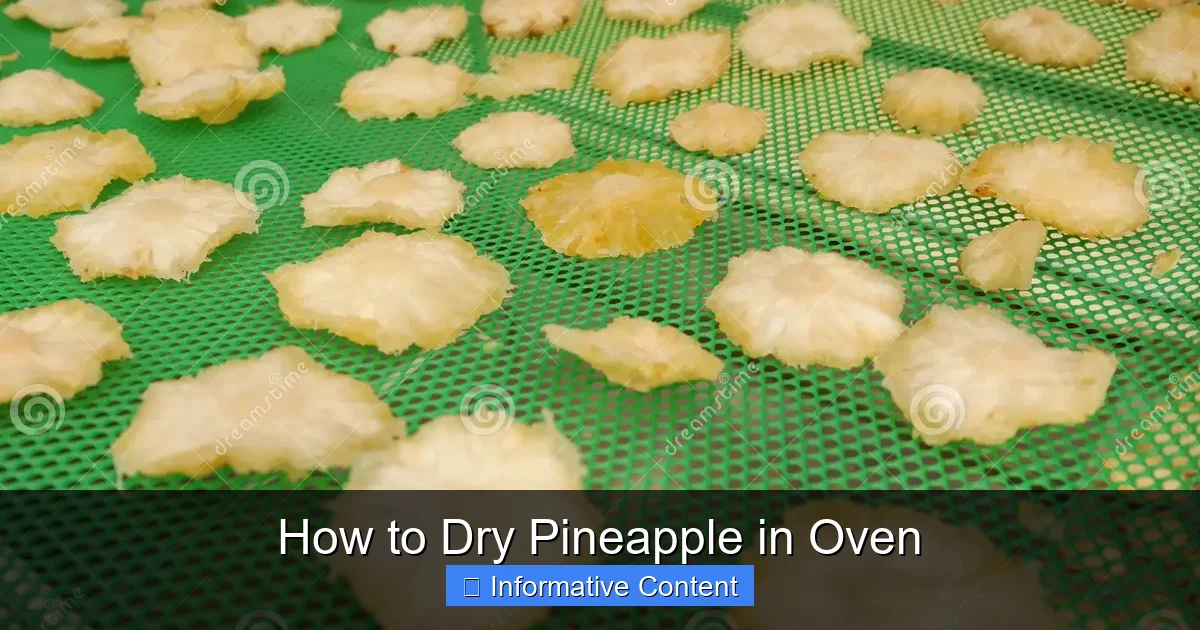
Visual guide about How to Dry Pineapple in Oven
Image source: thumbs.dreamstime.com
Essential Tools
- A sharp chef’s knife or serrated knife for clean cuts
- A sturdy cutting board
- A baking sheet or two (rimmed to catch any juice)
- Parchment paper or silicone baking mats (to prevent sticking)
- A small brush or paper towel (optional, for wiping excess moisture)
Ingredients
- 1–2 ripe pineapples (fresh, not canned)
- Optional: Lemon juice (to prevent browning, though pineapple resists it well)
- Optional: A pinch of sea salt or cinnamon (for flavor variation)
That’s it! No sugar, no oil, no preservatives. Just fresh pineapple and your oven.
Step-by-Step Guide to Drying Pineapple in the Oven
Now that you’re set up, let’s walk through the process. Drying pineapple in the oven takes time—usually 6 to 10 hours—but it’s mostly hands-off. Think of it as a slow, gentle transformation that turns juicy fruit into chewy, concentrated bites of sweetness.
Step 1: Prep the Pineapple
Start by washing the pineapple thoroughly under cool water. Use a vegetable brush to scrub the rough skin, as you’ll be handling it extensively. Pat it dry with a clean towel.
Next, slice off the top and bottom so the pineapple sits flat. Stand it upright and carefully cut away the spiky skin in vertical strips, following the curve of the fruit. Remove any remaining “eyes” with the tip of your knife.
Step 2: Core and Slice
Now, decide how you want your dried pineapple: rings, chunks, or spears. For even drying, slices should be about ¼-inch thick. Use a sharp knife to cut the pineapple into uniform rounds. If you prefer bite-sized pieces, cut the rings into quarters or smaller chunks.
To remove the tough core (which doesn’t dry well and can be fibrous), use a small round cookie cutter or the tip of your knife to punch out the center of each ring. Alternatively, slice the pineapple into wedges and remove the core before cutting into smaller pieces.
Step 3: Optional Pre-Treatment
While pineapple doesn’t brown as easily as apples or bananas, you can lightly brush the slices with lemon juice if you’re concerned about discoloration. This step is optional and won’t affect the flavor much due to pineapple’s natural acidity.
If you like a hint of spice, sprinkle a tiny amount of cinnamon or a pinch of sea salt over the slices. Keep it light—dried fruit intensifies in flavor, so a little goes a long way.
Step 4: Arrange on Baking Sheets
Line your baking sheets with parchment paper or silicone mats. This prevents sticking and makes cleanup a breeze. Arrange the pineapple slices in a single layer, making sure they don’t overlap. Overcrowding leads to uneven drying and steam buildup, which can make the fruit soggy instead of chewy.
If you’re drying a large batch, use multiple sheets and rotate them halfway through for even heat distribution.
Step 5: Set the Oven Temperature
This is the most critical part: your oven must be set to a low temperature. Ideal drying ranges from 140°F to 175°F (60°C–80°C). Most ovens don’t go this low, so here’s a pro tip: set your oven to its lowest setting (usually 150°F or 170°F) and use an oven thermometer to verify the actual temperature.
If your oven doesn’t go below 200°F (93°C), don’t worry—you can still make it work. Turn it to 175°F (80°C) and prop the door open slightly with a wooden spoon or oven mitt. This allows moisture to escape and keeps the internal temperature low. Just monitor it occasionally to ensure it doesn’t get too hot.
Step 6: Dry the Pineapple
Place the baking sheets in the oven and let the pineapple dry for 6 to 10 hours. The exact time depends on the thickness of your slices, your oven’s accuracy, and how chewy or crispy you like your dried fruit.
After the first 3–4 hours, flip the slices over using tongs or a spatula. This ensures even drying on both sides. If you’re using multiple trays, rotate them front to back and top to bottom to promote uniform exposure to heat.
Check the pineapple periodically toward the end. It’s done when it’s leathery and slightly pliable, with no visible moisture. It shouldn’t be brittle or hard unless you prefer a crispy texture (which takes longer).
Step 7: Cool and Test
Once dried, turn off the oven and let the pineapple cool completely on the baking sheets. As it cools, it will firm up slightly. Test a piece: it should be chewy, not sticky or wet. If it feels moist, return it to the oven for another 30–60 minutes.
Tips for Perfect Oven-Dried Pineapple
Even with a solid method, small tweaks can make a big difference in your results. Here are some expert tips to ensure success every time.
Use a Fan-Assisted Oven (If Available)
Convection ovens circulate air, which helps remove moisture more efficiently. If yours has a convection setting, use it on low. This can reduce drying time by 1–2 hours and improve evenness.
Don’t Rush the Process
Low and slow is the golden rule. High heat will cook the pineapple instead of drying it, resulting in a caramelized, candied texture—delicious, but not the same as true dried fruit. Patience pays off with better texture and flavor.
Rotate and Flip Regularly
Ovens have hot spots. Rotating trays and flipping slices ensures all pieces dry at the same rate. Set a timer to remind yourself every 2–3 hours.
Watch for Doneness
Dried pineapple continues to firm up as it cools. Remove it when it’s still slightly soft—it will become chewier once at room temperature. Over-drying leads to tough, brittle pieces that lose their fruity appeal.
Storing Your Homemade Dried Pineapple
Proper storage is key to maintaining quality and extending shelf life. Once completely cooled, transfer the dried pineapple to an airtight container—glass jars, resealable silicone bags, or food-safe plastic containers all work well.
Store in a cool, dark, and dry place like a pantry or cupboard. Avoid heat and sunlight, which can degrade flavor and texture. When stored correctly, homemade dried pineapple lasts up to 6 months.
For longer storage (up to 1 year), keep it in the refrigerator or freezer. Just let it come to room temperature before eating to restore its chewy texture.
Creative Ways to Enjoy Dried Pineapple
Now that you’ve mastered how to dry pineapple in the oven, it’s time to enjoy the fruits of your labor—literally! Dried pineapple is incredibly versatile and adds a tropical twist to both sweet and savory dishes.
- Snack straight up: Keep a jar on your counter for a quick, healthy pick-me-up.
- Trail mix: Combine with nuts, seeds, coconut flakes, and dark chocolate chips.
- Baking: Chop and add to muffins, scones, or granola bars for natural sweetness.
- Oatmeal or yogurt: Sprinkle on top for a fruity boost at breakfast.
- Salads: Toss into green salads or grain bowls for a sweet contrast.
- Smoothies: Rehydrate a few pieces in water, then blend for a tropical flavor.
You can also rehydrate dried pineapple by soaking it in warm water for 15–30 minutes. This softens it for use in recipes like chutneys, sauces, or desserts.
Final Thoughts
Drying pineapple in the oven is a simple, satisfying way to preserve one of nature’s sweetest fruits. It requires minimal effort, no special equipment, and delivers maximum flavor. Whether you’re looking to cut down on processed snacks, reduce food waste, or just enjoy a taste of the tropics year-round, this method is a game-changer.
With a little patience and attention to detail, you’ll end up with chewy, naturally sweet dried pineapple that’s far superior to anything you’d find in a store. So next time you spot a ripe pineapple at the market, grab it—and turn it into a delicious, homemade treat that lasts for months.
Frequently Asked Questions
How long does it take to dry pineapple in the oven?
Drying pineapple in the oven typically takes 6 to 10 hours, depending on slice thickness and oven temperature. Thinner slices dry faster, while thicker ones may take longer.
What temperature should I use to dry pineapple?
Set your oven between 140°F and 175°F (60°C–80°C). If your oven doesn’t go this low, use the lowest setting and crack the door slightly to release moisture.
Do I need to flip the pineapple slices?
Yes, flipping the slices halfway through ensures even drying and prevents one side from becoming over-dried or sticking to the pan.
Can I dry pineapple without a dehydrator?
Absolutely! A regular oven works perfectly for drying pineapple. Just use low heat and allow moisture to escape by propping the door open if needed.
How should I store dried pineapple?
Store cooled dried pineapple in an airtight container in a cool, dark place. It will keep for up to 6 months, or longer if refrigerated or frozen.
Is dried pineapple healthy?
Yes, when made without added sugar, dried pineapple is a healthy snack rich in vitamin C, fiber, and antioxidants. Just watch portion sizes, as it’s more calorie-dense than fresh fruit.