Making shredded chicken in the oven is a simple, hands-off way to cook tender, juicy chicken that’s perfect for meal prep and countless recipes. With minimal effort and basic ingredients, you can achieve fall-apart chicken that’s ready to use in tacos, sandwiches, soups, and more.
Key Takeaways
- Use bone-in, skin-on chicken thighs or breasts: These cuts stay juicier during roasting and shred more easily than boneless, skinless options.
- Season generously before roasting: Salt, pepper, garlic powder, and herbs add depth of flavor that infuses the meat as it cooks.
- Roast at 375°F (190°C) for even cooking: This temperature ensures the chicken cooks through without drying out.
- Use a meat thermometer for accuracy: Chicken is done when it reaches 165°F (74°C) internally—this prevents undercooking and overcooking.
- Let it rest before shredding: Resting allows juices to redistribute, keeping the meat moist and easier to pull apart.
- Shred with forks or a stand mixer: Two forks work well, but a stand mixer with paddle attachment makes quick work of large batches.
- Store properly for meal prep: Refrigerate for up to 4 days or freeze for up to 3 months in airtight containers.
Quick Answers to Common Questions
Can I use boneless, skinless chicken breasts?
Yes, but they’re more prone to drying out. Cook them for 25–30 minutes and monitor closely with a thermometer.
Do I need to cover the chicken while roasting?
No, covering can trap steam and prevent browning. Roast uncovered for the best texture.
Can I add vegetables to the pan?
Absolutely! Add potatoes, carrots, or onions around the chicken for a one-pan meal.
How do I know if the chicken is fully cooked?
Use a meat thermometer. The internal temperature should reach 165°F (74°C).
Can I freeze shredded chicken?
Yes, freeze in airtight containers for up to 3 months. Thaw in the fridge before reheating.
📑 Table of Contents
- Why Oven-Roasted Shredded Chicken Is a Kitchen Game-Changer
- Choosing the Right Cut of Chicken
- Essential Ingredients and Seasonings
- Step-by-Step Guide to Roasting Shredded Chicken
- How to Shred Chicken Like a Pro
- Storing and Using Your Shredded Chicken
- Common Mistakes to Avoid
- Conclusion: Master the Art of Oven-Roasted Shredded Chicken
Why Oven-Roasted Shredded Chicken Is a Kitchen Game-Changer
Shredded chicken is one of those kitchen staples that feels like magic—once you have it, you can turn it into tacos, salads, casseroles, soups, and sandwiches in minutes. But instead of boiling or slow-cooking, using the oven to make shredded chicken is often overlooked, even though it’s one of the easiest and most reliable methods. Not only does roasting in the oven give you more control over texture and flavor, but it also frees up your stovetop and slow cooker for other dishes.
Whether you’re meal prepping for the week or need a quick protein boost for dinner, oven-roasted shredded chicken delivers consistent results. It’s juicy, flavorful, and incredibly versatile. Plus, it requires minimal hands-on time—just season, roast, and shred. No constant stirring, watching, or worrying about burning. Once you try this method, you’ll wonder why you ever did it any other way.
Choosing the Right Cut of Chicken
Not all chicken cuts are created equal when it comes to shredding. While boneless, skinless chicken breasts are popular, they can dry out quickly in the oven if not monitored closely. For the best results, opt for bone-in, skin-on chicken thighs or breasts. The bone and skin act as natural insulators, helping the meat retain moisture during roasting.
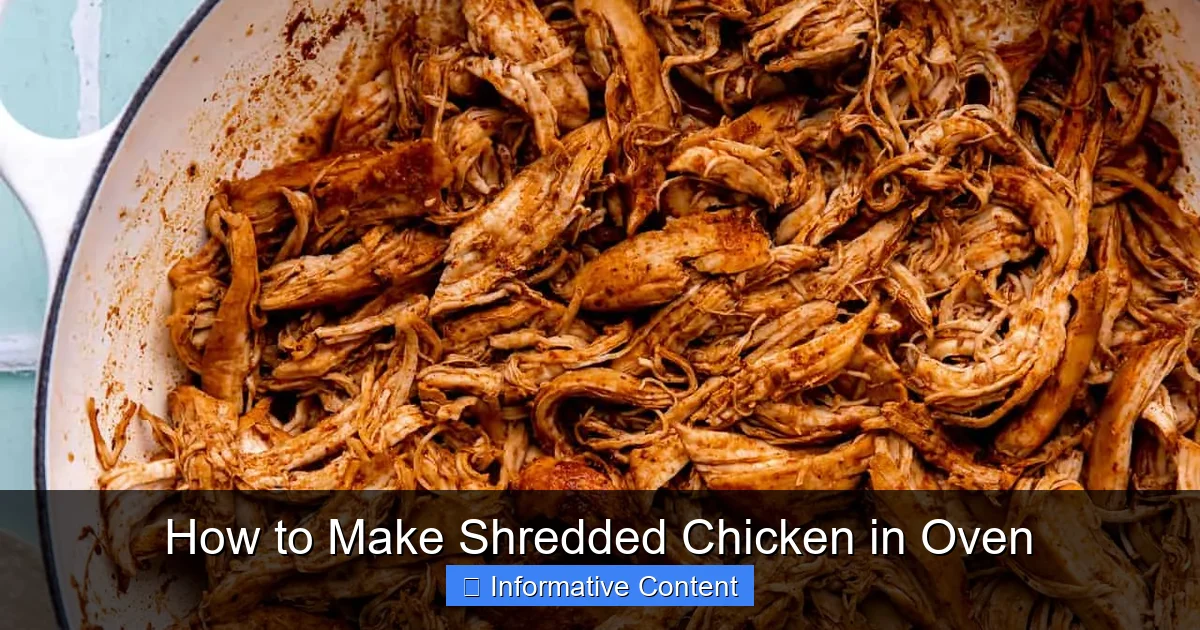
Visual guide about How to Make Shredded Chicken in Oven
Image source: houseofyumm.com
Bone-In vs. Boneless
Bone-in chicken thighs are the top choice for shredded chicken because they’re naturally more forgiving. Even if you slightly overcook them, they’ll still stay tender and juicy. Boneless cuts, especially breasts, cook faster but are more prone to drying out. If you prefer boneless, chicken thighs are still a better option than breasts due to their higher fat content.
Skin-On for Flavor and Moisture
Leaving the skin on during roasting adds richness and helps lock in moisture. You can remove it after cooking if you’re watching calories, but keeping it on during the roast makes a big difference in texture. The skin also crisps up nicely, adding a delicious contrast if you’re serving the chicken whole before shredding.
Essential Ingredients and Seasonings
You don’t need a long list of ingredients to make delicious shredded chicken. In fact, simplicity is key. Start with fresh, high-quality chicken and build flavor with basic pantry staples. The goal is to enhance the natural taste of the meat without overpowering it.
Basic Seasoning Blend
A simple mix of salt, black pepper, garlic powder, onion powder, and paprika works wonders. For a smoky twist, add a pinch of cumin or chili powder. Fresh herbs like thyme or rosemary can be added for aromatic depth. If you like a bit of heat, a dash of cayenne or red pepper flakes will do the trick.
Optional Flavor Boosters
For extra flavor, drizzle the chicken with olive oil or melted butter before seasoning. You can also add a splash of chicken broth or apple cider vinegar to the baking dish to create steam and keep the meat moist. Some people like to rub the chicken with a bit of Dijon mustard or lemon juice for a tangy kick.
Step-by-Step Guide to Roasting Shredded Chicken
Now that you’ve got your chicken and seasonings ready, it’s time to roast. This method is nearly foolproof and works great for both small and large batches.
Preheat and Prep
Start by preheating your oven to 375°F (190°C). This temperature is ideal—it’s hot enough to cook the chicken thoroughly but not so hot that it dries out. While the oven heats, pat the chicken dry with paper towels. Dry skin ensures better browning and seasoning adhesion.
Season Generously
Place the chicken pieces in a single layer on a baking sheet or in a roasting pan. Season both sides liberally with your chosen spice blend. Don’t be shy—this is your chance to build flavor. If using bone-in pieces, make sure to season around the bone and under the skin if possible.
Roast Until Done
Roast the chicken for 35 to 45 minutes, depending on the size and cut. Bone-in thighs may take closer to 45 minutes, while boneless breasts could be done in 25–30. The best way to know it’s ready is to use a meat thermometer. Insert it into the thickest part of the meat, avoiding the bone. Chicken is safe to eat at 165°F (74°C).
Rest Before Shredding
Once the chicken reaches the right temperature, remove it from the oven and let it rest for 10–15 minutes. This step is crucial—it allows the juices to settle back into the meat, making it more tender and easier to shred. Skipping this step can result in dry, stringy chicken.
How to Shred Chicken Like a Pro
Shredding chicken might seem straightforward, but a few techniques can make the process faster and more effective.
Using Two Forks
The classic method involves using two forks to pull the meat apart. Hold the chicken steady with one fork and use the other to tear and separate the fibers. This works well for smaller portions and gives you good control over the texture.
Stand Mixer Method
For larger batches, a stand mixer with the paddle attachment is a game-changer. Simply place the cooled chicken in the bowl and mix on low speed for 30–60 seconds. The paddles gently pull the meat apart without turning it into mush. This method is perfect for meal preppers or anyone making shredded chicken for a crowd.
Hands-On Approach
If you prefer a more tactile method, you can shred the chicken with your hands once it’s cool enough to handle. This works especially well with dark meat like thighs, which tend to fall apart more easily. Just be sure to wash your hands thoroughly before and after.
Storing and Using Your Shredded Chicken
One of the best things about oven-roasted shredded chicken is how well it stores. Proper storage ensures you can enjoy it all week long without sacrificing quality.
Refrigeration Tips
Store shredded chicken in an airtight container in the refrigerator for up to 4 days. Let it cool completely before sealing to prevent condensation, which can lead to sogginess. For best results, use it within the first 2–3 days.
Freezing for Long-Term Storage
To freeze, portion the chicken into meal-sized amounts and place them in freezer-safe bags or containers. Label with the date and freeze for up to 3 months. Thaw in the refrigerator overnight before reheating. You can reheat it in the microwave, on the stovetop with a splash of broth, or in the oven at 350°F (175°C) until warmed through.
Cooking Ideas and Recipe Inspiration
Shredded chicken is incredibly versatile. Use it in chicken tacos with salsa and avocado, mix it into a creamy chicken salad, or stir it into a pot of tortilla soup. It’s also great in enchiladas, burrito bowls, or as a topping for baked potatoes. For a quick weeknight dinner, toss it with pasta, marinara, and spinach for a protein-packed meal.
Common Mistakes to Avoid
Even simple recipes can go wrong if you’re not careful. Here are a few pitfalls to watch out for when making shredded chicken in the oven.
Overcooking the Chicken
One of the biggest mistakes is leaving the chicken in the oven too long. Overcooked chicken becomes dry and tough, making it difficult to shred. Always use a meat thermometer to check doneness, and remember that the temperature will rise a few degrees after removing it from the oven.
Skipping the Resting Period
Rushing to shred the chicken right out of the oven can lead to a dry, disappointing result. Resting allows the fibers to relax and the juices to redistribute. Think of it as letting a good steak rest—it makes all the difference.
Using the Wrong Pan
A dark or nonstick baking sheet can cause the chicken to brown too quickly. Use a light-colored metal baking sheet or a glass roasting dish for even heat distribution. Avoid overcrowding the pan, as this can lead to steaming instead of roasting.
Conclusion: Master the Art of Oven-Roasted Shredded Chicken
Making shredded chicken in the oven is one of those skills that pays off big time. It’s simple, reliable, and produces consistently delicious results. With the right cut of chicken, a few basic seasonings, and a little patience, you can create a versatile protein that elevates countless meals. Whether you’re feeding a family, prepping lunches, or just looking for a quick dinner solution, this method delivers.
So next time you’re planning your meals, consider roasting a batch of chicken. It’s a small effort that leads to big rewards—tender, flavorful, and ready-to-use shredded chicken that makes cooking easier and more enjoyable. Once you’ve mastered this technique, you’ll wonder how you ever lived without it.
Frequently Asked Questions
What’s the best cut of chicken for shredding?
Bone-in, skin-on chicken thighs are ideal because they stay juicy and tender during roasting. Boneless thighs are a close second.
How long does shredded chicken last in the fridge?
Properly stored in an airtight container, shredded chicken lasts up to 4 days in the refrigerator.
Can I season the chicken after shredding?
You can, but it’s better to season before roasting so the flavors penetrate the meat. Add extra seasoning after shredding if needed.
Is it safe to eat chicken at 160°F?
While 160°F is close, the USDA recommends 165°F for safety. The temperature will rise slightly during resting, so 160°F is acceptable if monitored.
Can I use a roasting pan instead of a baking sheet?
Yes, a roasting pan works great, especially if you’re cooking a large batch or adding vegetables.
Why is my shredded chicken dry?
This usually happens from overcooking or skipping the resting period. Use a thermometer and let the chicken rest before shredding.