Baking clams in the oven is a simple, delicious way to enjoy this seafood favorite. With minimal prep and bold flavors, you can serve restaurant-quality baked clams at home in under 30 minutes.
Key Takeaways
- Choose fresh, live clams: Look for tightly closed shells or ones that close when tapped—this ensures freshness and safety.
- Clean clams thoroughly: Scrub shells under cold water and soak in salted water to remove sand and grit.
- Use a flavorful topping: A mix of breadcrumbs, garlic, butter, and herbs creates a crispy, savory crust that enhances the natural sweetness of the clams.
- Bake at high heat: 400°F (200°C) ensures the clams cook quickly and evenly without becoming rubbery.
- Serve immediately: Baked clams are best enjoyed hot and fresh out of the oven with lemon wedges and crusty bread.
- Customize to taste: Add Parmesan, red pepper flakes, or white wine to the topping for extra depth and heat.
- Safety first: Discard any clams that don’t open after baking—they may be unsafe to eat.
Quick Answers to Common Questions
Can I use frozen clams for baking?
Yes, but thaw them completely in the refrigerator first. Pat dry before using, as excess moisture can affect the topping.
How do I know if clams are safe to eat?
Only eat clams that open during cooking. Discard any that remain closed after baking—they may be dead and unsafe.
Can I make baked clams ahead of time?
You can prep the clams and topping up to a day in advance, but bake them just before serving for the best texture and flavor.
What’s the best wine to serve with baked clams?
A crisp, acidic white wine like Sauvignon Blanc, Pinot Grigio, or Chardonnay complements the briny, buttery flavors perfectly.
Can I bake clams on the grill instead?
Absolutely! Use a grill-safe dish or foil packets and cook over medium heat for 10–12 minutes, or until the clams open.
📑 Table of Contents
Why Bake Clams in the Oven?
Clams are one of the most versatile and flavorful shellfish you can cook at home. Whether you’re hosting a dinner party or craving a cozy seafood meal, baking clams in the oven is a foolproof method that delivers tender, juicy meat with a crispy, golden topping. Unlike frying or steaming, oven-baking allows you to build layers of flavor while keeping the clams moist and succulent.
One of the best things about baking clams is how little effort it takes. With just a few pantry staples—like breadcrumbs, garlic, and butter—you can transform fresh clams into a restaurant-worthy dish. Plus, baking is hands-off once the clams go into the oven, giving you time to prep sides or enjoy a glass of wine while dinner cooks. Whether you’re using littleneck, cherrystone, or Manila clams, the oven method works beautifully and consistently.
Choosing the Right Clams
Types of Clams for Baking
Not all clams are created equal when it comes to baking. For the best texture and flavor, choose hard-shell clams like littlenecks or cherrystones. These varieties are meaty, sweet, and hold up well under high heat. Littlenecks are smaller and more tender, making them ideal for appetizers, while cherrystones are larger and perfect for a main course.
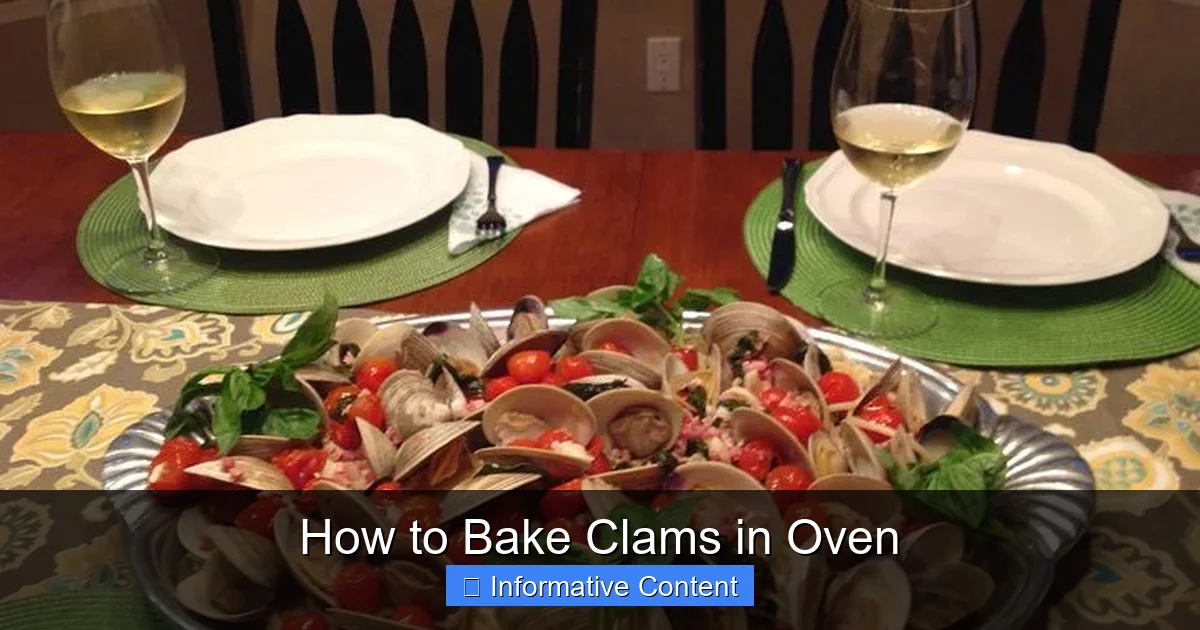
Visual guide about How to Bake Clams in Oven
Image source: i.pinimg.com
Manila clams are another excellent option, especially if you enjoy a slightly brinier taste. They’re smaller than hard-shell clams but pack a lot of flavor. Avoid using soft-shell clams (like steamer clams) for baking, as they tend to become tough and chewy when exposed to dry heat.
How to Pick Fresh Clams
When shopping for clams, always buy from a reputable seafood counter or fish market. Look for clams with tightly closed shells or ones that close when gently tapped. Open clams that don’t respond are likely dead and should be avoided—eating dead shellfish can cause foodborne illness.
Check the smell too. Fresh clams should have a clean, ocean-like scent. If they smell sour, fishy, or unpleasant, don’t buy them. Also, inspect the shells for cracks or chips, which can allow sand and bacteria to enter. Buy clams the same day you plan to cook them for optimal freshness.
Preparing Clams for the Oven
Cleaning and Soaking
Before baking, it’s essential to clean your clams thoroughly. Start by rinsing them under cold running water, using a stiff brush to scrub away any dirt, barnacles, or grit from the shells. Pay special attention to the hinge area, where sand often hides.
Next, soak the clams in a bowl of cold, salted water (about 1/3 cup of salt per gallon of water) for 20–30 minutes. This mimics seawater and encourages the clams to expel any remaining sand or sediment. After soaking, drain and rinse them again. This step is crucial—no one wants a gritty bite in their perfectly baked clams!
Shucking vs. Baking in Shell
You have two options when baking clams: shuck them first or bake them in the shell. Baking in the shell is easier and helps retain moisture, but it requires a bit more prep. If you go this route, gently pry the shells open just enough to add your topping, then press them back together slightly to hold the mixture in place.
Alternatively, you can shuck the clams and place the meat in small oven-safe dishes or clam shells (real or artificial). This method gives you more control over portioning and topping distribution. It’s also ideal if you’re serving guests who prefer not to deal with shells at the table.
Making the Perfect Topping
Classic Breadcrumb Topping
The topping is what transforms baked clams from good to great. A classic version includes fresh breadcrumbs, melted butter, minced garlic, parsley, and a pinch of salt and pepper. For extra richness, add grated Parmesan cheese. The butter helps the breadcrumbs crisp up in the oven, while the garlic and herbs infuse the clams with bold flavor.
To make the topping, combine 1 cup of breadcrumbs (preferably fresh, not dried), 3 tablespoons of melted butter, 2 cloves of minced garlic, 2 tablespoons of chopped parsley, and 1/4 cup of grated Parmesan. Mix well and season to taste. You can pulse stale bread in a food processor to make your own breadcrumbs—just make sure they’re coarse, not fine.
Flavor Variations
Don’t be afraid to get creative! Add a splash of white wine to the topping for a bright, acidic note. Red pepper flakes bring a subtle kick, perfect for those who like a little heat. For a Mediterranean twist, mix in capers, lemon zest, and oregano. Or go decadent with a splash of heavy cream and a sprinkle of crispy bacon bits.
If you’re avoiding dairy, use olive oil instead of butter and skip the Parmesan. Nutritional yeast can add a cheesy, umami flavor without the dairy. Gluten-free? Use gluten-free breadcrumbs or crushed gluten-free crackers.
Baking Clams Step-by-Step
Preheating and Prep
Preheat your oven to 400°F (200°C). This temperature is hot enough to cook the clams quickly without drying them out. While the oven heats, prepare your baking dish. A shallow, oven-safe dish or baking sheet works well. Line it with parchment paper or foil for easy cleanup.
If you’re baking clams in their shells, arrange them in a single layer with the hinge side down to prevent the topping from spilling out. For shucked clams, place each clam in a small ramekin or clam shell, then top generously with the breadcrumb mixture.
Baking Time and Doneness
Bake the clams for 12–15 minutes, or until the topping is golden brown and the clams have opened (if baked in shell). The internal temperature should reach 145°F (63°C) for safe consumption. Avoid overcooking—clams become tough and rubbery if baked too long.
Keep an eye on them during the last few minutes. If the topping browns too quickly, tent the dish loosely with aluminum foil. Once done, remove from the oven and let rest for 2–3 minutes before serving. This allows the flavors to settle and makes handling easier.
Serving and Enjoying Baked Clams
Presentation Tips
Baked clams are as much about presentation as taste. Serve them on a platter garnished with fresh parsley, lemon wedges, and a sprinkle of paprika for color. If using individual shells or ramekins, arrange them on a bed of rock salt to keep them steady and add a coastal touch.
Pair your clams with crusty bread for soaking up the delicious buttery juices. A simple green salad or roasted vegetables make great sides. For a complete meal, serve with pasta in a light garlic butter sauce or a crisp white wine like Sauvignon Blanc or Pinot Grigio.
Safety Reminders
Always discard any clams that don’t open after baking. This is a key safety step—unopened clams may be dead before cooking and could harbor harmful bacteria. Also, avoid cross-contamination by using separate utensils and cutting boards for raw and cooked seafood.
Store leftovers (if you have any!) in an airtight container in the refrigerator for up to 2 days. Reheat gently in the oven to preserve texture—microwaving can make them rubbery.
Conclusion
Baking clams in the oven is a simple, elegant, and incredibly satisfying way to enjoy seafood at home. With just a few ingredients and minimal effort, you can create a dish that rivals anything you’d find at a high-end seafood restaurant. From choosing the freshest clams to crafting a flavorful topping and baking to perfection, every step is designed to bring out the natural sweetness and briny depth of the shellfish.
Whether you’re cooking for a special occasion or just treating yourself, this method delivers consistent, delicious results. So next time you’re at the fish market, grab a batch of clams, whip up a quick topping, and let your oven do the rest. Your taste buds—and your dinner guests—will thank you.
Frequently Asked Questions
How long do you bake clams in the oven?
Bake clams at 400°F (200°C) for 12–15 minutes, or until the shells open and the topping is golden brown. Always discard unopened clams.
Do you need to shuck clams before baking?
No, you can bake clams in their shells. Just gently open them enough to add the topping, then press them back together slightly.
What kind of clams are best for baking?
Littleneck, cherrystone, and Manila clams are ideal. They’re meaty, sweet, and hold up well under high heat.
Can I use dried breadcrumbs instead of fresh?
Yes, but fresh breadcrumbs give a better texture. If using dried, reduce the butter slightly to avoid a greasy topping.
How do I prevent grit in baked clams?
Soak clams in salted water for 20–30 minutes before cooking to help them expel sand, then scrub and rinse thoroughly.
Can I make baked clams gluten-free?
Absolutely! Use gluten-free breadcrumbs or crushed gluten-free crackers and ensure all other ingredients are certified gluten-free.