Dehydrating fruit in the oven is a simple, cost-effective way to preserve fresh produce and create healthy, shelf-stable snacks. With just a few basic steps—slicing, arranging, and slow-drying—you can transform apples, bananas, strawberries, and more into delicious dried treats perfect for hiking, baking, or snacking.
Key Takeaways
- Choose ripe, fresh fruit: Use firm, unbruised fruit at peak ripeness for the best flavor and texture after dehydration.
- Uniform slicing is key: Cut fruit into even slices (about 1/4 inch thick) to ensure consistent drying and prevent under- or over-drying.
- Use the lowest oven temperature: Set your oven between 140°F and 170°F (60°C–75°C) to gently remove moisture without cooking the fruit.
- Leave the door slightly open: Prop the oven door open with a wooden spoon to allow steam to escape and improve airflow.
- Rotate trays and flip slices: Check and flip fruit every 1–2 hours for even drying and to prevent sticking or burning.
- Test for doneness: Properly dehydrated fruit should be leathery or slightly crisp, with no visible moisture when cut.
- Store properly for longevity: Cool completely, then store in airtight containers in a cool, dark place for up to 6–12 months.
Quick Answers to Common Questions
Can I dehydrate fruit without a dehydrator?
Yes! You can easily dehydrate fruit using your oven. Set it to the lowest temperature (ideally 140°F–170°F), prop the door open, and dry slices evenly on baking sheets.
How long does it take to dehydrate fruit in the oven?
Drying time varies by fruit and thickness, but most fruits take 4–10 hours. Thin apple slices may dry in 4–6 hours, while thicker pineapple can take 8–10 hours.
Should I peel fruit before dehydrating?
It depends. Peeling apples and pears can improve texture, but leaving the skin on peaches or plums adds fiber and nutrients. Choose based on preference.
Can I dehydrate frozen fruit?
It’s not recommended. Frozen fruit releases too much water when thawed, leading to uneven drying and potential spoilage. Use fresh, ripe fruit for best results.
How do I know when dried fruit is done?
Properly dehydrated fruit should be leathery or slightly crisp with no visible moisture. Cut a piece in half—if it’s dry inside, it’s ready.
📑 Table of Contents
Why Dehydrate Fruit at Home?
Have you ever bought a big batch of fresh fruit only to watch it spoil before you could eat it all? Or maybe you’ve eyed those pricey bags of dried fruit at the store and wondered if you could make them yourself—without a dehydrator? The good news is, you absolutely can. Dehydrating fruit in the oven is a simple, affordable, and rewarding way to preserve your favorite seasonal produce.
Oven dehydration lets you turn juicy apples, sweet strawberries, or tropical pineapple into chewy, flavor-packed snacks that last for months. It’s perfect for meal preppers, hikers, parents looking for healthy kid snacks, or anyone who loves homemade treats. Plus, you control the ingredients—no added sugars, preservatives, or artificial flavors. Just pure, concentrated fruit goodness.
What You’ll Need to Get Started
Before you begin, gather a few basic tools. The beauty of oven dehydration is that you likely already have everything you need at home. Here’s what to grab:
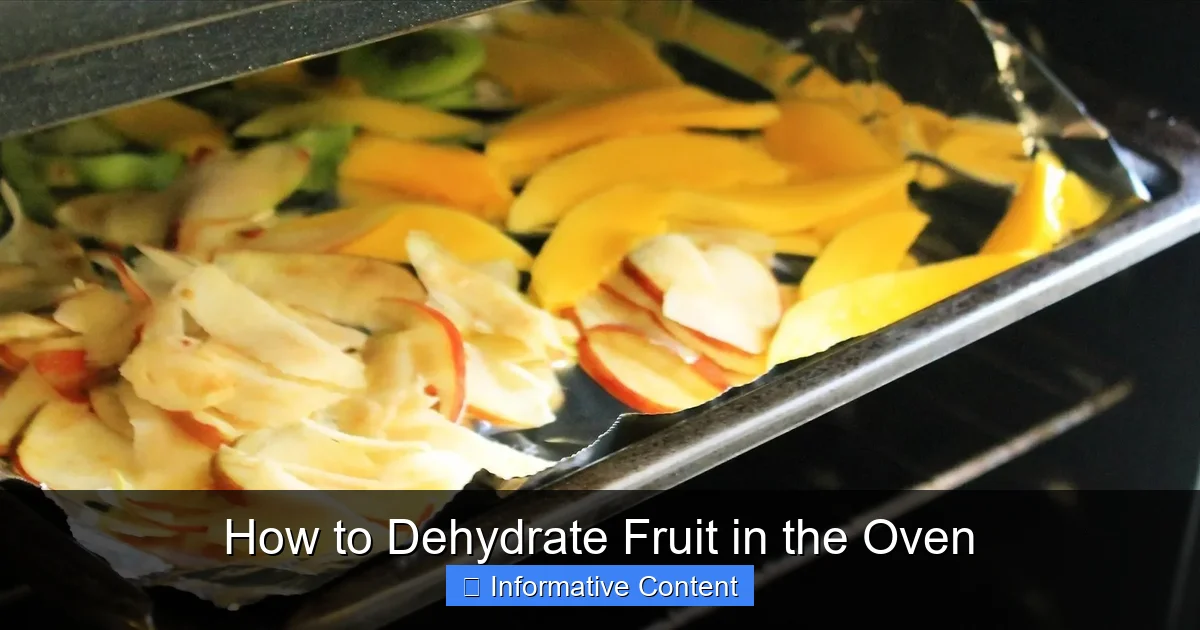
Visual guide about How to Dehydrate Fruit in the Oven
Image source: img.wonderhowto.com
- A reliable oven: Gas or electric works, but convection ovens dry faster due to better airflow.
- Sharp knife or mandoline slicer: For consistent, thin slices.
- Baking sheets: Use rimmed sheets to prevent juices from dripping.
- Parchment paper or silicone baking mats: These prevent sticking and make cleanup easier.
- Wooden spoon or oven-safe tool: To prop the oven door open.
- Airtight containers or jars: For storing your finished dried fruit.
Optional but helpful: a kitchen scale (to measure fruit), a spray bottle with lemon juice (to prevent browning), and a timer to track drying progress.
Step-by-Step Guide to Dehydrating Fruit in the Oven
1. Choose and Prepare Your Fruit
Start with fresh, ripe fruit that’s free of bruises or soft spots. Overripe fruit can become mushy, while underripe fruit may lack sweetness. Wash the fruit thoroughly under cool water and pat dry with a clean towel.
Next, peel if desired—some fruits like apples and pears benefit from peeling, while others like peaches or plums can be dried with the skin on. Remove any seeds, cores, or pits. For fruits prone to browning (like apples, bananas, or pears), soak slices in a bowl of water with a splash of lemon juice (1 tablespoon per cup of water) for 5–10 minutes. This helps maintain color and adds a hint of tang.
2. Slice Evenly for Consistent Drying
Uniform thickness is crucial. Aim for slices about 1/4 inch (6 mm) thick—thin enough to dry thoroughly but thick enough to retain some chew. A mandoline slicer makes this quick and precise, but a sharp knife works just fine with a little patience.
For round fruits like apples or pears, cut into rings or half-moons. Berries like strawberries can be halved or sliced. Bananas are best cut into coins. Pineapple? Remove the core and slice into rounds or chunks. The more consistent your slices, the more evenly they’ll dry.
3. Arrange on Baking Sheets
Line your baking sheets with parchment paper or silicone mats to prevent sticking. Lay the fruit slices in a single layer, making sure they don’t overlap. Crowding the pan traps moisture and leads to uneven drying or mold.
If you’re dehydrating multiple types of fruit, use separate trays to avoid flavor transfer. For example, strong-smelling fruits like pineapple might affect milder ones like apples.
4. Set the Oven Temperature
This is where many people go wrong. Most ovens don’t go below 170°F (75°C), which is actually perfect for dehydration. The ideal range is between 140°F and 170°F (60°C–75°C). If your oven doesn’t have a temperature setting that low, don’t worry—just use the lowest setting available.
Pro tip: Place an oven thermometer inside to verify the actual temperature. Oven dials can be off by 10–25°F, and accurate heat is key to successful drying.
5. Dry with the Door Slightly Open
To allow moisture to escape, prop the oven door open about 1–2 inches using a wooden spoon or oven mitt. This creates airflow and prevents steam from building up, which can slow drying or cause condensation.
Place the trays in the center of the oven. If you have multiple trays, stagger them for better air circulation. Rotate the trays front to back and top to bottom every 1–2 hours to ensure even drying.
6. Flip and Monitor Progress
After the first hour, start checking your fruit. Gently flip each slice with a spatula or tongs. This helps prevent sticking and ensures both sides dry evenly.
Drying time varies depending on the fruit, thickness, and oven. Thin apple slices may take 4–6 hours, while thicker pineapple chunks could take 8–10 hours. Bananas usually dry in 6–8 hours. Be patient—rushing leads to sticky, under-dried fruit that spoils quickly.
7. Test for Doneness
Properly dehydrated fruit should feel leathery or slightly crisp, with no pockets of moisture. When you cut a piece in half, it shouldn’t feel wet or sticky inside. Some fruits, like apples, become crisp when fully dry. Others, like peaches or mangoes, stay chewy.
If the fruit feels soft or pliable, it needs more time. If it’s brittle or hard, it may be over-dried—still safe to eat, but less enjoyable.
Best Fruits to Dehydrate in the Oven
Almost any fruit can be dehydrated, but some work better than others. Here are top choices and tips for each:
- Apples: Classic and versatile. Use sweet varieties like Fuji or Gala. Peel optional. Soak in lemon water to prevent browning.
- Bananas: Best when slightly underripe (yellow with green tips). Slice thick for chew, thin for crisp chips.
- Strawberries: Halve or slice. Remove the green tops. Dries into sweet, tangy bites.
- Pineapple: Remove the tough core. Sweet and tropical—great for trail mix.
- Peaches and Nectarines: Pit and slice. Best in summer when in season. Retain skin for extra fiber.
- Mangoes: Peel and slice along the flat sides of the pit. Naturally sweet and vibrant.
- Pears: Similar to apples. Use firm varieties like Bartlett or Anjou.
Avoid very watery fruits like watermelon or citrus unless you’re making fruit leather (a different technique). Berries like blueberries or raspberries are tricky—they dry unevenly and often become hard. For those, consider freezing or using a food dehydrator.
Storing Your Dried Fruit
Once your fruit is fully dehydrated, let it cool completely on the trays—this can take 30–60 minutes. Cooling helps redistribute any remaining moisture and prevents condensation in storage.
Store in airtight glass jars, plastic containers, or resealable bags. Label with the date and fruit type. Keep in a cool, dark, dry place like a pantry or cupboard. Properly stored, most dried fruit lasts 6–12 months.
For longer shelf life, consider vacuum sealing or storing in the freezer. This is especially helpful for fruits with higher fat content, like avocado (yes, it can be dehydrated!), which can go rancid faster.
Before eating, check for signs of spoilage: mold, off smells, or unusual texture. When in doubt, toss it.
Troubleshooting Common Issues
Even with the best prep, things can go sideways. Here’s how to fix common problems:
- Fruit is too sticky or moist: It’s under-dried. Return to the oven for another 1–2 hours, checking frequently.
- Fruit is too hard or brittle: Over-dried. Still edible, but less palatable. Next time, check earlier or reduce drying time.
- Fruit browned too much: Likely not soaked in lemon water or dried at too high a temperature. Use acid soak and lower heat next time.
- Fruit stuck to the pan: Use parchment or silicone mats. Avoid greasing the pan—it can cause sogginess.
- Uneven drying: Slices were too thick or uneven. Use a mandoline for consistency next time.
Creative Ways to Use Dried Fruit
Dried fruit isn’t just for snacking. Get creative with these ideas:
- Trail mix: Combine with nuts, seeds, and dark chocolate chips.
- Oatmeal or yogurt topping: Add a handful for natural sweetness.
- Baking: Use in muffins, cookies, or granola bars.
- Salads: Toss into greens with goat cheese and walnuts.
- Smoothies: Rehydrate by soaking in water or juice, then blend.
- Gifts: Package in cute jars with ribbon for homemade holiday gifts.
Final Thoughts
Dehydrating fruit in the oven is a simple, satisfying way to reduce food waste, save money, and enjoy healthy snacks year-round. With a little time and attention, you can turn seasonal abundance into pantry staples that last for months. Whether you’re drying apples for a school lunch or making mango chips for your next hike, the process is rewarding and delicious.
So next time you’re at the farmers market or grocery store, grab an extra basket of fruit. Slice, dry, and savor the sweet, concentrated flavors of summer—even in the dead of winter. Your future self will thank you.
Frequently Asked Questions
Can I dehydrate fruit at 200°F?
It’s not ideal. Temperatures above 170°F can cook the fruit instead of drying it, leading to caramelization or burning. Use the lowest oven setting and monitor closely.
Do I need to soak fruit in lemon water?
Soaking in lemon water (1 tbsp per cup) helps prevent browning in fruits like apples, bananas, and pears. It’s optional but recommended for better color and flavor.
Can I dehydrate multiple fruits at once?
Yes, but use separate trays to avoid flavor mixing. Strong-smelling fruits like pineapple can affect milder ones like apples.
Why is my dried fruit still sticky?
Sticky fruit means it’s under-dried. Return it to the oven for another 1–2 hours, checking frequently to avoid over-drying.
How should I store dehydrated fruit?
Cool completely, then store in airtight containers in a cool, dark place. Properly stored, most dried fruit lasts 6–12 months.
Can I rehydrate dried fruit?
Yes! Soak dried fruit in warm water, juice, or broth for 30–60 minutes to restore moisture. Great for cooking, baking, or smoothies.