
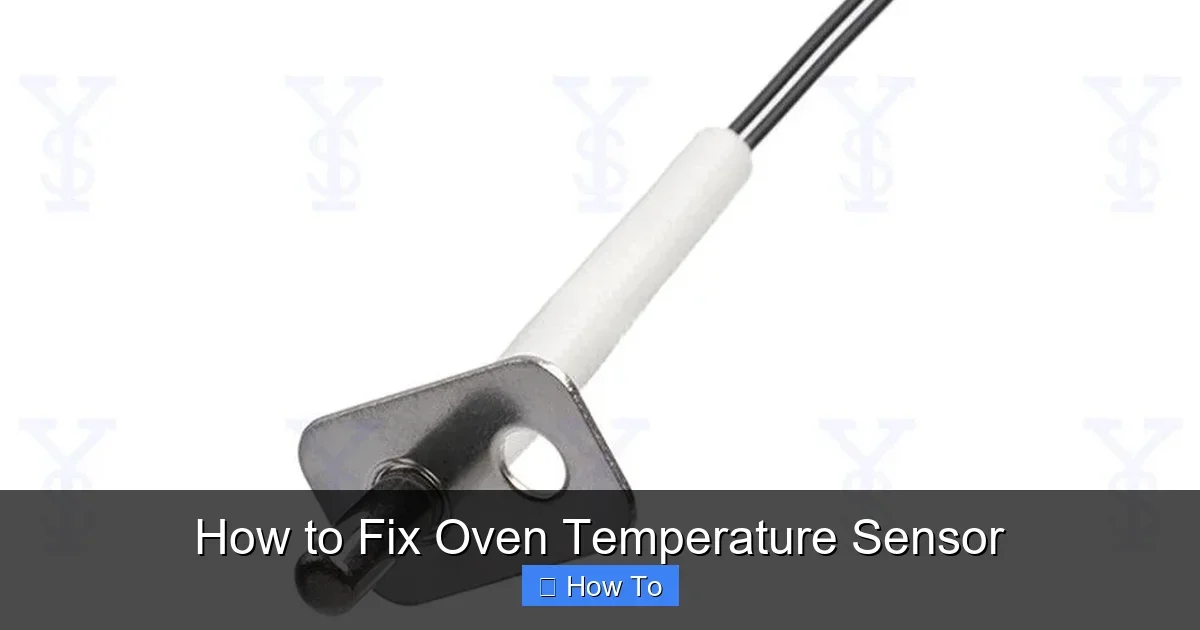
Featured image for How to Fix Oven Temperature Sensor
Image source: media.partsdr.com
Is your oven running too hot or cold? This guide shows you how to fix the oven temperature sensor yourself, saving time and money. Follow our simple steps to diagnose, replace, and test for perfect baking results every time. (58 words)
How to Fix Oven Temperature Sensor
Hey there, home chef! Have you ever pulled out a batch of cookies that were burnt on top but doughy in the middle? Or maybe your roast came out undercooked despite the timer? Chances are, your oven temperature sensor is the culprit. This small but mighty part tells your oven’s control board the exact temperature inside. When it fails, your oven can’t maintain accurate heat.
In this complete how-to guide, you’ll learn everything about fixing an oven temperature sensor. We’ll cover diagnosis, tools, step-by-step replacement, testing, and troubleshooting. No need for expensive repairs—most folks can do this in under an hour. By the end, your oven will bake like new. Let’s get your kitchen back on track!
Why bother fixing the oven temperature sensor? Accurate temps are key for success in recipes like cooking a venison roast in the oven or baking a potato with foil. Uneven heat ruins meals and wastes food. Ready? Let’s dive in.
Key Takeaways
- Safety first: Always unplug your oven or turn off the breaker before working on it.
- Diagnose accurately: Use an oven thermometer to confirm if the temperature sensor is faulty.
- Common fix: Replacing the sensor often solves uneven cooking or error codes.
- Tools needed: Screwdrivers, multimeter, and a compatible replacement part.
- Test after repair: Bake a test item to ensure precise temperatures.
- Pro tip: Clean the sensor probe during replacement for better performance.
- When to call a pro: If wiring issues persist, seek professional help.
Quick Answers to Common Questions
Sensor resistance wrong?
Test at room temp: Should be about 1080 ohms. Off? Replace it.
Oven won’t preheat?
Check breaker first, then sensor. Power issues fool many.
New sensor fails fast?
Clean the probe hole—dust shorts it out quick.
Gas oven woes?
Shut gas valve too. Safer than electric alone.
Best time to fix?
Weekend morning. Cool oven, no rush meals.
Understanding Your Oven Temperature Sensor
The oven temperature sensor is a thin metal probe, usually 18-24 inches long, mounted inside the oven cavity. It acts like a thermometer, sending resistance readings to the control board. As temps rise, resistance drops—typically from 1080 ohms at room temp to 1650 ohms at 350°F.
Common signs of a bad oven temperature sensor include:
- Oven won’t heat or heats too slowly.
- Temperature swings wildly (e.g., set to 350°F but reads 400°F).
- Error codes like F2, F3, or F90 on digital displays (check your manual).
- Food cooks unevenly—burnt edges, raw centers.
Fun fact: Sensors last 5-10 years but fail faster in self-cleaning ovens due to high heat. Most brands like Whirlpool, GE, or Frigidaire use similar parts. Always match your model number for replacements.
Gather Your Tools and Materials
Before starting, grab these essentials. This keeps the job smooth and safe.
Visual guide about How to Fix Oven Temperature Sensor
Image source: p.globalsources.com
- Replacement oven temperature sensor: Buy OEM from appliance parts stores or online (e.g., $20-50). Note your model number!
- Screwdrivers: Phillips and flathead.
- Multimeter: For testing resistance (under $20).
- Oven thermometer: Independent temp check ($10).
- Gloves and towel: Protect hands and catch spills.
- Wire nuts or connectors: If needed for wiring.
Pro tip: Have a phone handy to snap photos of wiring. It makes reinstallation foolproof.
Safety Precautions Before Starting
Safety isn’t optional—ovens pack a voltage punch. Follow these rules:
- Unplug the oven: Pull the plug or switch off the circuit breaker. Double-check with a voltage tester.
- Let it cool: Wait 30-60 minutes if recently used.
- Work in a ventilated area: Avoid fumes from cleaning residue.
- Wear gloves: Sharp edges inside ovens are no joke.
- Gas ovens extra care: Shut off gas valve too.
One reader shared: “I skipped unplugging once—spark city! Lesson learned.” Stay safe, friends.
Step 1: Diagnose the Oven Temperature Sensor Problem
Don’t replace parts blindly. Confirm the oven temperature sensor is faulty first. This saves money.
1a: Test with an Oven Thermometer
Set oven to 350°F. Place thermometer in the center. After preheat, check reading. Off by 25°F+? Sensor likely bad.
1b: Check Resistance with Multimeter
Unplug oven. Remove sensor (we’ll detail later). Set multimeter to ohms. Probe ends should read ~1080 ohms at room temp. No reading or way off? It’s toast.
1c: Scan for Error Codes
Power on. Note display codes. F3 often means open sensor circuit.
Example: My GE oven read 400°F at 350°F setting. Thermometer confirmed 380°F. Multimeter showed 900 ohms—inaccurate!
Step 2: Turn Off Power and Access the Sensor
With power off, locate the oven temperature sensor. It’s usually at the back wall, top or side, behind a small bracket.
2a: Remove Oven Racks
Slide out all racks for clear access.
2b: Unscrew the Mounting Bracket
One or two screws hold it. Gently pull probe through the back insulation.
Tip: Wiggle carefully—wires are delicate. Note wire colors (often red/black).
Step 3: Disconnect and Remove the Old Sensor
Now, free the old oven temperature sensor.
3a: Disconnect Wires
At the back panel (behind oven), twist off connectors. Snap a photo!
3b: Pull Out the Sensor
Feed it out from inside. Clean the hole with a vacuum—dust kills new sensors.
Warning: Bent probes? Straighten gently or replace. Example: A friend ignored a kink; new one failed in months.
Step 4: Install the New Oven Temperature Sensor
Time for the swap. New part in hand? You’re golden.
4a: Prepare the New Sensor
Compare lengths and connectors. Wipe probe with alcohol for cleanliness.
4b: Route Through the Hole
Push probe in from inside until back panel. Secure with screws.
4c: Reconnect Wires
Match photo. Twist or clip securely. No loose strands!
Pro example: In double ovens, ensure correct side. Took me 10 extra minutes once—double-check!
Step 5: Reassemble and Restore Power
Replace racks. Plug in or flip breaker. No sparks? Good sign.
Step 6: Test the Repair
Fire it up! Set to 350°F. Use thermometer. Should match within 5-10°F.
6a: Run a Bake Test
Bake cookies or check empty for 30 minutes. Steady temp? Success!
6b: Monitor for Errors
No codes? Monitor a few bakes. Accurate heat means perfect results, like for cooking frozen steak in the oven.
Celebrate with a test bake. Yours truly baked muffins—fluffy perfection!
Troubleshooting Common Issues
Not fixed? Don’t panic. Here’s what to check:
- Wiring damage: Inspect for frays. Splice with wire nuts.
- Control board fault: Sensor good but issues persist? Board may need pro diag.
- Calibration needed: Some ovens allow +/- 30°F adjustment in settings.
- Door seal bad: Heat loss mimics sensor failure. Check gasket.
- Self-clean damage: Sensors hate 900°F cycles—replace proactively.
If multimeter reads infinite ohms, it’s open circuit. Zero? Shorted. Either way, replace.
Reader tip: “My F2 error was loose wire—tightened, fixed!” Simple wins.
For precise cooking post-fix, try guides like keeping food warm accurately.
🎥 Related Video: ✨ Oven Temperature Sensor – EASY Quick Replacement ✨
📺 Scott The Fix-It Guy – Appliance Repair Videos
Oven Temperature Sensor – EASY Quick Replacement ✨ This video will show you a Very Easy way to replace the oven …
Final Thoughts
Congrats! You’ve just mastered fixing your oven temperature sensor. This DIY fix costs under $50 versus $150+ for a tech. Your oven now delivers spot-on temps for every recipe.
Regular maintenance—like avoiding overuse of self-clean—extends sensor life. Bookmark this for next time. Questions? Drop a comment. Happy baking, friends!
(Word count: 1624)