Drying strawberries in the oven is one of the easiest ways to preserve their sweet flavor for snacks, baking, and smoothies. With just a few simple steps — slicing, arranging, and baking at a low temperature — you can create delicious oven-dried strawberries that last for weeks. This guide covers everything from selecting the best fruit to storing your finished dehydrated strawberries perfectly.
If you have ever wondered how to turn fresh, juicy strawberries into sweet, chewy snacks that last for weeks, you are in the right place. Drying strawberries in the oven is a simple, affordable, and incredibly rewarding kitchen project. You do not need any fancy equipment — just your oven, a baking sheet, and some fresh berries.
Whether you want to make healthy snacks for your kids, add a gourmet touch to your morning oatmeal, or preserve a bumper crop from the farmers’ market, oven-dried strawberries are the answer. In this guide, we will walk you through every single step, share expert tips, and help you avoid the most common mistakes. Let’s get started.
Key Takeaways
- Low and slow is the key: Dry strawberries at 170°F–200°F (75°C–95°C) for 3–6 hours to preserve flavor and nutrients without burning them.
- Uniform slices matter: Cut strawberries into consistent ¼-inch slices so they dry evenly and finish at the same time.
- Use parchment paper: Line your baking sheets to prevent sticking and make cleanup effortless.
- Check for doneness: Properly dried strawberries should be leathery and pliable with no visible moisture when you break one open.
- Proper storage extends shelf life: Store in airtight containers in a cool, dark place for up to 2–3 months, or freeze for longer storage.
- Fresh, ripe berries work best: Choose firm, deeply red strawberries without soft spots for the best dehydrated results.
- Pat berries dry first: Removing excess moisture before baking significantly reduces drying time and improves texture.
📑 Table of Contents
- Why Dry Strawberries in the Oven?
- What You Need to Dry Strawberries in the Oven
- Step-by-Step Guide: How to Dry Strawberries in the Oven
- Tips for Perfect Oven-Dried Strawberries
- How to Store Dried Strawberries
- Common Mistakes to Avoid
- Creative Ways to Use Dried Strawberries
- Oven Dried vs. Dehydrator vs. Air Dried: Which Method Is Best?
- Troubleshooting Common Problems
- Health Benefits of Dried Strawberries
- Conclusion
Why Dry Strawberries in the Oven?
You might be thinking, “Why not just buy dehydrated strawberries at the store?” That is a fair question. But there are several compelling reasons to make them at home.
First, you control the ingredients. Store-bought dried strawberries often contain added sugar, preservatives, and artificial colors. When you dry them yourself, you know exactly what goes into your food — just pure strawberries.
Second, it saves money. Fresh strawberries go on sale frequently, especially during peak season. Buying in bulk and drying them yourself is far more cost-effective than purchasing pre-packaged dried fruit.
Third, the flavor is unbeatable. Homemade oven-dried strawberries taste fresher and more vibrant than anything you will find on a shelf. The concentrated sweetness is absolutely delightful.
Finally, drying fruit in the oven is a great introduction to food preservation. Once you master strawberries, you can apply the same technique to other fruits. If you are curious about drying other produce, check out our guide on how to dry tomatoes in the oven for another delicious project.
What You Need to Dry Strawberries in the Oven
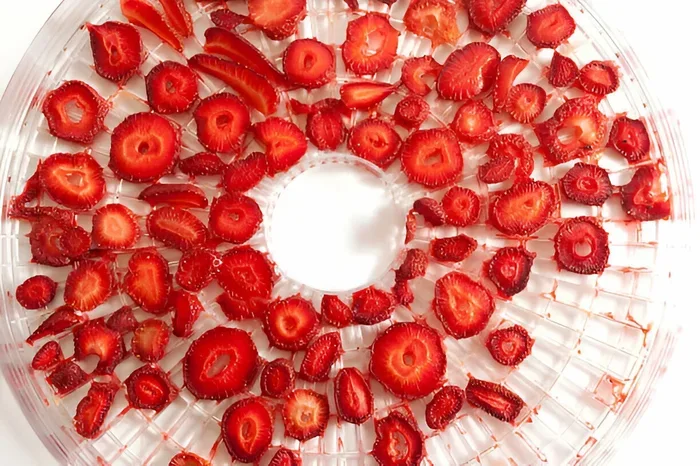
Visual guide about dried strawberries oven
Image source: hrrecipes.com
Before you preheat that oven, let’s make sure you have everything ready. The good news is that the equipment list is very short.
Essential Equipment
- Fresh strawberries — About 1–2 pounds to start. Choose ripe, firm berries with deep red color.
- Sharp knife or mandoline slicer — For cutting uniform slices. A mandoline gives you the most consistent results.
- Baking sheets — You will need at least two standard-sized sheet pans.
- Parchment paper or silicone baking mats — These prevent sticking and make cleanup a breeze.
- Wire cooling rack (optional) — Placing a wire rack on top of the baking sheet improves air circulation and speeds up drying.
- Paper towels — For patting the strawberries dry before baking.
Optional Additions
- Lemon juice — A light spritz helps prevent browning and adds a subtle tang.
- Honey or simple syrup — Brushing slices with a thin coat of honey before drying creates a slightly sweeter, more candy-like result.
- Cinnamon or vanilla extract — For a fun flavor twist that pairs beautifully with the natural sweetness of strawberries.
Step-by-Step Guide: How to Dry Strawberries in the Oven
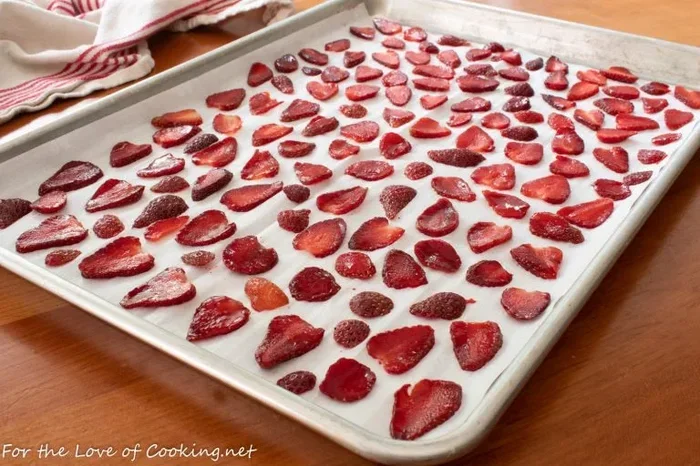
Visual guide about dried strawberries oven
Image source: fortheloveofcooking.net
Now let’s walk through the entire process from start to finish. Follow these steps carefully, and you will end up with perfectly dried strawberries every single time.
Step 1: Wash and Hull the Strawberries
Start by rinsing your strawberries under cool running water. Gently rub them with your fingers to remove any dirt or debris. Do not soak them — strawberries absorb water like sponges, and excess moisture will increase your drying time significantly.
Once clean, remove the green tops (hulls) using a sharp knife or a strawberry huller. Cut just below the leaves, removing as little of the flesh as possible.
Pat each strawberry dry with paper towels. This step is more important than most people realize. The drier the surface, the faster and more evenly they will dehydrate.
Step 2: Slice the Strawberries Uniformly
This is arguably the most critical step in the entire process. Uniform slices dry evenly. If some pieces are thick and others are thin, the thin ones will burn while the thick ones are still wet inside.
Aim for slices that are approximately ¼ inch (6mm) thick. This thickness allows the strawberries to dry thoroughly without becoming too brittle.
A mandoline slicer is the best tool for achieving consistent thickness. If you are using a sharp knife, take your time and try to keep each slice as even as possible.
Pro tip: If your strawberries are very large, you can cut them in half lengthwise before slicing. This creates more uniform pieces and reduces the overall drying time.
Step 3: Prepare Your Baking Sheets
Line your baking sheets with parchment paper or silicone baking mats. Do not skip this step — dried strawberry juice is incredibly sticky and nearly impossible to clean off bare metal.
If you have wire cooling racks that fit inside your baking sheets, place them on top of the parchment. Elevating the strawberries allows hot air to circulate underneath, which promotes even drying on both sides.
Step 4: Arrange the Strawberry Slices
Place the strawberry slices in a single layer on your prepared baking sheets. Make sure the slices do not touch or overlap. Each piece needs space around it for air to flow freely.
Overcrowding is one of the most common mistakes people make. If the slices are too close together, they will steam instead of dry, resulting in a soggy, uneven texture.
If you run out of space, use additional baking sheets rather than cramming everything onto one pan.
Step 5: Set the Oven Temperature
Preheat your oven to 170°F to 200°F (75°C to 95°C). The exact temperature depends on your oven and how quickly you want the strawberries to dry.
Here is a quick reference:
- 170°F (75°C): Slowest drying, best for preserving maximum flavor and nutrients. Takes 5–6 hours.
- 185°F (85°C): Moderate drying. Takes 4–5 hours. A good middle ground.
- 200°F (95°C): Fastest drying. Takes 3–4 hours. Watch carefully to avoid burning.
The lower the temperature, the better the results. Low heat preserves the strawberries’ natural color, flavor, and nutritional content. High heat can cause the sugars to caramelize too quickly, leading to a burnt taste.
Step 6: Bake and Monitor
Place the baking sheets in the oven. If you are using multiple sheets, position them on different racks and rotate them every hour to ensure even heat distribution.
Crack the oven door open slightly — about 1–2 inches — using a wooden spoon to prop it open. This allows moisture to escape, which is essential for proper dehydration. If all the steam stays trapped inside the oven, your strawberries will take much longer to dry.
Check the strawberries every hour. After about 2–3 hours, you can flip them over if you are not using wire racks. This helps the bottom side dry more evenly.
Step 7: Test for Doneness
The total drying time will vary depending on your oven, the thickness of your slices, and the moisture content of the berries. Most batches take between 3 and 6 hours.
To test if your strawberries are done, remove a slice from the oven and let it cool for a minute. Then break it in half. There should be no visible moisture in the center. The texture should be leathery and pliable — similar to a raisin or a piece of jerky.
If the center still looks wet or feels mushy, return the slices to the oven and check again in 30 minutes.
Important: The strawberries will continue to dry slightly as they cool on the counter. So if they are just barely pliable when you take them out, they will be perfect once they reach room temperature.
Tips for Perfect Oven-Dried Strawberries
Now that you know the basic process, here are some expert tips that will take your dried strawberries from good to absolutely amazing.
Choose the Right Strawberries
Not all strawberries are created equal when it comes to drying. Firm, ripe berries with deep red color work best. Avoid overripe or mushy strawberries — they will fall apart during slicing and become too soft when dried.
If possible, use fresh strawberries that are in season. They have the highest sugar content and the most intense flavor. Frozen strawberries can work in a pinch, but they tend to be mushier and take longer to dry.
Do Not Skip the Pre-Drying Pat Down
We mentioned this earlier, but it deserves repeating. Thoroughly patting your strawberry slices dry with paper towels before they go into the oven can shave 30–60 minutes off your total drying time. It is a small step that makes a big difference.
Use a Convection Oven If You Have One
Convection ovens circulate hot air with a fan, which significantly improves the drying process. If your oven has a convection setting, use it. You can typically reduce the temperature by 25°F and the drying time by about 20%.
Experiment with Flavors
Plain dried strawberries are delicious on their own, but you can easily elevate them with a few simple additions:
- Honey-glazed: Brush slices with a thin layer of honey before baking for a sweeter, slightly sticky result.
- Spicy: A light dusting of cayenne pepper and lime zest creates a sweet-and-spicy snack.
- Vanilla: Toss slices with a few drops of pure vanilla extract for a warm, aromatic flavor.
- Citrus: A squeeze of lemon or orange juice brightens the natural strawberry flavor beautifully.
How to Store Dried Strawberries
Proper storage is just as important as the drying process itself. If you store your dried strawberries incorrectly, they can absorb moisture from the air and become moldy within days.
Short-Term Storage (Up to 2 Weeks)
For short-term storage, place your completely cooled dried strawberries in an airtight container or a resealable glass jar. Store them in a cool, dark place like a pantry or cupboard. Make sure the berries are completely cool before sealing the container — any residual heat will create condensation.
Medium-Term Storage (Up to 2–3 Months)
For longer storage, add a small food-safe silica gel packet to the container. This absorbs any remaining moisture and keeps the strawberries dry and fresh. You can also store them in the refrigerator, which extends their shelf life significantly.
Long-Term Storage (Up to 1 Year)
The freezer is your best friend for long-term storage. Place dried strawberries in a freezer-safe bag or container, squeeze out as much air as possible, and freeze. They will keep for up to a year without losing much flavor or texture.
When you are ready to use them, simply remove the amount you need and let them come to room temperature. There is no need to thaw them in the microwave or oven.
Common Mistakes to Avoid
Even with a straightforward process like this, there are a few pitfalls that can ruin your batch. Here is what to watch out for.
Mistake #1: Slicing Too Thick or Too Thin
Slices that are too thick (more than ¼ inch) will take forever to dry and may still have moisture in the center. Slices that are too thin (less than ⅛ inch) will dry too quickly and become brittle chips rather than chewy dried fruit.
Stick to ¼ inch for the best balance of texture and drying time.
Mistake #2: Using Too High a Temperature
It is tempting to crank up the oven to speed things up, but this almost always backfires. High heat causes the outside of the strawberry to harden while trapping moisture inside. The result is a piece that looks dry on the outside but is still wet and prone to mold on the inside.
Be patient and keep the temperature low. Your strawberries will thank you.
Mistake #3: Overcrowding the Baking Sheet
When slices are placed too close together, they steam instead of dry. This leads to uneven results and a longer drying time. Always leave at least a small gap between each slice.
Mistake #4: Not Checking for Doneness
Every oven is different, and drying times can vary significantly. Do not rely solely on the clock. Always test a piece before removing the entire batch from the oven.
Mistake #5: Storing While Still Warm
Sealing warm strawberries in a container creates condensation, which introduces moisture right back into your carefully dried fruit. Always let them cool completely — at least 30 minutes — before storing.
Creative Ways to Use Dried Strawberries
Once you have a batch of beautiful oven-dried strawberries, you will be amazed at how many ways you can use them.
Snacking
The simplest use is eating them straight out of the jar. Dried strawberries are a fantastic healthy snack that satisfies sweet cravings without any added sugar. They are perfect for lunchboxes, road trips, and afternoon pick-me-ups.
Baking and Desserts
Chop dried strawberries and fold them into muffin batter, cookie dough, or pancake mix. They add bursts of concentrated strawberry flavor that fresh berries simply cannot match. They are also gorgeous as a topping for cakes, cupcakes, and cheesecakes.
Breakfast Bowls
Sprinkle dried strawberries over oatmeal, yogurt parfaits, granola bowls, or smoothie bowls. They add natural sweetness, beautiful color, and a delightful chewy texture.
Trail Mix
Combine dried strawberries with nuts, seeds, dark chocolate chips, and other dried fruits for a custom trail mix that is both nutritious and delicious.
Homemade Gifts
Package dried strawberries in small mason jars with a ribbon and a handwritten label. They make thoughtful, homemade gifts for holidays, birthdays, or thank-you presents.
If you enjoy drying strawberries, you might also love learning about how to dry figs in the oven — another fantastic dried fruit that is surprisingly easy to make at home.
Oven Dried vs. Dehydrator vs. Air Dried: Which Method Is Best?
There are several ways to dry strawberries, and each method has its pros and cons. Here is a quick comparison to help you decide.
| Method | Time Required | Cost | Quality | Best For |
|---|---|---|---|---|
| Oven Drying | 3–6 hours | Free (uses existing oven) | Very Good | Most home cooks |
| Food Dehydrator | 6–10 hours | $40–$200 equipment cost | Excellent | Frequent drying, large batches |
| Air Drying | 2–5 days | Free | Fair | Warm, dry climates |
| Sun Drying | 2–4 days | Free | Good (weather dependent) | Hot, sunny climates |
For most people, the oven method is the best starting point. It requires no special equipment, produces excellent results, and gives you full control over the process. If you find yourself drying fruit regularly, investing in a food dehydrator might be worth it for the convenience and slightly superior results.
Troubleshooting Common Problems
Even when you follow every step perfectly, things can sometimes go wrong. Here are solutions to the most common issues.
Problem: Strawberries Are Still Sticky After Drying
This usually means they need more time in the oven. Return them for another 30–60 minutes and test again. Sticky spots indicate residual moisture.
Problem: Strawberries Are Too Hard or Brittle
The oven temperature was probably too high, or they were left in too long. Unfortunately, you cannot rehydrate them, but they still work great when chopped into small pieces for baking.
Problem: Strawberries Tasted Burnt
The temperature was too high, or the slices were too thin. Next time, lower the temperature by 10–15°F and cut slightly thicker slices.
Problem: Strawberries Molded During Storage
This means they were not fully dried before storing, or moisture got into the container. Always test for doneness thoroughly and use airtight containers with silica gel packets for long-term storage.
Health Benefits of Dried Strawberries
Dried strawberries are not just delicious — they are also packed with nutritional benefits.
Rich in antioxidants: Strawberries are one of the best sources of antioxidants, including vitamin C and anthocyanins. These compounds help fight inflammation and protect your cells from damage.
Good source of fiber: Dried strawberries retain most of the fiber from fresh berries, which supports digestive health and helps you feel full longer.
Concentrated nutrients: Because the water has been removed, the nutrients in dried strawberries are more concentrated per gram. A small handful provides a significant dose of vitamins and minerals.
Low in calories: A serving of dried strawberries (about ¼ cup) contains roughly 100–120 calories, making them a relatively light snack option.
Just keep in mind that the natural sugars are also more concentrated. Enjoy dried strawberries in moderation as part of a balanced diet.
If you are interested in other healthy oven projects, you might also enjoy our guide on how to bake vegetables in the oven for perfect flavor every time. It is a great way to make healthy eating more exciting.
Conclusion
Drying strawberries in the oven is one of the simplest and most satisfying kitchen projects you can tackle. With just fresh berries, a low oven temperature, and a little patience, you can create delicious, shelf-stable snacks that are perfect for eating on their own or adding to your favorite recipes.
Remember the key principles: slice uniformly, keep the temperature low, do not overcrowd the baking sheets, and always test for doneness before storing. Follow these guidelines, and you will never have a failed batch.
So the next time you see strawberries on sale — or your garden produces more than you can eat — do not let them go to waste. Fire up that oven and start drying. Your future self will thank you every time you reach for a handful of sweet, chewy, homemade dried strawberries.
Frequently Asked Questions
How long does it take to dry strawberries in the oven?
Drying strawberries in the oven typically takes 3 to 6 hours, depending on your oven temperature, the thickness of your slices, and the moisture content of the berries. Lower temperatures around 170°F take closer to 6 hours, while 200°F can finish in about 3–4 hours. Always test for doneness rather than relying solely on time.
What temperature is best for drying strawberries?
The ideal temperature for drying strawberries in the oven is between 170°F and 200°F (75°C–95°C). Lower temperatures preserve more flavor and nutrients, while higher temperatures speed up the process but require closer monitoring to prevent burning. Most experts recommend 185°F as the sweet spot.
Do I need to flip the strawberries while drying?
If you are using a wire cooling rack on your baking sheet, flipping is not necessary because air circulates on both sides. However, if the slices are placed directly on parchment paper, flipping them halfway through the drying process helps ensure even results on both sides.
Can I dry frozen strawberries in the oven?
Yes, you can dry frozen strawberries, but they tend to be mushier and take longer to dry compared to fresh berries. Thaw them completely, pat them very dry with paper towels, and slice them before placing them in the oven. Fresh strawberries will always give you better texture and flavor.
How do I know when dried strawberries are done?
Properly dried strawberries should be leathery and pliable, similar to a raisin. Break a cooled slice in half — there should be no visible moisture in the center. If it feels mushy or looks wet inside, return the batch to the oven for another 30–60 minutes.
How long do oven-dried strawberries last?
When stored in an airtight container in a cool, dark place, oven-dried strawberries last up to 2–3 months. In the refrigerator, they can last up to 6 months. For the longest shelf life, store them in the freezer in a freezer-safe bag, where they will keep for up to 1 year.