Replacing an oven element is a straightforward DIY repair that can save you money and restore your oven’s performance. This guide walks you through the entire process, from identifying a faulty heating element to installing a new one safely. Whether you have a bake element or broil element that needs replacing, you’ll find everything you need to get the job done right.
There’s nothing quite like preheating your oven for a big dinner only to realize it’s not heating properly. Maybe one side is hotter than the other, or perhaps the oven simply won’t reach the temperature you set. Chances are, you’re dealing with a faulty oven heating element. The good news? This is one of the most common oven problems, and it’s also one of the easiest to fix yourself.
Replacing an oven element doesn’t require any special training or expensive tools. In fact, most homeowners can complete this repair in less than an hour. You’ll save money on service calls and get your oven back to peak performance quickly. In this guide, we’ll cover everything you need to know about how to replace an oven element, from diagnosing the problem to installing the new part with confidence.
- Safety first: Always disconnect power to your oven before attempting any electrical repair to avoid serious injury.
- Identify the problem: Look for visible damage like blisters, holes, or uneven heating to confirm the element is faulty.
- Get the right part: Match the exact model number of your oven to ensure you purchase the correct replacement element.
- Basic tools needed: A screwdriver and a socket wrench are typically all you need for most oven element replacements.
- DIY-friendly repair: Most homeowners can replace an oven element in under an hour with no special skills required.
- Test before reassembly: Always test the new element after installation to confirm it heats properly before putting everything back together.
- Know when to call a pro: If you notice wiring damage or the new element doesn’t work, contact a licensed technician.
Quick Answers to Common Questions
How long does it take to replace an oven element?
Most oven element replacements take between 20 and 45 minutes, depending on your oven model and experience level. The actual removal and installation only takes about 15 minutes, with extra time for disconnecting power and testing.
Can I use my oven with a broken heating element?
It’s not recommended. A damaged element can cause uneven heating, electrical arcing, or even a fire hazard. If you see sparks or notice a burning smell, stop using the oven immediately and replace the element.
How do I know if it’s the bake or broil element that’s broken?
If your oven heats from the top but not the bottom, the bake element is likely faulty. If it heats from the bottom but not the top, the broil element is the problem. You can also visually inspect both elements for damage like holes, blisters, or cracks.
Do I need to hire an electrician to replace an oven element?
No, you don’t need an electrician. This is a straightforward DIY repair that involves disconnecting and reconnecting two wires. Just make sure to turn off the circuit breaker before starting.
What happens if I install the wrong element?
An incorrect element may not fit properly, could have the wrong wattage, or might not heat correctly. In some cases, it could trip the breaker or cause damage to the oven’s electrical system. Always verify the part number matches your oven model.
📑 Table of Contents
- What Is an Oven Heating Element and How Does It Work?
- Signs You Need to Replace Your Oven Element
- Tools and Materials You’ll Need
- Step-by-Step Guide to Replacing an Oven Element
- Common Mistakes to Avoid
- Expert Tips for a Smooth Replacement
- When to Call a Professional
- How Much Does It Cost to Replace an Oven Element?
- Maintaining Your Oven Elements for Longer Life
- Frequently Asked Questions About Oven Element Replacement
- Conclusion
What Is an Oven Heating Element and How Does It Work?
An oven heating element is the component responsible for generating the heat your oven needs to cook food. Most standard ovens have two elements: a bake element located at the bottom of the oven cavity and a broil element at the top. When you set your oven to a specific temperature, electricity flows through the element, causing it to glow red and produce heat.
Over time, these elements wear out. They endure thousands of heating and cooling cycles, which eventually causes the metal to degrade. When an element fails, your oven may heat unevenly, take much longer to preheat, or stop heating altogether. Understanding how these elements work helps you diagnose problems faster and decide whether a replacement is necessary.
Types of Oven Elements
Not all oven elements are created equal. Here are the main types you’ll encounter:
- Bake element: Located at the bottom of the oven, this is the primary heating element used for most cooking tasks.
- Broil element: Found at the top of the oven, this element provides direct high heat for broiling and browning.
- Convection element: Found in convection ovens, this element works with a fan to circulate hot air evenly throughout the cavity.
- Hidden bake element: Some modern ovens have a bake element tucked beneath the oven floor for easier cleaning and a sleeker look.
Signs You Need to Replace Your Oven Element
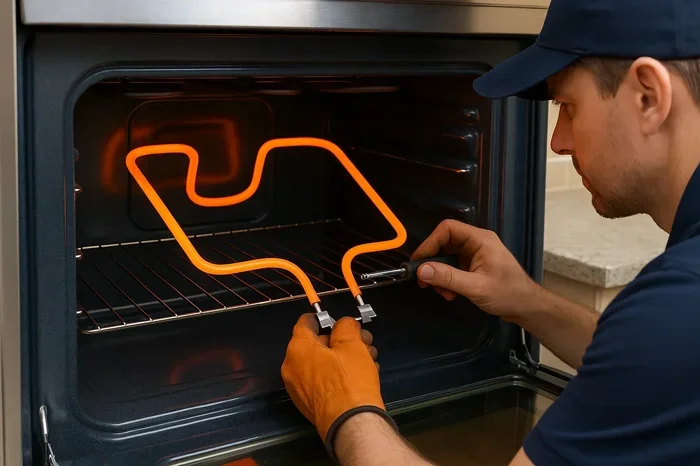
Visual guide about how do you replace an oven element
Image source: repairpartszone.com
Before you grab your tools, it’s important to confirm that the heating element is actually the problem. Here are the most common signs of a bad oven element:
Visible Physical Damage
Open your oven door and take a close look at both the top and bottom elements. If you notice any of the following, it’s time for a replacement:
- Blisters or bubbles on the surface of the element
- Holes or burn spots where the metal has deteriorated
- Cracks or breaks in the coil
- Sections that don’t glow red when the oven is on
Uneven Heating or Cooking
If your food comes out burned on one side and undercooked on the other, a failing element could be the culprit. An element that only partially heats creates hot and cold spots inside the oven cavity. This is one of the most frustrating symptoms because it affects every meal you cook.
Oven Not Reaching Temperature
When your oven struggles to reach the set temperature or takes significantly longer than usual to preheat, the element may be losing its ability to generate sufficient heat. You can verify this by using an oven thermometer to check whether the internal temperature matches your settings.
Sparkling or Flashing Inside the Oven
If you see sparks or flashing when you turn on the oven, turn it off immediately. This indicates a serious electrical issue with the element that needs urgent attention. Continuing to use a sparking element can cause further damage or even start a fire.
Tools and Materials You’ll Need
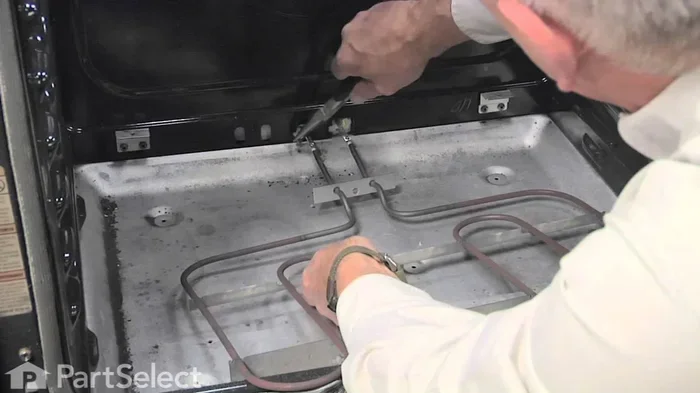
Visual guide about how do you replace an oven element
Image source: i.ytimg.com
One of the best things about this repair is how few tools you actually need. Here’s your checklist:
- Screwdriver: A flathead or Phillips screwdriver, depending on your oven model
- Socket wrench or nut driver: Typically a ¼-inch or 5/16-inch socket for the mounting screws
- Needle-nose pliers: Helpful for handling wire connectors
- Multimeter (optional): For testing the element’s continuity before replacement
- Replacement heating element: Make sure it matches your oven’s make and model exactly
- Work gloves: To protect your hands from sharp edges inside the oven
How to Find the Right Replacement Element
Finding the correct part is crucial. Start by locating your oven’s model number, which is usually found on a sticker inside the oven door frame, on the back of the oven, or underneath the cooktop on range models. Once you have the model number, search for the replacement element online or at an appliance parts store. Many retailers allow you to enter your model number and will show you compatible parts.
Step-by-Step Guide to Replacing an Oven Element
Now let’s get into the actual repair process. Follow these steps carefully, and you’ll have your oven working like new in no time.
Step 1: Disconnect the Power
This is the most important step. Never work on an oven while it’s connected to power. For electric ovens, turn off the dedicated circuit breaker in your home’s electrical panel. If you can’t identify the correct breaker, turn off the main breaker to be safe. For gas ovens with electric igniters, you’ll still need to disconnect power to the control board.
Step 2: Access the Element
Remove the oven racks to give yourself plenty of working space. For the bake element, you’ll see it at the bottom of the oven cavity. For the broil element, look at the top. Some ovens have a panel or cover that needs to be removed first. Use your screwdriver to take out any screws holding the panel in place.
Step 3: Remove the Mounting Screws
Each element is held in place by two screws, usually located at the back of the oven cavity where the element connects to the wiring. Use your socket wrench or screwdriver to carefully remove these screws. Don’t force them — if they’re stuck, apply a little penetrating oil and wait a few minutes before trying again.
Step 4: Disconnect the Wires
Gently pull the element forward to expose the wire connections at the back. You’ll see two wires connected to the element terminals. Use your needle-nose pliers to carefully disconnect each wire. Take a photo of the wiring before you disconnect anything so you can reference it during reinstallation.
Step 5: Install the New Element
Position the new element in the same location as the old one. Reconnect the wires to the matching terminals — the photo you took earlier will be invaluable here. Make sure each connection is tight and secure. Loose connections can cause arcing, overheating, and potential fire hazards.
Step 6: Secure the Element
Push the element back into place and reinstall the mounting screws. Don’t overtighten them, as this can damage the element or the oven’s interior. The element should sit flush and stable without any wobbling.
Step 7: Restore Power and Test
Turn the breaker back on and set your oven to 350°F. Watch the element through the oven door — it should glow evenly across its entire surface within a few minutes. If it heats up properly, congratulations! You’ve successfully replaced your oven element. If it doesn’t heat, double-check your wiring connections and ensure the breaker is fully on.
Common Mistakes to Avoid
Even a simple repair can go wrong if you’re not careful. Here are the most common mistakes people make when replacing an oven heating element:
- Forgetting to disconnect power: This is the number one mistake and the most dangerous. Always verify the power is off before touching any electrical components.
- Using the wrong replacement part: Even elements that look similar may have different wattage ratings or terminal configurations. Always match the exact part number.
- Not taking photos of the wiring: Without a reference photo, reconnecting wires can be confusing and lead to incorrect installation.
- Overtightening screws: This can crack the element housing or strip the screw holes in the oven wall.
- Ignoring damaged wiring: If you notice frayed, melted, or discolored wires during the repair, don’t just replace the element — have a professional inspect the wiring.
Expert Tips for a Smooth Replacement
Here are some insider tips that will make your repair even easier:
- Test the old element first: Use a multimeter to check for continuity. If the element has no continuity, it’s definitely bad. This saves you from replacing a part that might still be good.
- Clean while you’re in there: Since the oven is already open and the racks are out, take a few minutes to clean the oven interior. It’s much easier to clean without the element in the way.
- Inspect the oven door seal: While you have the oven open, check the door gasket for cracks or gaps. A damaged seal lets heat escape and makes your new element work harder than it needs to.
- Keep the old element’s packaging: Store the new element’s packaging with the part number written on it. If you ever need to order another one, you’ll have the information handy.
- Consider replacing both elements: If one element has failed, the other may not be far behind. Replacing both at the same time can save you a second repair visit.
When to Call a Professional
While replacing an oven element is a great DIY project, there are situations where you should call a licensed appliance repair technician:
- You notice damaged or melted wiring behind the element
- The new element doesn’t work after installation
- Your oven trips the breaker repeatedly
- You smell burning plastic or electrical odors that persist after replacement
- You’re uncomfortable working with electrical components
There’s no shame in calling a professional. Electrical repairs can be dangerous if you’re not confident in your skills. A qualified technician can diagnose and fix the problem quickly and safely.
How Much Does It Cost to Replace an Oven Element?
One of the biggest advantages of this repair is the low cost. A replacement oven element typically costs between $15 and $50, depending on your oven’s brand and model. Compare that to the $150 to $300 you’d pay for a service call from an appliance repair company, and the savings are significant.
If you decide to hire a professional, expect to pay between $100 and $200 for the repair, including parts and labor. Even with professional installation, it’s still more cost-effective than buying a new oven.
Maintaining Your Oven Elements for Longer Life
Once you’ve installed a new element, you’ll want it to last as long as possible. Here are some simple maintenance tips:
- Clean spills immediately: Food debris that accumulates on the element can cause hot spots and premature failure. Wipe up spills as soon as the oven cools down.
- Avoid using foil on the oven floor: Aluminum foil can reflect heat back into the element and cause it to overheat.
- Don’t slam the oven door: The vibration can loosen element connections over time.
- Run the self-clean cycle sparingly: If your oven has a self-cleaning feature, use it only when necessary. The extreme heat of the cleaning cycle puts additional stress on the elements.
- Keep the oven interior clean: Regular cleaning prevents buildup that can affect heating efficiency. Check out our guide on cleaning an electric oven for more tips.
Frequently Asked Questions About Oven Element Replacement
Many homeowners have questions before tackling this repair. The most common concerns involve safety, cost, and whether the job is truly DIY-friendly. The short answer is yes — this is one of the most accessible appliance repairs you can do at home. Just remember to always disconnect power first and double-check your connections before testing.
Conclusion
Replacing an oven element is a simple, affordable repair that anyone can handle with basic tools and a little patience. By following the steps in this guide, you can restore your oven’s heating performance without spending hundreds of dollars on a service call. Remember to always prioritize safety by disconnecting power before starting, use the exact replacement part for your oven model, and take photos of the wiring before disconnecting anything.
With a new element installed and a few maintenance habits in place, your oven should serve you well for years to come. Don’t let a broken heating element keep you from cooking your favorite meals — grab your tools and get the job done today.