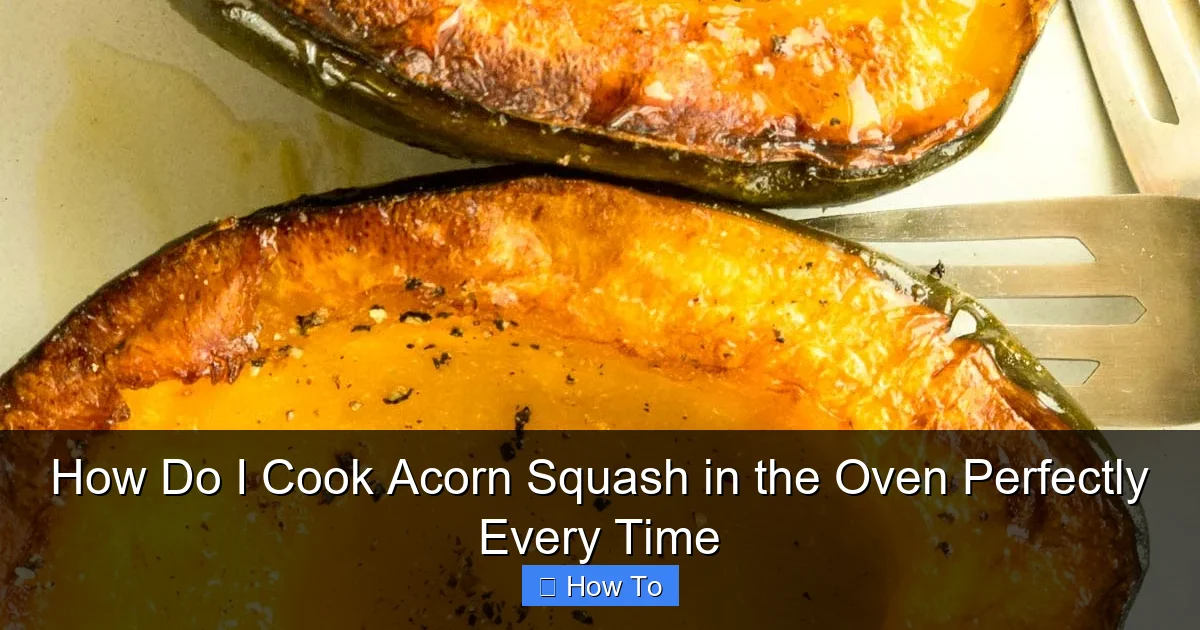
Featured image for how to cook acorn squash in the oven
Image source: gittaskitchen.com
Preheat your oven to 400°F and cut the acorn squash in half—this ensures even, consistent cooking every time. Scoop out the seeds, brush the flesh with oil or butter, and season generously before roasting cut-side down for 35–45 minutes until tender and caramelized. The key to perfection is high heat and patience—never rush the roast for that rich, sweet flavor and creamy texture.
How to How Do I Cook Acorn Squash in the Oven Perfectly Every Time
Why This Matters / Understanding the Problem
You’ve picked up a beautiful acorn squash at the farmers’ market or grocery store—deep green, firm, and full of promise. But now you’re staring at it, wondering: How do I cook acorn squash in the oven perfectly every time? It’s a common kitchen dilemma. Too many people end up with mushy, bland, or undercooked squash because they skip key steps or overcomplicate the process.
Acorn squash is naturally sweet, nutty, and packed with fiber, vitamins A and C, and potassium. When roasted right, it transforms into a caramelized, fork-tender side dish or even a hearty main. The secret lies in simple techniques that enhance its natural flavor—no fancy tools or culinary school required.
Whether you’re prepping for a cozy fall dinner, a holiday feast, or just want a healthy weeknight veggie, mastering the art of roasting acorn squash will save time, reduce waste, and impress your taste buds. Let’s get into how to consistently nail that golden, buttery texture—every single time.
What You Need
Good news: you don’t need a gourmet kitchen to roast acorn squash like a pro. Here’s your quick checklist of tools and ingredients.
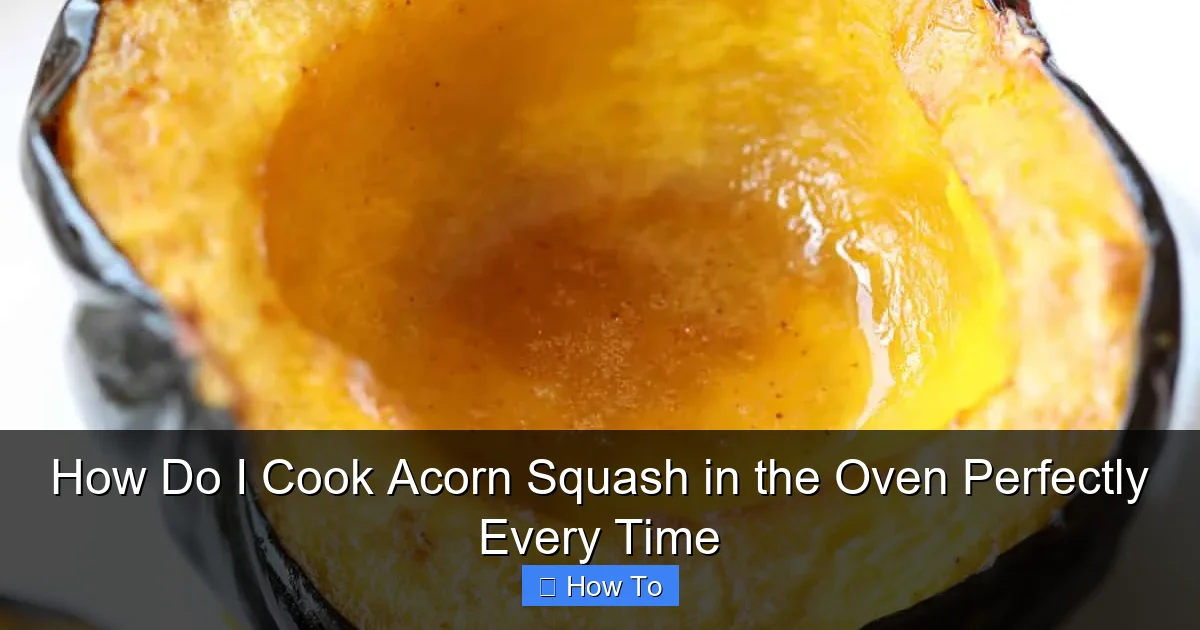
Visual guide about how to cook acorn squash in the oven
Image source: bellyfull.net
- Acorn squash (1 medium, about 2–3 pounds)
- Sharp chef’s knife (for safe, clean cutting)
- Cutting board (preferably non-slip)
- Spoon or ice cream scoop (to remove seeds)
- Baking sheet (rimmed to catch drips)
- Parchment paper or silicone baking mat (optional, for easy cleanup)
- Olive oil or melted butter (2–3 tbsp total)
- Seasonings: salt, black pepper, cinnamon, nutmeg, brown sugar, or maple syrup (choose your flavor profile)
- Oven (preheated to 400°F/200°C)
Pro tip: Pick acorn squash that feels heavy for its size, has dull (not shiny) skin, and no soft spots. These signs mean it’s ripe and flavorful—perfect for roasting.
Now that you’ve got your gear, let’s dive into the step-by-step method to answer how do I cook acorn squash in the oven perfectly every time—without fail.
Step-by-Step Guide to How Do I Cook Acorn Squash in the Oven Perfectly Every Time
Step 1: Preheat and Prep Your Oven
Start by preheating your oven to 400°F (200°C). This temperature is the sweet spot—hot enough to caramelize the natural sugars in the squash, but not so hot that it burns the outside before the inside softens.

Visual guide about how to cook acorn squash in the oven
Image source: images.squarespace-cdn.com
While the oven heats, line your baking sheet with parchment paper or a silicone mat. This prevents sticking and makes cleanup a breeze. A clean workspace is key to cooking acorn squash in the oven perfectly every time.
Step 2: Wash and Dry the Squash
Rinse the squash under cool water to remove dirt, especially if it’s from a farmers’ market. Dry it thoroughly with a clean towel. Moisture on the surface can steam the squash instead of roasting it, leading to soggy results.
Why does this matter? Dry skin = crisp edges and better browning. Think of it like roasting chicken—you want that golden crust, not a boiled texture.
Step 3: Safely Cut the Squash in Half
Place the squash on a stable cutting board. Use a sharp chef’s knife and press down firmly from the top to split it in half lengthwise. It’s tough, so go slowly and use steady pressure.
Warning: Never try to cut a squash on your hand or a wobbly surface. Use a damp towel under the board to prevent slipping. If it’s too hard, microwave the whole squash for 1–2 minutes to soften slightly—just don’t overdo it.
Once halved, you’ll see the seed cavity. That’s your next target.
Step 4: Scoop Out the Seeds and Stringy Pulp
Use a sturdy spoon or ice cream scoop to scrape out the seeds and fibrous strands. Don’t discard the seeds—roast them separately with a little oil and salt for a crunchy snack!
Pro tip: Save the seeds in a bowl. After roasting, toss them with olive oil, salt, and a pinch of smoked paprika. Bake at 350°F for 10–12 minutes for a healthy treat.
Now your squash halves are clean and ready for seasoning—the fun part.
Step 5: Season for Flavor (Choose Your Style)
There are two classic flavor paths: sweet or savory. Pick one—or mix and match!
- Sweet version: Drizzle with 1 tbsp maple syrup or honey + 1 tbsp melted butter. Sprinkle with cinnamon, nutmeg, and a pinch of brown sugar.
- Savory version: Brush with olive oil, then season with salt, pepper, garlic powder, and rosemary.
- Balanced twist: Use olive oil + a touch of maple syrup + sea salt + cracked black pepper. Best of both worlds.
Use your fingers or a pastry brush to coat the flesh evenly. Don’t skimp—seasoning is what turns plain squash into a showstopper. This step is crucial to learning how to cook acorn squash in the oven perfectly every time with flavor.
Step 6: Arrange on Baking Sheet, Cut-Side Up
Place the seasoned squash halves cut-side up on the prepared baking sheet. Why? This allows steam to escape and the edges to crisp up. If you flip them cut-side down, they’ll steam and become mushy.
Leave about 1 inch between each half so air can circulate. Crowding leads to uneven cooking—a common mistake.
Step 7: Roast at 400°F for 35–45 Minutes
Pop the tray into the preheated oven. Roast for 35 to 45 minutes, depending on size. Start checking at 35 minutes.
How do you know it’s done? Insert a fork into the thickest part. It should slide in easily with no resistance. The edges will be golden brown and slightly caramelized.
If the top browns too fast but the inside is still hard, cover loosely with foil and continue roasting. This prevents burning while ensuring even doneness.
Step 8: Optional Broil for Extra Crisp (1–2 Minutes)
For restaurant-style caramelization, switch the oven to broil for the last 1–2 minutes. Keep a close eye—broilers work fast and can burn squash in seconds.
Only do this if the squash is fully tender but the top needs more color. This step adds depth to your dish and answers the question: how do I cook acorn squash in the oven perfectly every time with a restaurant-quality finish?
Step 9: Rest, Serve, and Enjoy
Remove the squash from the oven and let it rest for 5 minutes. This allows the juices to redistribute, making it easier to scoop and serve.
Use a spoon to scoop the flesh directly from the skin. It should come out in soft, buttery chunks. Serve as is, or mash it slightly for a rustic purée.
Pair with roasted chicken, quinoa, or a fresh green salad. Leftovers keep well in the fridge for up to 5 days—perfect for meal prep.
Pro Tips & Common Mistakes to Avoid
Pro tip: Score the flesh before roasting. Use a knife to make shallow crosshatch cuts (like a grid) about 1/4 inch deep. This increases surface area, letting flavors penetrate deeper and speeding up cooking.
Common mistake: Overcrowding the pan. When squash touches, steam builds up and causes soggy results. Always leave space between halves.
Pro tip: Use melted butter instead of oil for richer flavor. Butter has milk solids that caramelize beautifully, enhancing the squash’s natural sweetness.
Common mistake: Underseasoning. Acorn squash is mild, so it needs bold flavors to shine. Don’t be shy with salt, herbs, or sweeteners.
Pro tip: Roast extra halves and freeze them. Scoop out the flesh, mash with a bit of butter, and store in freezer bags. Use later for soups, risottos, or stuffed squash.
Common mistake: Skipping the parchment. It’s not just for cleanup—it helps conduct heat evenly and prevents sticking, which is essential for cooking acorn squash in the oven perfectly every time.
FAQs About How Do I Cook Acorn Squash in the Oven Perfectly Every Time
Q1: Can I roast acorn squash with the skin on?
Yes! The skin becomes tender and edible when roasted. Just wash it well. Some people even prefer it for extra fiber and texture. If you’re unsure, peel it after roasting—it’s easier then.
Q2: How do I know if my acorn squash is ripe?
Look for a deep green, dull skin with no soft spots or cracks. It should feel heavy for its size. Avoid squash with yellow patches—they’re overripe and may be bitter.
Q3: Can I use other squashes like kabocha or butternut?
Absolutely. This method works for most winter squashes. Adjust time slightly: kabocha cooks faster (30–40 min), butternut needs longer (45–50 min). The key to how do I cook acorn squash in the oven perfectly every time applies to all!
Q4: What if my squash is too hard to cut?
Microwave the whole squash for 1–2 minutes to soften the flesh slightly. Let it cool before cutting. Or, use a heavy chef’s knife and press down with your palm—never your hand.
Q5: Can I add other veggies to the same pan?
Yes! Carrots, sweet potatoes, or Brussels sprouts roast well at 400°F. Just cut them to similar thickness so they cook evenly. Add them to the pan at the same time as the squash.
Q6: Is roasted acorn squash healthy?
Very! One cup of cooked acorn squash has only 115 calories, 30g carbs, 9g fiber, and high levels of vitamin A (214% DV) and vitamin C (37% DV). It’s a nutrient-dense, low-fat food.
Q7: Can I make this ahead of time?
Yes. Roast it, cool, and store in an airtight container in the fridge for up to 5 days. Reheat in the oven at 350°F for 10–15 minutes to restore texture. Avoid microwaving—it makes it mushy.
🎥 Related Video: Baked Acorn Squash #fallrecipe #baking #cooking #weeknightmeal
📺 Homemade Food Junkie
Final Thoughts
Now you know exactly how do I cook acorn squash in the oven perfectly every time—and it’s easier than you thought. No guesswork, no mush, no bland bites. Just sweet, caramelized, fork-tender goodness with minimal effort.
The secret? Preheat, prep, season, space, and check doneness. Follow these steps, and you’ll turn a humble squash into a star dish—whether it’s a weeknight side or the centerpiece of your holiday table.
Next time you see acorn squash at the market, grab one (or two!). Try the sweet version one night, the savory the next. Mix in spices like smoked paprika or chili flakes for a twist. Experiment with toppings: toasted pecans, crumbled goat cheese, or a drizzle of balsamic.
Remember: cooking isn’t about perfection—it’s about progress. Every time you roast acorn squash, you get better. And now, with this guide, you’re set up to succeed every single time.
So go ahead—preheat that oven, grab your knife, and get roasting. Your perfect acorn squash awaits.