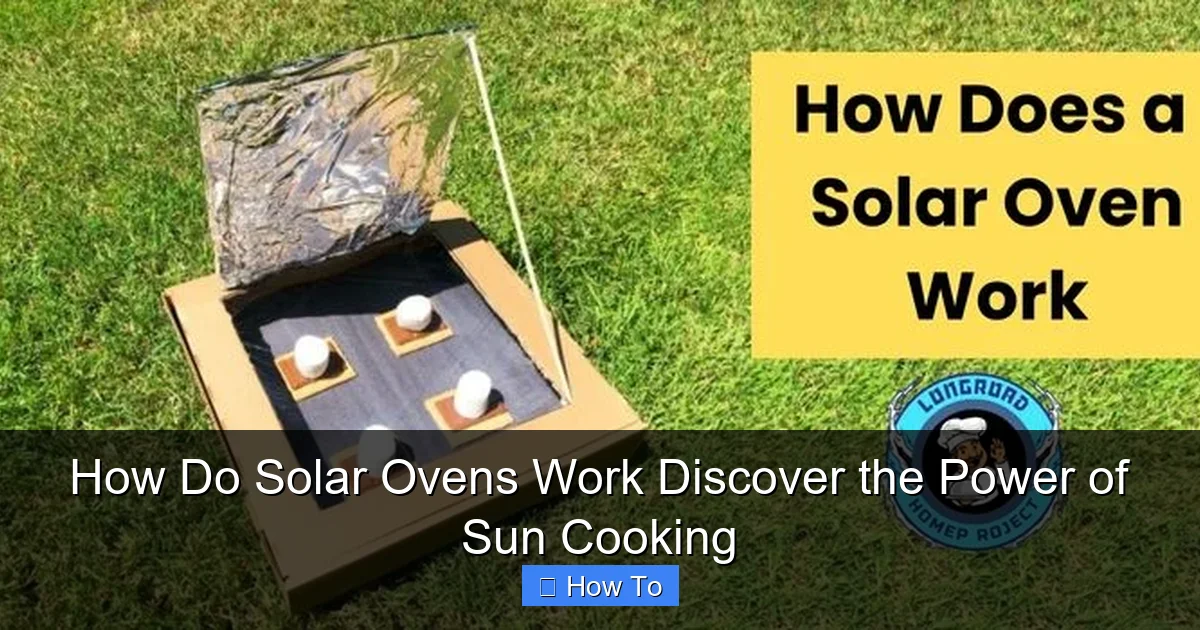
Featured image for how to solar ovens work
Image source: longroadhomeproject.com
Solar ovens harness the sun’s energy using reflective surfaces to concentrate sunlight and generate intense heat for cooking. By trapping this heat in an insulated, transparent chamber, they create a greenhouse effect that safely and efficiently prepares food—no fuel, no emissions, just pure solar power. It’s a simple, sustainable way to cook using nothing but sunlight.
“`html
How to How Do Solar Ovens Work Discover the Power of Sun Cooking
Why This Matters / Understanding the Problem
Have you ever tried cooking a meal only to realize the power went out, or your propane tank is empty? You’re not alone. Many people face energy shortages, high fuel costs, or simply want a greener way to cook. That’s where the How Do Solar Ovens Work Discover the Power of Sun Cooking question becomes more than just curiosity—it’s a practical solution.
Solar ovens use nothing but sunlight to bake, roast, steam, and even dehydrate food. No electricity, no gas, no smoke. Whether you’re camping, prepping for emergencies, or reducing your carbon footprint, understanding how solar ovens work opens up a world of clean, free cooking.
This guide breaks down the science and practice behind solar cooking. By the end, you’ll know exactly how solar ovens work and how to use them safely and effectively—no science degree required.
What You Need
Before diving into the steps, gather these tools and materials. Most are affordable, reusable, and easy to find.
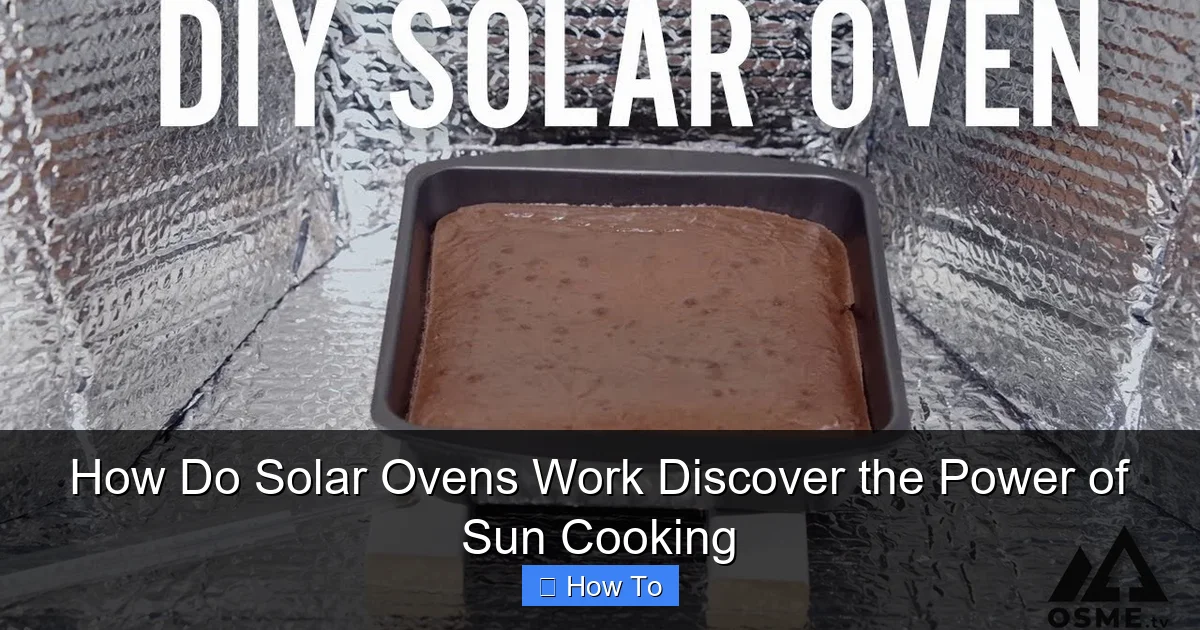
Visual guide about how to solar ovens work
Image source: i.ytimg.com
- Solar oven (commercial or DIY—we’ll cover both)
- Dark-colored, lidded cookware (black pots or pans absorb heat better)
- Oven-safe glass lid (to trap heat like a greenhouse)
- Thermometer (optional, but helpful for tracking internal temp)
- Sunlight (direct, unobstructed—ideal: 10 AM to 2 PM)
- Oven mitts (for handling hot pots)
- Reflective surface (foil, mirrors, or built-in reflectors on commercial models)
- Insulating material (like cardboard or foam, especially for DIY ovens)
Pro Tip: If you’re on a budget, you can build a basic solar oven using a pizza box, aluminum foil, plastic wrap, and a thermometer. But for consistent results, a commercial model like a Global Sun Oven or All American Sun Oven is worth the investment.
Step-by-Step Guide to How Do Solar Ovens Work Discover the Power of Sun Cooking
Step 1: Choose the Right Time and Location
Solar cooking only works when the sun is strong. Aim for clear skies and peak daylight hours—usually between 10 AM and 2 PM.
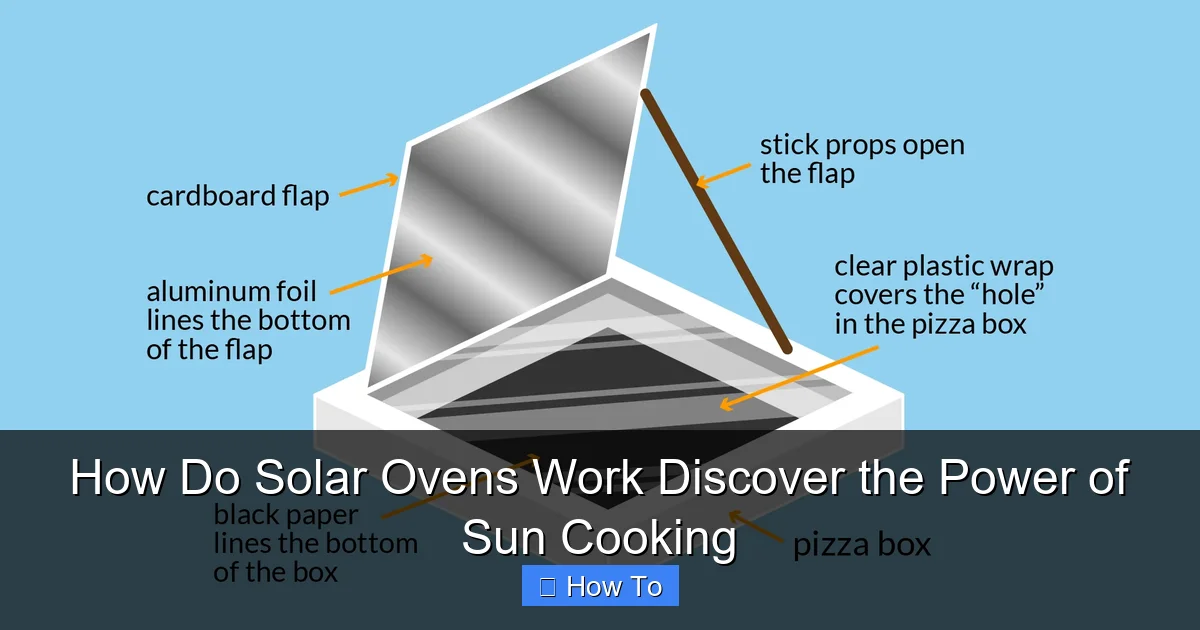
Visual guide about how to solar ovens work
Image source: science-u.org
Pick a spot with direct, uninterrupted sunlight. Avoid shade from trees, buildings, or fences. Even a small shadow can cut cooking time in half.
Place your solar oven on a stable, flat surface—like a picnic table or concrete patio. This keeps it steady and helps with aiming.
Why it matters: The How Do Solar Ovens Work Discover the Power of Sun Cooking principle depends on maximum sunlight exposure. No sun, no heat.
Step 2: Preheat Your Solar Oven
Just like a regular oven, solar ovens need preheating. Set it up 20–30 minutes before adding food.
Open the lid or reflector, aim the oven toward the sun, and let it heat up. Use a thermometer to check the internal temperature—many models reach 250°F to 350°F (120°C to 175°C) on sunny days.
For DIY ovens, the temp may max out around 200°F (93°C), which is still great for slow cooking.
Preheating ensures consistent cooking from the start. Cold ovens = cold food, even after hours in the sun.
Step 3: Prepare Your Food and Cookware
Use dark, shallow, lidded cookware. Black absorbs heat better, and a lid traps steam and heat—just like a greenhouse.
Cut food into smaller pieces to speed up cooking. A whole chicken may take 4+ hours, but chicken pieces can cook in 2–3 hours.
Marinate, season, or pre-cook items like rice or beans if needed. Solar ovens are great for slow roasting but not for searing or frying.
Place the food inside the cookware, seal with a lid, and set it in the oven’s cooking chamber.
Pro Tip: Use a glass lid instead of metal. It allows sunlight to pass through and traps heat inside—key to understanding how solar ovens work like mini greenhouses.
Step 4: Position the Oven for Maximum Sunlight
Solar ovens have reflectors (mirrors or foil-covered panels) that bounce extra sunlight into the cooking chamber.
Adjust the reflectors so they face the sun directly. Most models have an indicator—like a shadow line or aiming notch—to help you align them.
Check the oven every 30–60 minutes and re-angle it as the sun moves. This keeps the internal temperature steady.
If you’re using a DIY oven, use cardboard flaps covered in foil to redirect light. Just make sure they don’t block airflow.
Warning: Never look directly at the reflectors—they can concentrate sunlight and damage your eyes. Treat them like you would a magnifying glass.
Step 5: Monitor and Adjust During Cooking
Solar cooking is slow—but that’s the point. It’s energy-efficient and gentle on food.
Check the oven every 30 minutes. If the sun is strong, you may only need to adjust the angle slightly. On partly cloudy days, you might need to reposition more often.
Use an oven thermometer to track temperature. If it drops below 200°F (93°C), cooking slows down significantly.
Stirring isn’t always necessary, but it helps with even cooking—especially for stews or casseroles.
Step 6: Test for Doneness and Serve
Solar ovens don’t have timers, so rely on visual and texture cues. Insert a fork or knife to check tenderness.
Meat should reach safe internal temperatures: 165°F (74°C) for poultry, 145°F (63°C) for whole cuts of beef or pork.
Use oven mitts to remove the hot cookware. Let food rest for 5 minutes before serving—it continues cooking slightly from residual heat.
Enjoy your meal! Solar-cooked food often tastes more natural, with less burning or drying out.
Step 7: Clean and Store Your Solar Oven
After use, let the oven cool completely. Wipe down the interior and cookware with mild soap and water.
For commercial models, fold reflectors and store in a dry, shaded place. Avoid leaving them in direct sunlight when not in use—UV can degrade materials over time.
DIY ovens can be disassembled and stored flat. Save the components for next time.
Proper care extends the life of your solar oven and keeps it ready for your next sun-powered cooking adventure.
Pro Tips & Common Mistakes to Avoid
Solar cooking is simple, but small mistakes can ruin your meal. Here’s how to stay on track.
- Don’t start cooking in the late afternoon. The sun’s angle is too low, and heat drops fast.
- Never cook on cloudy or hazy days. You need direct sunlight. Even 30% cloud cover can reduce efficiency by half.
- Use the right cookware. Light-colored or shiny pots reflect heat instead of absorbing it. Stick to dark, matte finishes.
- Avoid opening the oven frequently. Every time you open it, you lose heat. Plan your checks.
- Don’t expect fast results. Solar ovens cook slowly—but that’s part of their charm. Think of it as slow-cooked, not slow-fail.
- Keep the glass lid clean. Dust or grease blocks sunlight. Wipe it with a damp cloth before each use.
Real-life example: Sarah, a camper in Arizona, tried to bake cookies at 4 PM. After two hours, they were still doughy. She switched to 11 AM the next day—and had perfect, golden cookies in 90 minutes. Timing is everything when you’re learning how solar ovens work.
Also, remember: solar ovens aren’t for everything. They’re great for roasting veggies, baking bread, or cooking grains. But they’re not ideal for frying eggs or boiling water quickly.
FAQs About How Do Solar Ovens Work Discover the Power of Sun Cooking
Q: Can a solar oven really cook food without electricity or fuel?
A: Yes! Solar ovens use concentrated sunlight to generate heat. The reflectors focus sunlight into the cooking chamber, and the dark pot absorbs it, turning light into thermal energy. No fuel, no emissions—just physics.
Q: How hot do solar ovens get?
A: Most reach between 250°F and 350°F (120°C to 175°C). Some high-end models can hit 400°F (205°C), but that’s rare. The key is consistent, even heat—not extreme temperatures.
Q: Can I cook on a cloudy day?
A: Not reliably. You need direct sunlight for effective solar cooking. On overcast days, the oven may warm up slightly, but it won’t cook food properly. Save solar cooking for sunny days.
Q: Are solar ovens safe to use?
A: Absolutely. They don’t produce flames, fumes, or electrical hazards. Just be careful with hot surfaces and use mitts. The biggest risk is eye strain from bright reflectors—so don’t stare into them.
Q: Can I build my own solar oven?
A: Yes! A DIY solar oven can be made from a pizza box, aluminum foil, plastic wrap, and black paper. It won’t reach the same temps as a commercial model, but it’s great for baking cookies or roasting veggies. It’s a fun way to learn how solar ovens work firsthand.
Q: How long does it take to cook in a solar oven?
A: It depends on the food and sunlight. A simple casserole might take 2–3 hours. A whole chicken could take 4–6 hours. But remember: solar cooking is about low and slow, not speed.
Q: Can I use a solar oven in winter?
A: Yes—if the sun is out. Snow and cold don’t stop solar ovens, as long as there’s direct sunlight. In fact, cold, clear winter days can be ideal. Just avoid cooking during snowstorms or heavy cloud cover.
🎥 Related Video: Solar oven #science #shorts #short #shortvideo #youtube #youtubeshorts #ytshorts #art #project #love
📺 Art by T
Final Thoughts
Now that you know How Do Solar Ovens Work Discover the Power of Sun Cooking, you’re ready to harness the sun’s energy for delicious, eco-friendly meals. Whether you’re off-grid, camping, or just want to cut your energy bill, solar ovens are a smart, sustainable choice.
Start small: try baking a potato or roasting veggies on a sunny day. Once you see how easy and effective it is, you’ll wonder why you didn’t try it sooner.
Remember: the sun is free, abundant, and always available (on sunny days). With a little patience and the right setup, you can cook anything from lasagna to cookies—using nothing but light.
So grab your solar oven, find a sunny spot, and let the sun do the work. Your taste buds—and the planet—will thank you.
“`