Baking a potato with foil in the oven is a classic, foolproof method that delivers tender, fluffy insides and slightly crispy skin. With just a few simple steps—washing, seasoning, wrapping, and baking—you can create a delicious side dish or hearty meal base in under an hour.
There’s something deeply satisfying about a perfectly baked potato—crispy on the outside, fluffy on the inside, and warm enough to melt butter on contact. Whether you’re serving it as a side dish, loading it up with toppings for a hearty meal, or enjoying it simply with a sprinkle of salt, the baked potato is a comfort food staple in homes around the world. And while there are many ways to cook a potato—microwaving, air frying, or even grilling—one of the most reliable and traditional methods is baking it with foil in the oven.
Using foil to bake a potato might seem old-school, but it’s a technique that delivers consistent results. The foil acts as a protective barrier, trapping steam and heat to cook the potato evenly from all sides. This method ensures the inside becomes tender and light, while the skin stays intact and develops a pleasant texture—slightly crisp yet not burnt. Plus, it’s incredibly easy: no special equipment, no constant monitoring, and minimal cleanup. Whether you’re a beginner cook or a seasoned home chef, learning how to bake a potato with foil in the oven is a skill worth mastering.
Key Takeaways
- Choose the right potato: Russet potatoes work best due to their high starch content and fluffy texture when baked.
- Preheat your oven: Always preheat to 400°F (200°C) for even cooking and optimal texture.
- Wash and dry thoroughly: Clean the skin to remove dirt and dry it well to help the foil seal in moisture.
- Season before wrapping: Rub with oil and salt to enhance flavor and promote crispy skin.
- Use heavy-duty foil: This prevents tearing and ensures even heat distribution during baking.
- Bake for 45–60 minutes: Cooking time depends on potato size—test doneness with a fork.
- Let it rest before serving: Allowing the potato to sit for 5 minutes after baking helps the interior finish cooking evenly.
Quick Answers to Common Questions
Can I bake a potato with foil at a lower temperature?
Yes, you can bake at 375°F, but it will take longer—about 75 to 90 minutes. The lower heat cooks the potato more slowly, which can result in a softer skin.
Do I need to poke holes if using foil?
Yes, poking holes is still important. Steam needs to escape to prevent the potato from bursting, even when wrapped in foil.
Can I use parchment paper instead of foil?
Parchment paper isn’t recommended for direct oven baking at high temperatures. Foil is better because it conducts heat and seals in moisture effectively.
How do I know when the potato is done?
Insert a fork or knife into the thickest part. If it slides in easily with no resistance, the potato is fully cooked.
Can I bake multiple potatoes at once?
Absolutely! Just make sure they’re spaced apart on the rack or baking sheet so heat can circulate evenly around each one.
📑 Table of Contents
Why Bake a Potato with Foil?
Many people wonder why foil is used at all—after all, you can bake a potato directly on the oven rack. While that method works, it often leads to uneven cooking, drier skin, and more mess from oil drips. Wrapping the potato in foil solves these issues by creating a mini steam chamber around the potato. This gentle, enclosed environment allows the heat to penetrate evenly, resulting in a perfectly cooked interior every time.
Another advantage of using foil is convenience. You can prepare several potatoes at once, wrap them individually, and bake them all together without worrying about them sticking to the pan or losing moisture. Foil also makes cleanup a breeze—just toss the used wrap after serving. Plus, if you’re cooking for a crowd or meal prepping, foil-wrapped potatoes can be stored and reheated easily, making them a practical choice for busy weeknights.
Choosing the Right Potato
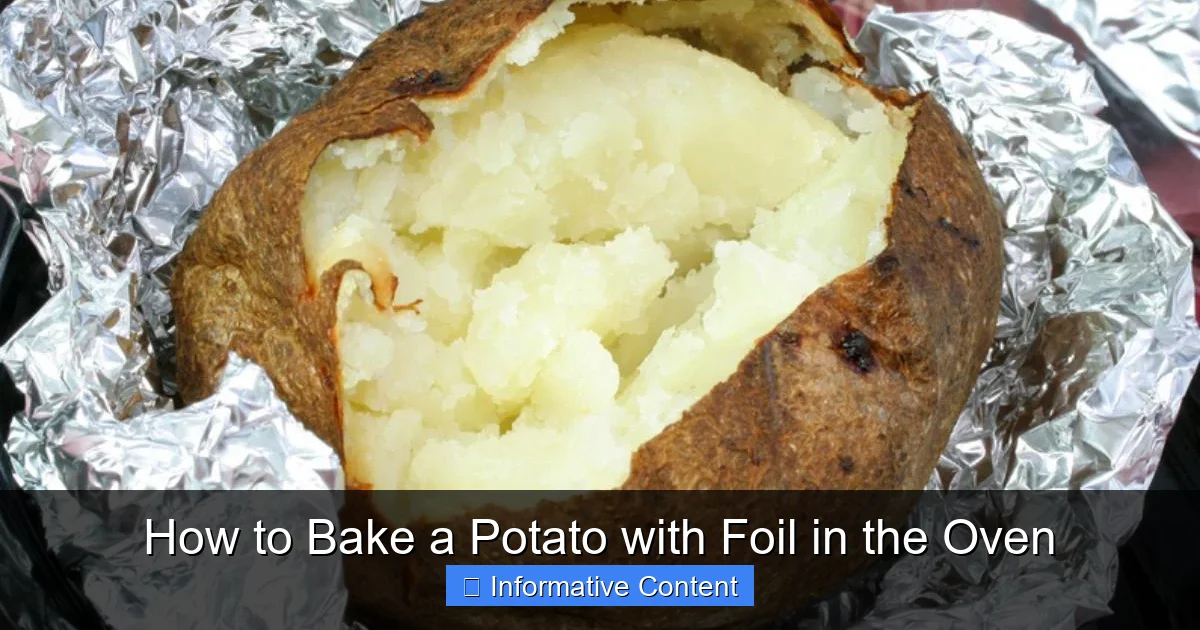
Visual guide about How to Bake a Potato with Foil in the Oven
Image source: images.eatthismuch.com
Not all potatoes are created equal when it comes to baking. The ideal potato for this method is one that becomes fluffy and light when cooked, with a skin that crisps up nicely. That’s why Russet potatoes are the top choice. Also known as Idaho potatoes, they have a high starch content and low moisture, which is perfect for achieving that classic baked potato texture.
You can identify a good Russet by its thick, netted brown skin and oblong shape. They typically weigh between 10 to 16 ounces, which is the perfect size for a single serving. If you can’t find Russets, Yukon Gold potatoes are a decent alternative—they’re slightly waxier but still bake up tender and flavorful. Avoid waxy potatoes like red or new potatoes, as they tend to stay firm and don’t develop the same fluffy interior.
How Many Potatoes Should You Bake?
The number of potatoes you bake depends on your needs. For a family of four, plan on one medium to large potato per person. If you’re serving the potato as a side dish alongside a protein like grilled chicken or steak, one per person is sufficient. But if the potato is the main event—topped with chili, cheese, sour cream, and bacon—you might want to consider baking an extra one or two to avoid disappointed appetites.
Step-by-Step Guide to Baking a Potato with Foil
Now that you know why foil works and which potatoes to choose, let’s walk through the process step by step. This method is simple, repeatable, and delivers excellent results every time.
Step 1: Preheat the Oven
Start by preheating your oven to 400°F (200°C). This temperature is ideal because it’s hot enough to cook the potato thoroughly without burning the skin. Preheating ensures that the potato begins cooking immediately once it goes in, which helps maintain even heat distribution. If you put the potato in a cold oven, it will take longer to cook and may end up uneven.
Step 2: Wash and Dry the Potato
Rinse each potato under cool running water to remove any dirt or debris from the skin. Use a vegetable brush if needed—potato skins can harbor soil, especially if they’re freshly harvested. After washing, pat the potato completely dry with a clean kitchen towel or paper towels. This step is crucial because moisture on the skin can prevent the oil from adhering properly and may cause the foil to stick.
Step 3: Poke Holes in the Skin
Using a fork, poke 4 to 6 holes around the potato. These holes allow steam to escape during baking, preventing the potato from bursting. It’s a small step, but an important one—without ventilation, pressure can build up inside and cause the potato to split open.
Step 4: Season the Potato
Rub each potato with a thin layer of olive oil or melted butter. This not only adds flavor but also helps the skin crisp up slightly, even under foil. Sprinkle generously with kosher salt or sea salt—this enhances the natural taste of the potato and gives the skin a subtle crunch. You can also add a pinch of black pepper, garlic powder, or rosemary for extra flavor, though traditionalists often prefer to keep it simple.
Step 5: Wrap in Foil
Cut a piece of heavy-duty aluminum foil large enough to fully wrap the potato with some overlap. Place the potato in the center and bring the edges up and over, folding them tightly to seal. Make sure there are no gaps—this keeps the steam in and ensures even cooking. If you’re using regular foil, consider doubling up the layers for extra durability.
Step 6: Bake in the Oven
Place the wrapped potatoes directly on the middle oven rack or on a baking sheet if you prefer. Baking on the rack allows for better air circulation, but a baking sheet catches any potential drips and makes handling easier. Bake for 45 to 60 minutes, depending on the size of the potato. A medium potato (about 12 ounces) will take closer to 45 minutes, while a large one (16 ounces or more) may need up to an hour.
To test for doneness, carefully unwrap one potato (use oven mitts—it will be hot!) and insert a fork or knife into the center. It should slide in easily with no resistance. If it meets any resistance, rewrap and bake for another 5–10 minutes.
Step 7: Let It Rest
Once the potatoes are done, remove them from the oven and let them rest for 5 minutes before serving. This resting period allows the heat to distribute evenly throughout the potato, finishing the cooking process and making the interior even fluffier. It also makes the potato easier to handle and less likely to burn your mouth.
Serving Suggestions and Toppings
A baked potato is a blank canvas for creativity. While it’s delicious on its own with just a pat of butter and a sprinkle of salt, it truly shines when loaded with toppings. Here are some classic and creative ideas:
– **Classic Loaded:** Sour cream, shredded cheddar cheese, crispy bacon bits, chopped green onions, and a dollop of butter.
– **Healthy Twist:** Greek yogurt, steamed broccoli, chives, and a sprinkle of feta cheese.
– **Southwest Style:** Black beans, corn, diced tomatoes, avocado, and a drizzle of chipotle sauce.
– **Vegetarian Delight:** Hummus, roasted red peppers, olives, and fresh herbs like parsley or dill.
– **Breakfast Potato:** Scrambled eggs, cheddar, sausage crumbles, and a dash of hot sauce.
You can also serve the potato split open with the skin folded back, or scoop out the insides, mix with toppings, and return to the skin for a stuffed version.
Tips for Perfect Results Every Time
Even with a simple recipe, small details can make a big difference. Here are a few pro tips to ensure your foil-baked potatoes are always a success:
– **Don’t skip the oil and salt:** These ingredients are essential for flavor and texture. Without them, the skin can taste bland and dry.
– **Use heavy-duty foil:** Regular foil can tear or melt under high heat. Heavy-duty foil holds up better and provides a tighter seal.
– **Avoid overwrapping:** While you want a good seal, don’t wrap the potato too tightly. Leave a little room for expansion as it cooks.
– **Rotate for even cooking:** If your oven has hot spots, rotate the potatoes halfway through baking to ensure they cook evenly.
– **Reheat with care:** To reheat a leftover foil-baked potato, unwrap it and place it on a baking sheet at 350°F for 15–20 minutes, or microwave for 2–3 minutes (though this may soften the skin).
Conclusion
Baking a potato with foil in the oven is a timeless technique that combines simplicity with delicious results. It’s a method that’s stood the test of time for good reason—it’s reliable, easy, and produces a perfectly cooked potato every time. Whether you’re cooking for one or feeding a family, this approach ensures tender, fluffy insides and flavorful, slightly crispy skin.
With just a few basic ingredients and minimal effort, you can turn a humble potato into a satisfying meal or side dish. So the next time you’re looking for a comforting, versatile dish that requires little more than an oven and some foil, remember: the classic baked potato is always a winner.
Frequently Asked Questions
Can I bake a potato with foil in a convection oven?
Yes, you can. Reduce the temperature by 25°F (to 375°F) and check for doneness a few minutes early, as convection ovens cook faster.
Is it safe to bake potatoes in foil?
Yes, it’s safe as long as you use aluminum foil properly and avoid cooking acidic foods in it. For plain potatoes, foil is perfectly safe.
Why is my baked potato still hard after an hour?
This could mean your oven isn’t hot enough, the potatoes are very large, or they weren’t preheated. Try increasing the temperature slightly or baking longer.
Can I prepare foil-wrapped potatoes ahead of time?
Yes, you can wash, season, and wrap potatoes up to a day in advance. Store them in the fridge and bake as usual—just add 5–10 minutes to the cooking time.
Do I need to flip the potato while baking?
No, flipping isn’t necessary when using foil. The sealed wrap ensures even cooking on all sides.
What’s the best way to store leftover baked potatoes?
Unwrap and store in an airtight container in the fridge for up to 4 days. Reheat in the oven or microwave before serving.