Cooking St. Louis ribs in the oven is a simple, hands-off way to achieve tender, flavorful ribs without a smoker or grill. With the right preparation, low-and-slow cooking, and a good glaze, you can enjoy restaurant-quality ribs at home.
Key Takeaways
- Choose the right cut: St. Louis-style ribs are trimmed spare ribs with cartilage and uneven edges removed for even cooking.
- Remove the membrane: Pulling off the tough membrane on the bone side ensures tender, bite-through ribs.
- Season generously: A dry rub with salt, pepper, paprika, garlic, and brown sugar enhances flavor and forms a delicious crust.
- Cook low and slow: Bake at 300°F (150°C) for 2.5 to 3 hours until meat pulls back from the bones.
- Finish with sauce: Apply barbecue sauce in the last 15–20 minutes to caramelize without burning.
- Rest before serving: Let ribs rest 10 minutes after cooking to lock in juices and improve texture.
- Customize to taste: Adjust spice levels, sweetness, or smokiness with your favorite rubs and sauces.
Quick Answers to Common Questions
Can I cook St. Louis ribs without a wire rack?
Yes, you can cook them directly on foil-lined baking sheets. Just flip them halfway through cooking to prevent sticking and ensure even browning.
How do I know when the ribs are done?
The meat should pull back from the bones, and a fork should slide in easily. The internal temperature should reach 190–203°F (88–95°C).
Can I use liquid smoke in the rub?
Yes, adding ½ to 1 teaspoon of liquid smoke to your dry rub can mimic the smoky flavor of grilled ribs.
Should I wrap the ribs in foil during cooking?
Yes, wrapping them tightly in foil for the first 2–2.5 hours keeps them moist. Uncover only when adding sauce.
Can I make these ribs spicy?
Absolutely. Add cayenne, chipotle powder, or hot sauce to the rub or sauce for extra heat.
📑 Table of Contents
Why St. Louis Ribs Are Worth the Effort
St. Louis ribs are a barbecue favorite for good reason. These trimmed spare ribs are meaty, flavorful, and perfect for slow cooking. Unlike baby back ribs, which are leaner and smaller, St. Louis-style ribs come from the belly side of the pig and have more fat and connective tissue. That means they become incredibly tender and juicy when cooked properly. The extra fat also adds rich flavor, making every bite satisfying.
One of the best things about cooking St. Louis ribs in the oven is convenience. You don’t need a smoker, grill, or special equipment. Just your oven, a baking sheet, and a little patience. Whether you’re cooking for a weeknight dinner or a weekend gathering, oven-baked ribs are a reliable crowd-pleaser. With the right technique, you can achieve that fall-off-the-bone texture and smoky-sweet flavor usually reserved for BBQ joints.
Choosing the Right Cut
Not all ribs are created equal. When shopping for St. Louis ribs, look for a specific cut: spare ribs that have been trimmed into a neat rectangle. The butcher removes the rib tips, cartilage, and uneven edges, leaving a uniform slab that cooks evenly. This trimming process is what sets St. Louis-style ribs apart from regular spare ribs.
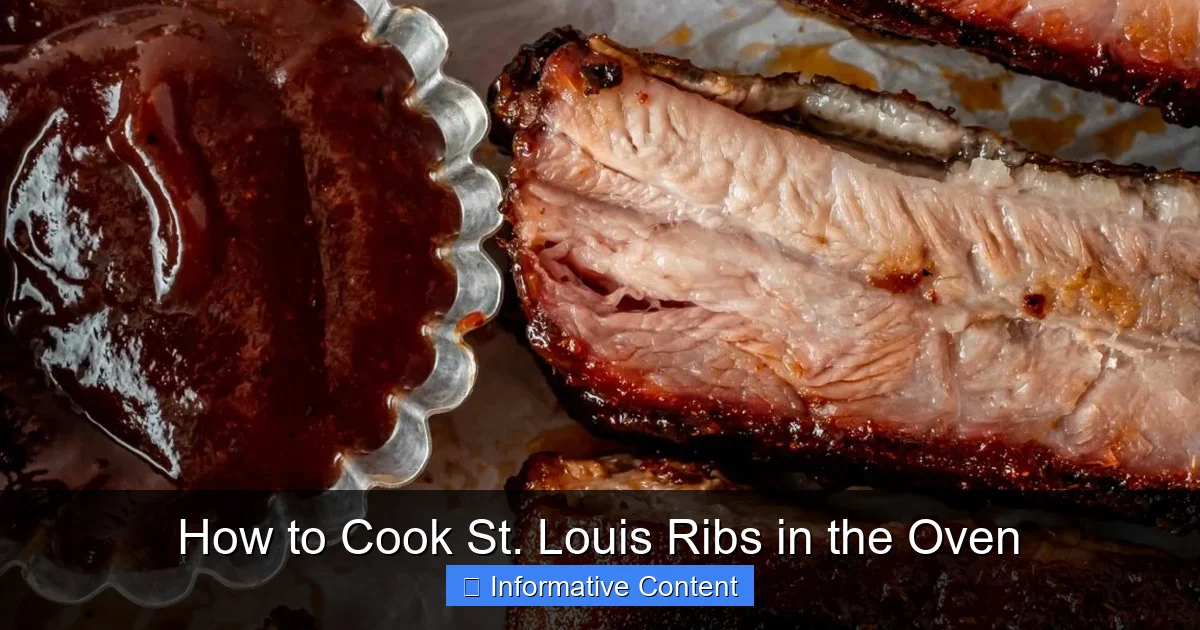
Visual guide about How to Cook St. Louis Ribs in the Oven
Image source: whiskedawaykitchen.com
What to Look for at the Store
When selecting ribs, choose a slab that’s well-marbled with fat. The fat will render during cooking, keeping the meat moist. Avoid ribs that look dry or have large gaps between bones. A good slab should be about 1 to 1.5 inches thick and weigh between 2.5 to 3.5 pounds. If you can’t find pre-trimmed St. Louis ribs, ask your butcher to trim spare ribs for you. Many grocery stores now carry them pre-trimmed in the meat section.
Understanding the Anatomy
Spare ribs come from the lower belly of the pig and include the rib bones, cartilage, and sternum. St. Louis-style ribs are spare ribs with the sternum, cartilage, and rib tips removed. This creates a flat, even surface ideal for even cooking and sauce absorption. The result is a more consistent texture and better presentation.
Prepping the Ribs: The Secret to Tender Meat
Proper preparation is key to great ribs. Skipping steps like removing the membrane or skipping the rub can lead to tough, less flavorful results. Take the time to prep your ribs well—it makes a huge difference.
Removing the Membrane
The thin, silvery membrane on the bone side of the ribs is tough and chewy. It prevents seasoning from penetrating and stops the meat from becoming truly tender. To remove it, slide a butter knife under the membrane at one end, lift it, and grab it with a paper towel for a better grip. Pull it off in one piece if possible. If it tears, repeat until the entire membrane is gone. This step is non-negotiable for melt-in-your-mouth ribs.
Applying the Dry Rub
A good dry rub adds depth and forms a flavorful crust called the “bark.” You can buy pre-made rubs, but homemade versions let you control the flavor. A basic rub includes:
- 2 tablespoons brown sugar
- 1 tablespoon paprika (smoked paprika adds extra depth)
- 1 teaspoon garlic powder
- 1 teaspoon onion powder
- 1 teaspoon black pepper
- 1 teaspoon salt
- ½ teaspoon chili powder (optional, for heat)
- ½ teaspoon cayenne (optional, for spice)
Mix the ingredients in a bowl, then generously coat both sides of the ribs. Press the rub into the meat to help it adhere. For maximum flavor, let the ribs sit with the rub for at least 1 hour at room temperature, or cover and refrigerate overnight. The longer they marinate, the more flavorful they’ll be.
Cooking St. Louis Ribs in the Oven
Now for the main event: cooking. The goal is to break down the collagen and fat slowly, turning them into gelatin for that tender, juicy texture. Oven cooking at a low temperature does this beautifully.
Setting Up the Oven
Preheat your oven to 300°F (150°C). This low temperature allows the ribs to cook slowly without drying out. Line a baking sheet with heavy-duty aluminum foil—this makes cleanup easier and helps trap moisture. Place a wire rack on the baking sheet if you have one. This elevates the ribs, allowing heat to circulate and preventing them from sitting in rendered fat.
The Cooking Process
Place the seasoned ribs bone-side down on the rack or directly on the foil. Cover the entire baking sheet tightly with another sheet of foil. This creates a sealed environment, keeping the ribs moist during the long cook. Bake for 2.5 to 3 hours. The exact time depends on the thickness of your ribs and your oven, but a good indicator is when the meat starts to pull back from the bones by about ¼ inch.
After the initial cook, remove the ribs from the oven and carefully peel back the top layer of foil. Be cautious—steam will escape. At this point, you can check for doneness. The ribs should feel tender when pierced with a fork, but not falling apart. If they’re still tough, re-cover and cook another 15–30 minutes.
Adding the Sauce
Barbecue sauce adds sweetness, tang, and shine. But if you apply it too early, the sugar in the sauce can burn. Instead, add it in the last 15–20 minutes of cooking. Brush a thin layer of your favorite sauce on both sides of the ribs. Return them to the oven, uncovered, to let the sauce caramelize. You can repeat this step once or twice for a thicker glaze, but keep an eye on them to prevent burning.
Finishing and Serving
Once the ribs are done, resist the urge to slice them immediately. Letting them rest is crucial for juicy results.
Resting the Ribs
Remove the ribs from the oven and let them rest, loosely tented with foil, for 10 minutes. This allows the juices to redistribute throughout the meat. Skipping this step can lead to dry ribs, even if they were perfectly cooked.
Slicing and Serving
To serve, use a sharp knife to cut between the bones. You can slice them into individual ribs or leave them in sections of 2–3 bones. Serve with extra barbecue sauce on the side, along with classic sides like coleslaw, cornbread, or baked beans. For a complete meal, pair with a fresh green salad or roasted vegetables.
Tips for Perfect Oven-Baked Ribs Every Time
Even with a solid recipe, small tweaks can elevate your ribs. Here are some pro tips to ensure success:
- Use a meat thermometer: While visual cues are helpful, the internal temperature is the most accurate way to check doneness. Aim for 190–203°F (88–95°C). At this range, the collagen has broken down, and the meat is tender.
- Don’t rush the cook: Low and slow is the name of the game. Cooking at higher temps can dry out the ribs or leave them tough.
- Experiment with wood chips: For a smoky flavor without a smoker, place a few soaked wood chips (like hickory or apple) in a foil pouch and put it on the oven rack above the ribs during the last hour of cooking.
- Make them ahead: Ribs taste even better the next day. Cook them a day in advance, refrigerate, then reheat in a 275°F (135°C) oven for 20–30 minutes before serving.
- Freeze for later: Cooked ribs freeze well. Wrap them tightly in foil or vacuum seal, then freeze for up to 3 months. Thaw in the fridge before reheating.
Conclusion
Cooking St. Louis ribs in the oven is a simple, foolproof way to enjoy tender, flavorful ribs at home. With the right cut, proper prep, and low-and-slow cooking, you can achieve BBQ-worthy results without any special equipment. Whether you’re feeding a family or hosting friends, these ribs are sure to impress. So fire up your oven, grab a slab, and get ready for a delicious, stress-free meal that tastes like it came straight from a pit master’s kitchen.
Frequently Asked Questions
What’s the difference between St. Louis ribs and spare ribs?
St. Louis ribs are a trimmed version of spare ribs. The rib tips, cartilage, and sternum are removed, creating a uniform, rectangular slab that cooks more evenly.
How long do St. Louis ribs take to cook in the oven?
At 300°F (150°C), they typically take 2.5 to 3 hours, depending on thickness. Always check for doneness by testing the meat’s tenderness.
Can I use a different oven temperature?
You can cook at 275°F (135°C) for 3.5–4 hours for even slower cooking, or 325°F (163°C) for 2–2.5 hours, but lower temps yield more tender results.
Do I need to baste the ribs while cooking?
Basting isn’t necessary when wrapped in foil. The sealed environment keeps them moist. Only baste when adding sauce near the end.
Can I cook St. Louis ribs from frozen?
It’s best to thaw them first. If cooking from frozen, add 1–1.5 hours to the cook time and check frequently to avoid drying out.
What’s the best barbecue sauce to use?
Use your favorite store-bought sauce or make your own with ketchup, brown sugar, vinegar, Worcestershire, and spices. Sweet, smoky, or spicy—it’s up to you!