Drying fruit in the oven is a simple, affordable way to preserve seasonal produce and create healthy, chewy snacks. With just a few basic steps, you can transform fresh apples, bananas, or mangoes into delicious dried treats that last for weeks.
Key Takeaways
- Choose ripe, firm fruit: Overripe or bruised fruit won’t dry evenly and may taste off.
- Slice uniformly: Consistent thickness ensures even drying and prevents some pieces from burning while others stay moist.
- Use low oven temperatures: Set your oven between 140°F and 170°F (60°C–75°C) to gently remove moisture without cooking the fruit.
- Flip and rotate trays: This promotes even drying and prevents sticking or uneven texture.
- Check for doneness: Properly dried fruit should be leathery or slightly crisp, not sticky or moist.
- Store in airtight containers: Keep dried fruit in a cool, dark place to maintain freshness and prevent moisture absorption.
- Experiment with flavors: Add cinnamon, lemon juice, or honey for extra taste before drying.
Quick Answers to Common Questions
Can I dry fruit in a regular oven?
Yes! Most home ovens can dry fruit effectively when set to the lowest temperature (ideally 140°F–170°F). Just monitor closely and prop the door open slightly if needed.
How long does it take to dry fruit in the oven?
Drying time varies by fruit type and thickness, but most fruits take 4 to 8 hours. Check every hour after the first few hours.
Do I need to peel the fruit before drying?
Peeling is optional. Some prefer the texture and fiber of the skin, while others find it tough after drying. Apples and pears are commonly peeled, but bananas and mangoes are usually dried with skin removed.
Can I dry multiple types of fruit at once?
It’s best to dry similar fruits together, as different fruits dry at different rates. If you must mix, choose fruits with similar moisture content and drying times, like apples and pears.
Is oven-dried fruit healthy?
Yes! Oven-dried fruit retains most of its nutrients and natural sugars. It’s a great alternative to processed snacks, especially when made without added sugar or preservatives.
📑 Table of Contents
Why Dry Fruit in the Oven?
Drying fruit might sound like something only professional chefs or survivalists do, but it’s actually a simple, rewarding process anyone can try at home. Whether you’ve got a bumper crop of apples from your backyard tree or scored a great deal on bananas at the farmers’ market, drying fruit in the oven is an excellent way to preserve it without needing expensive equipment like a food dehydrator.
Oven-dried fruit retains much of its natural sweetness and nutrients, making it a healthier alternative to store-bought dried snacks that often contain added sugar, preservatives, or sulfur. Plus, homemade dried fruit tastes fresher and more vibrant. It’s perfect for snacking, adding to oatmeal or yogurt, or tossing into trail mix. And the best part? You don’t need fancy tools—just your oven, a knife, and a little patience.
Choosing the Right Fruit
Not all fruits dry equally well, so picking the right ones is key to success. The ideal candidates are firm, ripe (but not overripe) fruits with a good balance of sweetness and acidity. Overly soft or bruised fruit can become mushy or ferment during drying.
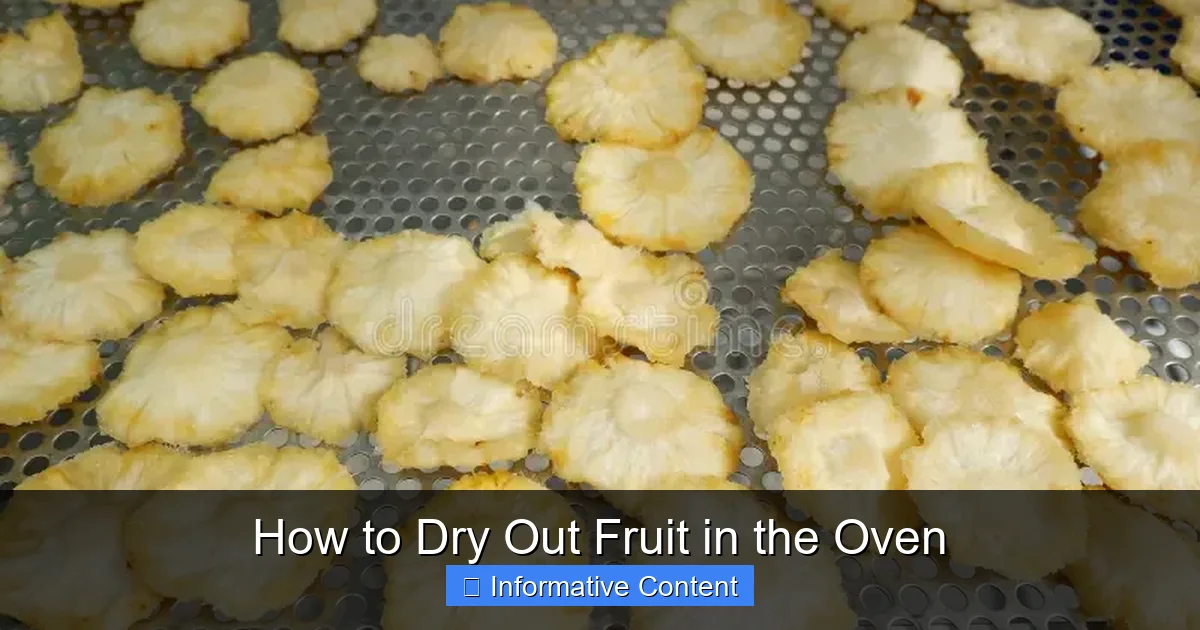
Visual guide about How to Dry Out Fruit in the Oven
Image source: thumbs.dreamstime.com
Best Fruits for Oven Drying
- Apples: Crisp varieties like Granny Smith or Honeycrisp work best. Remove the core and slice evenly.
- Bananas: Use slightly green-tipped bananas for a chewier texture. Riper bananas will be sweeter but may caramelize more.
- Pears: Similar to apples, pears dry beautifully and develop a rich, honey-like flavor.
- Peaches and nectarines: These stone fruits become intensely sweet when dried. Pit them first and slice thin.
- Mangoes: Tropical and naturally sweet, mangoes make chewy, candy-like dried slices.
- Strawberries: Slice thinly and expect a tangy-sweet result. They shrink significantly, so don’t be surprised by the size change.
Fruits to Avoid or Use with Caution
High-water-content fruits like watermelon or citrus tend to dry poorly in the oven—they either take too long or become tough and bitter. Berries like blueberries or raspberries can also be tricky due to their small size and delicate structure. If you’re a beginner, stick to the recommended fruits above for the best results.
Preparing the Fruit
Proper preparation is crucial for even drying and great flavor. The goal is to create uniform slices that will lose moisture at the same rate.
Washing and Peeling
Start by washing the fruit thoroughly under cool running water. For fruits with thick skins like apples or pears, peeling is optional—some people prefer the texture and added fiber, while others find the skin tough after drying. If you do leave the skin on, consider blanching the slices in boiling water for 30 seconds to help break down the outer layer and speed up drying.
Slicing Evenly
Use a sharp knife or a mandoline slicer to cut the fruit into ¼-inch (6mm) thick slices. Uniformity is everything—if one piece is twice as thick as another, it will dry much slower and could end up underdone while thinner pieces burn. For round fruits like apples or peaches, cut them into wedges or rounds. Bananas and mangoes can be sliced lengthwise or into rounds.
Optional Flavor Enhancements
This is where you can get creative! Lightly toss slices in lemon juice to prevent browning (especially helpful for apples and pears). Sprinkle with cinnamon, nutmeg, or a light brush of honey for added sweetness. Some people even dip banana slices in yogurt before drying for a tangy twist. Just remember: less is more. You don’t want to add so much liquid that it interferes with the drying process.
Setting Up Your Oven
Oven drying requires low, steady heat—think of it as a gentle, all-day bake rather than a quick roast. Most home ovens don’t go below 170°F (75°C), which is actually perfect for this task.
Oven Temperature and Rack Placement
Set your oven to the lowest possible temperature, ideally between 140°F and 170°F (60°C–75°C). If your oven doesn’t go that low, you can prop the door open slightly with a wooden spoon or oven mitt to let heat escape and maintain a cooler environment. Place the oven racks in the middle and lower positions to allow for good air circulation.
Using Baking Sheets and Liners
Line baking sheets with parchment paper or silicone baking mats to prevent sticking. Avoid aluminum foil—it can react with acidic fruits and leave a metallic taste. Arrange the fruit slices in a single layer, making sure they don’t overlap. If you’re drying multiple batches, rotate the trays halfway through for even drying.
Improving Airflow
Good airflow helps moisture escape faster. If your oven has a convection setting, use it—it circulates warm air and can reduce drying time by up to 25%. If not, you can place a small fan near the open oven door (safely away from heat) to help draw out moisture.
The Drying Process
Now comes the waiting game. Drying fruit in the oven is a slow process—typically taking 4 to 8 hours, depending on the fruit type, thickness, and your oven’s efficiency.
Monitoring Progress
Check the fruit every hour after the first 2–3 hours. Look for signs of doneness: the slices should be leathery or slightly crisp, with no visible moisture when pressed. They shouldn’t be sticky or gummy. Apples and pears may curl slightly at the edges when done. Bananas often turn golden brown and become chewy like fruit leather.
Flipping and Rotating
Halfway through the drying time, flip each slice over using tongs or a fork. This ensures both sides dry evenly. Also, swap the positions of your baking trays—top rack to bottom, front to back—to account for hot spots in your oven.
Testing for Doneness
To test if your fruit is fully dried, let a slice cool completely at room temperature. If it’s still soft or moist, return it to the oven. Properly dried fruit should keep for several weeks when stored correctly. Under-dried fruit can mold, while over-dried fruit becomes hard and brittle.
Storing Your Dried Fruit
Once your fruit is dry and cooled, it’s time to store it properly to maintain quality and extend shelf life.
Cooling Before Storage
Never pack warm fruit—it can create condensation inside the container, leading to mold. Let the slices cool on the baking sheet for at least 30 minutes before transferring them.
Airtight Containers
Use glass jars, plastic containers, or resealable bags with a good seal. Label them with the date and fruit type. Store in a cool, dark, dry place like a pantry or cupboard. Avoid areas near the stove or in direct sunlight, as heat and light can degrade the fruit over time.
How Long Does It Last?
Properly dried and stored fruit can last 4–6 months at room temperature. For longer storage, keep it in the refrigerator (up to 1 year) or freezer (up to 18 months). If you notice any off smells, discoloration, or soft spots, it’s time to toss it.
Troubleshooting Common Issues
Even with the best preparation, things don’t always go perfectly. Here’s how to fix common problems.
Fruit Is Too Chewy or Sticky
This means it’s under-dried. Return the slices to the oven and continue drying, checking every 30 minutes. High humidity in your kitchen can also slow drying—consider using a dehumidifier or drying on a dry, sunny day.
Fruit Is Too Hard or Brittle
Over-drying happens when the oven is too hot or the fruit is left in too long. While still edible, it may not be pleasant to eat. Next time, check earlier and reduce drying time slightly.
Fruit Turned Brown
Browning is natural, especially for apples and pears. To minimize it, soak slices in lemon water (1 tablespoon lemon juice per cup of water) for 5–10 minutes before drying. This preserves color without affecting taste.
Fruit Stuck to the Pan
If slices stick, gently loosen them with a spatula while still warm. Using parchment paper or silicone mats greatly reduces this issue. Avoid spraying pans with non-stick spray—it can leave a residue that affects flavor.
Creative Ways to Use Oven-Dried Fruit
Once you’ve mastered the basics, the possibilities are endless. Dried fruit isn’t just for snacking—it’s a versatile ingredient in both sweet and savory dishes.
- Add chopped dried apples or pears to muffin or bread batter.
- Rehydrate dried mangoes in warm water and blend into smoothies.
- Use dried banana chips as a crunchy topping for ice cream or yogurt.
- Include dried peaches in grain bowls or salads for a sweet burst.
- Make homemade trail mix with dried fruit, nuts, and dark chocolate chips.
Final Thoughts
Drying fruit in the oven is a simple, satisfying way to reduce food waste, save money, and enjoy healthy snacks year-round. With a little practice, you’ll be able to dry everything from seasonal favorites to exotic imports with confidence. It’s a skill that pays off in flavor, nutrition, and convenience—plus, your kitchen will smell amazing while it’s happening.
So next time you see a sale on fruit or have extra from your garden, don’t let it go to waste. Grab a baking sheet, fire up the oven, and start drying. Your future self will thank you for those chewy, sweet, homemade treats.
Frequently Asked Questions
What’s the best oven temperature for drying fruit?
The ideal temperature is between 140°F and 170°F (60°C–75°C). This low heat gently removes moisture without cooking the fruit. If your oven doesn’t go that low, prop the door open slightly to reduce heat.
How do I prevent fruit from sticking to the pan?
Use parchment paper or silicone baking mats instead of foil or bare pans. These non-stick surfaces make it easy to remove dried fruit without breaking or tearing.
Can I speed up the drying process?
Using the convection setting on your oven can reduce drying time by circulating warm air. Also, slicing fruit thinner and ensuring good airflow around the trays helps speed things up.
Why did my dried fruit turn brown?
Browning is a natural reaction called oxidation. To prevent it, soak slices in lemon water before drying. The acid slows the browning process and helps preserve the fruit’s color.
How can I tell if my fruit is fully dried?
Properly dried fruit should be leathery or slightly crisp, with no sticky or moist spots. Let a slice cool completely—if it’s still soft, it needs more time in the oven.
Can I freeze oven-dried fruit?
Yes! Freezing extends shelf life up to 18 months. Store in airtight containers or freezer bags, removing as much air as possible to prevent freezer burn.