Making Shrinky Dinks in the oven is a fun, creative activity for kids and adults alike. With just a few simple supplies and a little patience, you can turn colorful drawings into durable, shrunken keepsakes in under 30 minutes.
Key Takeaways
- Use specialty Shrinky Dinks plastic sheets or #6 polystyrene for best results—regular plastic won’t shrink properly.
- Preheat your oven to 325°F (163°C) and bake on a parchment-lined baking sheet for even heating.
- Draw or print designs before baking using colored pencils, permanent markers, or inkjet printers (with compatible sheets).
- Bake for 2–4 minutes until the plastic curls, then flattens and shrinks to about 1/3 its original size.
- Let them cool completely before handling—they’re hot and fragile right out of the oven.
- Seal with clear acrylic spray (optional) to protect colors and add durability, especially for jewelry or keychains.
- Adult supervision is recommended due to oven use and hot materials—great for family crafting time!
Quick Answers to Common Questions
Can I use regular plastic for Shrinky Dinks?
No, only #6 polystyrene plastic (like official Shrinky Dinks sheets or certain takeout containers) will shrink properly. Other plastics may melt, burn, or not react at all.
How long do Shrinky Dinks take to bake?
Most pieces bake in 2 to 4 minutes at 325°F. Watch closely—they’ll curl, then flatten and shrink as they finish.
Can I print on Shrinky Dinks?
Yes, some sheets are designed for inkjet printers. Check the packaging to ensure compatibility before printing.
Do Shrinky Dinks need to be sealed?
Sealing is optional but recommended for jewelry or items that will be handled often. Use a clear acrylic spray for protection and shine.
Why did my Shrinky Dinks bubble in the oven?
Bubbling usually happens from too high a temperature or trapped air. Stick to 325°F and avoid overbaking.
📑 Table of Contents
What Are Shrinky Dinks?
Shrinky Dinks are a beloved craft kit that lets you turn hand-drawn or printed designs into small, hardened plastic keepsakes. Originally popularized in the 1970s, these colorful sheets of polystyrene plastic shrink dramatically when baked—usually down to about one-third of their original size—while thickening and becoming durable. The result? Tiny, vibrant charms, pendants, ornaments, or fridge magnets that look like they were professionally made.
What makes Shrinky Dinks so special is their simplicity and versatility. Whether you’re a parent looking for a rainy-day activity, a teacher planning a classroom project, or a craft enthusiast wanting to make custom jewelry, Shrinky Dinks offer endless creative possibilities. And the best part? You don’t need fancy equipment—just an oven, some basic art supplies, and a little imagination.
Materials You’ll Need
Visual guide about How to Make Shrinky Dinks in the Oven
Image source: wikihow.com
Before you start, gather all your supplies to make the process smooth and enjoyable. Here’s what you’ll need:
- Shrinky Dinks plastic sheets – These are specially designed for shrinking. You can buy pre-cut kits or full sheets online or at craft stores.
- #6 polystyrene plastic – If you can’t find official Shrinky Dinks, look for #6 plastic (often found in takeout containers or CD cases). Test a small piece first—not all #6 plastic shrinks evenly.
- Colored pencils or permanent markers – Colored pencils work best for detailed drawings and blend nicely. Permanent markers (like Sharpies) are great for bold lines and solid colors.
- Printer (optional) – Some Shrinky Dinks sheets are printable with inkjet printers. Just make sure to check the packaging for compatibility.
- Scissors or craft knife – For cutting out your designs before or after baking.
- Parchment paper or silicone baking mat – Prevents sticking and ensures even heat distribution.
- Baking sheet – A standard metal or glass baking sheet works fine.
- Oven – Any conventional home oven will do.
- Clear acrylic sealer (optional) – Adds shine and protects your finished pieces, especially if making jewelry.
Pro Tip: Test Your Plastic First
If you’re using recycled #6 plastic, cut a small 1-inch square and bake it alone to see how it reacts. Some plastics may warp, bubble, or not shrink at all. Stick to known Shrinky Dinks sheets for consistent results.
Step-by-Step Instructions
Now that you have your materials ready, let’s walk through the process of making Shrinky Dinks in the oven—step by step.
Step 1: Design Your Creation
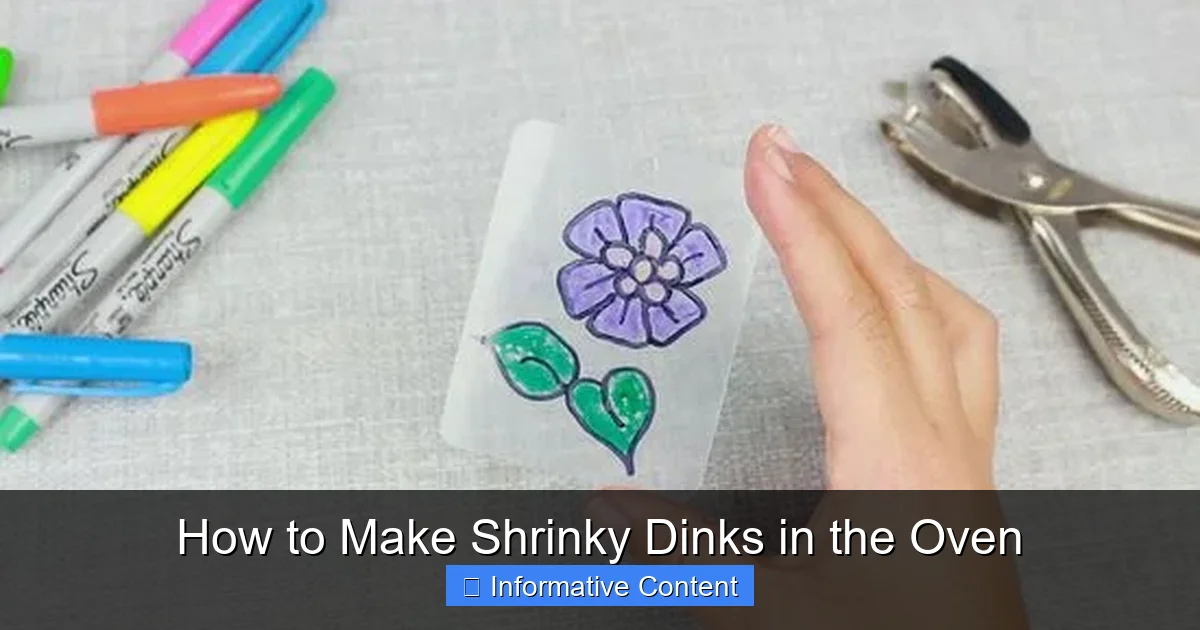
Start by deciding what you want to make. Popular ideas include animals, names, cartoon characters, geometric shapes, or even custom keychains. You can draw freehand directly onto the rough side of the Shrinky Dinks sheet (the smooth side won’t hold pencil well). Use colored pencils for soft, blendable colors or permanent markers for bold, solid fills.
If you prefer printed designs, trace or print your image onto regular paper first, then place it under the plastic sheet and trace over it with a pencil or marker. Some crafters even use photocopies or inkjet-printed designs—just remember that the image will shrink along with the plastic, so fine details may disappear.
Step 2: Cut Out Your Design
Once your drawing is complete, carefully cut around the edges with scissors or a craft knife. Leave a small border (about 1/8 inch) to prevent the edges from curling too much during baking. If you’re making a pendant or keychain, punch a small hole near the top before baking—this will become your attachment point after shrinking.
Step 3: Preheat the Oven
Preheat your oven to 325°F (163°C). This temperature is ideal for even shrinking without burning or bubbling the plastic. Avoid higher temperatures—they can cause warping or discoloration.
Step 4: Prepare the Baking Sheet
Line your baking sheet with parchment paper or a silicone baking mat. This prevents the plastic from sticking and makes cleanup a breeze. Place your cut-out designs on the sheet, making sure they don’t touch each other—they’ll expand slightly before shrinking.
Step 5: Bake the Shrinky Dinks
Place the baking sheet in the center of the oven and bake for 2 to 4 minutes. You’ll notice the plastic begin to curl at the edges—this is normal! Within a minute or two, it will flatten out again and start to shrink. The entire piece will become thicker and more rigid.
Keep a close eye on them—overbaking can cause bubbling or burning. Most pieces are done when they’ve stopped moving and are about one-third the size of the original.
Step 6: Cool Completely
Once baked, carefully remove the baking sheet from the oven and let the Shrinky Dinks cool on the sheet for at least 5–10 minutes. They’ll be very hot and fragile right out of the oven, so avoid touching them too soon. As they cool, they’ll harden into their final shape.
Creative Ideas and Tips
Shrinky Dinks aren’t just for simple shapes—there are countless ways to get creative!
- Make custom jewelry: Turn your designs into pendants, earrings, or charm bracelets. Add jump rings or earring hooks after cooling.
- Create holiday ornaments: Draw snowflakes, reindeer, or Santa for Christmas, or pumpkins and ghosts for Halloween.
- Personalize gifts: Make name tags, bookmarks, or keychains for friends and family.
- Use stencils or templates: Print free templates online for consistent shapes like hearts, stars, or animals.
- Layer colors: Draw with multiple colored pencils and blend gently for a watercolor effect.
- Add glitter or foil: Sprinkle fine glitter or place small pieces of metallic foil under the plastic before baking for a sparkly finish.
Safety Tips for Kids
While Shrinky Dinks are a fantastic kids’ activity, always supervise young children during the baking process. Let them handle the drawing and cutting, but have an adult manage the oven and hot materials. Use oven mitts and keep kids at a safe distance while the baking sheet is in use.
Troubleshooting Common Issues
Even with careful preparation, things don’t always go perfectly. Here’s how to fix common problems:
- Plastic won’t shrink: You might be using the wrong type of plastic. Double-check that it’s #6 polystyrene or official Shrinky Dinks material.
- Bubbling or warping: This usually happens from too high a temperature or uneven heating. Stick to 325°F and use a center oven rack.
- Colors fade or smear: Permanent markers can sometimes bleed when heated. Use high-quality markers or switch to colored pencils for better results.
- Edges curl too much: Make sure your pieces aren’t too thin or uneven. Leave a small border when cutting.
- Plastic sticks to the pan: Always use parchment paper or a silicone mat—never bake directly on metal.
Finishing Touches
Once your Shrinky Dinks are cooled and hardened, you can enhance them further. For a glossy, professional look, spray both sides with a clear acrylic sealer. This also protects the colors from scratching and makes them more durable—especially important if you’re turning them into wearable items.
You can also sand the edges lightly with fine-grit sandpaper for a smooth finish, or drill a larger hole if needed for chains or cords. Attach jump rings, keychain rings, or earring findings using pliers for a polished final product.
Conclusion
Making Shrinky Dinks in the oven is a delightful blend of art, science, and nostalgia. It’s a craft that brings out creativity in people of all ages and produces charming, personalized keepsakes in under an hour. With just a few simple steps—draw, cut, bake, and cool—you can transform ordinary plastic into tiny works of art.
Whether you’re crafting with kids, making gifts, or exploring a new hobby, Shrinky Dinks offer a fun, low-cost way to create something truly unique. So grab your colored pencils, preheat that oven, and let your imagination shrink—and shine!
Frequently Asked Questions
What temperature should I bake Shrinky Dinks at?
Always bake Shrinky Dinks at 325°F (163°C). This temperature ensures even shrinking without burning or warping the plastic.
Can I make Shrinky Dinks without an oven?
No, an oven is required to activate the shrinking process. Toaster ovens and conventional ovens both work well.
How much do Shrinky Dinks shrink?
Shrinky Dinks typically shrink to about one-third of their original size and become about three times thicker.
Are Shrinky Dinks safe for kids?
Yes, but adult supervision is essential during the baking process due to hot oven and materials. Kids can safely handle the drawing and cutting parts.
Can I reuse leftover Shrinky Dinks plastic?
Yes! Save scraps and cut them into new shapes for future projects. Just make sure they’re clean and free of ink or debris.
Do Shrinky Dinks fade over time?
Colors may fade slightly with prolonged sun exposure. Sealing them with acrylic spray and storing in shade helps preserve vibrancy.