Making spring rolls in the oven is a healthier, mess-free alternative to deep frying—without sacrificing crispiness or flavor. With simple ingredients and a few smart techniques, you can enjoy golden, crunchy spring rolls right from your kitchen.
Key Takeaways
- Oven-baked spring rolls are healthier: They use little to no oil, cutting down on calories and fat compared to fried versions.
- Crispy results are achievable: With proper prep and baking techniques, your spring rolls will turn out golden and crunchy.
- Customizable fillings: Use vegetables, proteins, or even fruit—spring rolls are versatile and fun to personalize.
- Easy assembly tips: Rolling tightly and sealing edges properly prevents fillings from spilling during baking.
- Prep ahead for convenience: Assemble spring rolls in advance and freeze them for quick, ready-to-bake meals.
- Perfect for parties or snacks: Serve with dipping sauces like sweet chili or peanut sauce for a crowd-pleasing appetizer.
Quick Answers to Common Questions
Can I use frozen spring roll wrappers?
Yes, but thaw them completely and pat dry before use. Frozen wrappers can become sticky or tear easily if not handled properly.
How do I prevent spring rolls from sticking to the baking sheet?
Always use parchment paper or a silicone baking mat. Lightly oiling the surface also helps prevent sticking.
Can I make spring rolls without oil?
You can, but they won’t get as crispy. For best results, use a light brush of oil or cooking spray.
How long do baked spring rolls stay fresh?
Store in the fridge for up to 2 days. Reheat in the oven to restore crispiness.
Can I bake spring rolls from frozen?
Yes! Bake at 400°F for 20–25 minutes, flipping halfway through, until golden and heated through.
📑 Table of Contents
- Why Bake Spring Rolls Instead of Frying?
- What You’ll Need to Make Oven-Baked Spring Rolls
- Step-by-Step Guide to Rolling Perfect Spring Rolls
- How to Bake Spring Rolls for Maximum Crispiness
- Creative Filling Ideas and Flavor Variations
- Serving Suggestions and Dipping Sauces
- Make-Ahead and Storage Tips
- Conclusion
Why Bake Spring Rolls Instead of Frying?
If you love spring rolls but dread the greasy mess and smoke that comes with deep frying, baking is your new best friend. Oven-baked spring rolls deliver that satisfying crunch you crave—without the need for a pot of bubbling oil. Plus, they’re significantly healthier, making them a great option for weeknight dinners or light appetizers.
Baking also gives you more control. You don’t have to worry about oil temperature or uneven cooking. Just pop them in the oven, set a timer, and walk away. And let’s be honest—cleanup is a breeze. No splattered oil on your stovetop or lingering kitchen smell.
But the real win? Flavor. When done right, baked spring rolls are just as delicious as their fried counterparts. The key is in the preparation: using the right wrapper, sealing them tightly, and giving them a light brush of oil before baking. With a few simple tricks, you’ll get that golden, crispy exterior and tender, flavorful filling every time.
What You’ll Need to Make Oven-Baked Spring Rolls
Visual guide about How to Make Spring Rolls in the Oven
Image source: i.pinimg.com
Before you start rolling, gather your ingredients and tools. The good news? Most of these are pantry staples or easy to find at your local grocery store.
Essential Ingredients
- Spring roll wrappers: Look for thin, square rice paper or wheat-based wrappers. Rice paper is gluten-free and gives a delicate crunch, while wheat wrappers are sturdier and easier to work with.
- Fillings: Classic options include shredded carrots, cabbage, bean sprouts, bell peppers, and fresh herbs like cilantro or mint. Add protein if you like—cooked shrimp, chicken, or tofu work beautifully.
- Binding agents: A little cornstarch slurry (cornstarch mixed with water) helps hold moist fillings together and prevents sogginess.
- Oil for brushing: Use a light oil like canola, vegetable, or sesame oil. A pastry brush ensures even coverage.
- Optional seasonings: Soy sauce, garlic, ginger, or a dash of chili flakes can boost flavor in your filling.
Kitchen Tools
- Baking sheet
- Parchment paper or silicone baking mat
- Small bowl of water (for sealing wrappers)
- Pastry brush
- Sharp knife or kitchen shears
Having everything ready before you start makes the process smooth and stress-free. Trust me—there’s nothing worse than realizing you’re out of cabbage halfway through rolling!
Step-by-Step Guide to Rolling Perfect Spring Rolls
Rolling spring rolls might seem tricky at first, but with a little practice, it becomes second nature. The secret is in the technique: keep it tight, don’t overfill, and seal it well.
Prep Your Fillings
Start by prepping and cooking your fillings. Vegetables should be thinly sliced or julienned so they fit neatly inside the wrapper. If using raw veggies like carrots or cabbage, consider blanching them for 30 seconds to soften slightly—this helps prevent tearing during rolling.
For proteins, make sure they’re fully cooked and cooled. Warm fillings can make the wrapper soggy. Mix everything in a bowl and season to taste. A splash of soy sauce or a pinch of salt goes a long way.
Soften the Wrappers
If using rice paper, dip each sheet into warm water for about 5–10 seconds until pliable. Lay it flat on a clean, damp towel. Wheat wrappers usually don’t need soaking—just keep them covered with a damp cloth to prevent drying.
Roll with Confidence
Place about 2 tablespoons of filling near the bottom third of the wrapper. Fold the bottom edge over the filling, then fold in the sides. Roll tightly toward the top, sealing the edge with a dab of water or cornstarch slurry.
Pro tip: Don’t overstuff! A tight roll ensures even cooking and prevents bursting in the oven.
Seal and Set
Once rolled, place seam-side down on a plate. Cover with a damp cloth to keep them from drying out while you finish the batch.
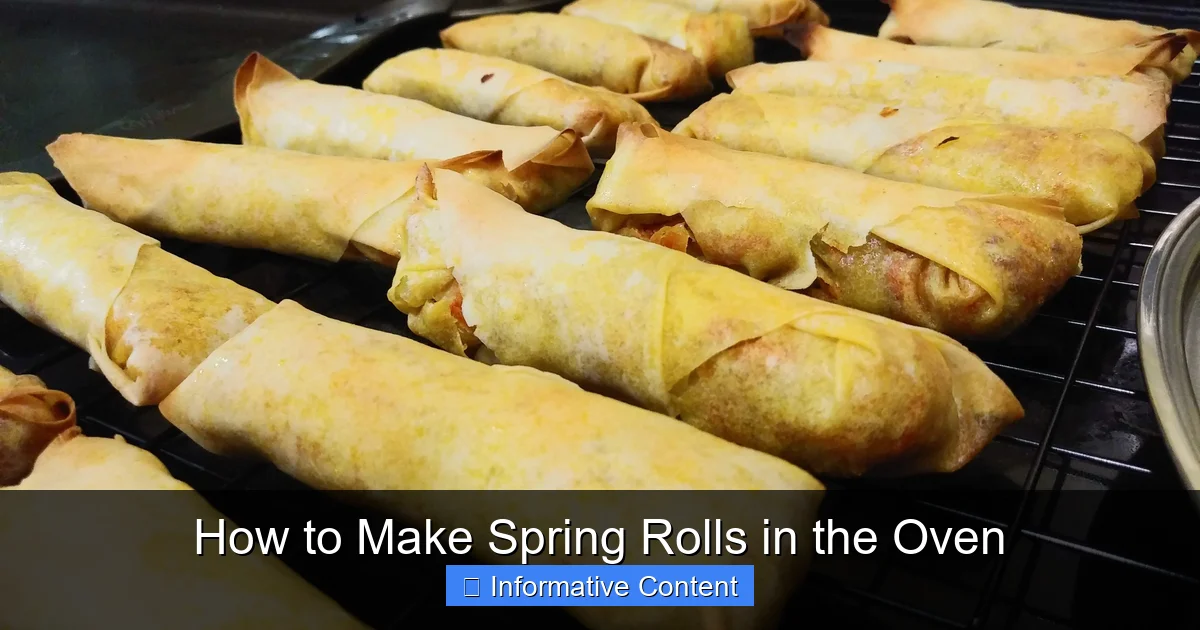
How to Bake Spring Rolls for Maximum Crispiness
Now for the magic step: baking. With the right temperature and technique, your spring rolls will come out golden, crunchy, and utterly delicious.
Preheat and Prep
Preheat your oven to 400°F (200°C). Line a baking sheet with parchment paper or a silicone mat—this prevents sticking and makes cleanup easy.
Brush with Oil
Lightly brush each spring roll with oil on all sides. This step is crucial for achieving that crispy texture. Don’t skip it! You can also spray them with cooking spray if you prefer less mess.
Bake Until Golden
Place the rolls seam-side down on the baking sheet, leaving a little space between each. Bake for 15–20 minutes, flipping halfway through. They’re done when they’re golden brown and crisp to the touch.
Cool Slightly Before Serving
Let them cool for 2–3 minutes after baking. This helps the exterior set and makes them easier to handle. Serve warm for the best texture and flavor.
Creative Filling Ideas and Flavor Variations
One of the best things about spring rolls is how customizable they are. Whether you’re feeding picky eaters or hosting a dinner party, you can tailor the fillings to suit any taste.
Classic Veggie Combo
Try a mix of shredded purple cabbage, julienned carrots, sliced cucumber, and fresh mint. Add a handful of bean sprouts for extra crunch.
Protein-Packed Options
Add grilled chicken, shrimp, or pan-seared tofu. Marinate your protein in soy sauce, garlic, and a touch of honey for extra flavor.
Sweet and Savory Twist
For a unique spin, try a sweet filling with mango, avocado, and basil. Pair with a spicy peanut dipping sauce for a tropical vibe.
Kid-Friendly Version
Use mild flavors like cooked noodles, shredded cheese (if not vegan), and soft veggies. Skip the spice and serve with a sweet dipping sauce like honey mustard.
Vegan and Gluten-Free
Use rice paper wrappers and fill with tofu, mushrooms, and fresh herbs. Season with tamari (gluten-free soy sauce) and a splash of rice vinegar.
The possibilities are endless—experiment and find your favorite combo!
Serving Suggestions and Dipping Sauces
Spring rolls shine when paired with the right dipping sauce. A good sauce can elevate the entire experience, adding sweetness, spice, or tang.
Popular Dipping Sauces
- Sweet Chili Sauce: Sweet, slightly spicy, and widely available. Perfect with veggie or shrimp rolls.
- Peanut Sauce: Made with peanut butter, soy sauce, lime juice, and a touch of honey. Creamy and rich.
- Nuoc Cham: A Vietnamese classic with fish sauce, lime, sugar, and chili. Light and refreshing.
- Hoisin Sauce: Sweet and salty, great with meat-based rolls.
- Soy-Ginger Dipping Sauce: Mix soy sauce, rice vinegar, minced ginger, and a drizzle of sesame oil.
Serve your spring rolls on a platter with small bowls of sauce for dipping. Garnish with chopped peanuts, sesame seeds, or extra herbs for a restaurant-worthy presentation.
Make-Ahead and Storage Tips
Spring rolls are perfect for meal prep or entertaining. Here’s how to keep them fresh and delicious.
Refrigeration
Assemble rolls and store them in an airtight container in the fridge for up to 24 hours. Cover with a damp paper towel to prevent drying. Bake just before serving.
Freezing
Freeze unbaked spring rolls on a tray, then transfer to a freezer bag. They’ll keep for up to 3 months. Bake straight from frozen—just add 5–10 minutes to the cooking time.
Reheating
If you have leftovers (unlikely!), reheat in a 350°F (175°C) oven for 8–10 minutes to restore crispiness. Avoid the microwave—it makes them soggy.
Conclusion
Making spring rolls in the oven is a smart, healthy, and delicious way to enjoy this beloved appetizer. With minimal oil, simple ingredients, and a few key techniques, you can create crispy, flavorful rolls that satisfy your cravings without the guilt.
Whether you’re cooking for one or hosting a party, oven-baked spring rolls are a versatile, crowd-pleasing option. Experiment with fillings, try new sauces, and make them your own. Once you master the basics, you’ll wonder why you ever fried them in the first place.
So preheat that oven, roll up your sleeves, and get ready to enjoy golden, crunchy spring rolls—baked to perfection.
Frequently Asked Questions
What’s the difference between spring rolls and egg rolls?
Spring rolls typically use thinner wrappers and are often filled with fresh vegetables, while egg rolls have a thicker, egg-based wrapper and are usually fried. Spring rolls can be baked, making them a lighter option.
Can I use rice paper for oven-baked spring rolls?
Yes, but rice paper can become chewy when baked. For best results, use wheat-based wrappers or brush rice paper rolls lightly with oil and bake at a lower temperature (375°F) for a shorter time.
Why are my spring rolls soggy after baking?
This usually happens if the filling is too wet or the wrappers weren’t sealed properly. Drain excess moisture from veggies and avoid overfilling.
How many spring rolls does this recipe make?
A standard batch uses one package of wrappers (about 20 sheets) and yields 15–20 spring rolls, depending on size.
Can I add cheese to spring rolls?
Yes, but use melt-resistant cheeses like mozzarella or feta. Avoid soft cheeses that may leak during baking.
Are oven-baked spring rolls kid-friendly?
Absolutely! Use mild fillings like carrots, noodles, and chicken, and serve with sweet dipping sauces like honey mustard or sweet chili.