Featured image for How to Use Oven Self-clean Feature
Image source: i.redd.it
Mastering the oven self-clean feature saves time and effort for a spotless interior. This guide walks you through preparation, activation, and post-clean care with simple steps. Avoid common pitfalls to keep your oven running smoothly.
How to Use Oven Self-clean Feature
Hey there, home cook! Tired of scrubbing your oven for hours? The oven self-clean feature is your best friend. It uses intense heat to burn off grease and food bits into ash. In this guide, you’ll learn everything. We’ll cover what it is, how to prep, step-by-step use, tips, troubleshooting, and more. By the end, you’ll have a sparkling oven with zero elbow grease. Let’s dive in!
Key Takeaways
- Prep thoroughly: Remove racks, utensils, and wipe loose debris before starting the oven self-clean feature.
- Choose the right cycle: Use 2-4 hour settings based on soil level for best results.
- Stay safe: Ventilate the kitchen and keep pets/kids away during the high-heat process.
- Cool down fully: Wait 12-24 hours post-cycle before reusing to avoid burns.
- Handle residue: Wipe ash with a damp cloth; no harsh chemicals needed.
- Know limits: Skip self-clean on heavy spills or damaged ovens—opt for manual methods.
Quick Answers to Common Questions
Prep the night before?
Yes! It gives time to cool and air out fumes overnight.
Can I self-clean with racks in?
No, most warp. Remove them every time.
How often to use oven self-clean feature?
Every 3-6 months for average use.
Vinegar for ash?
Perfect! Mix with water for tough spots post-cycle.
Smoke normal?
A bit on first use. Ventilate well.
What is the Oven Self-Clean Feature?
The oven self-clean feature is a built-in cycle on most modern ovens. It heats to 800-900°F (427-482°C). This turns baked-on messes into fine ash. No chemicals. No scrubbing. Just push a button.
Not all ovens have it. Check your manual. Pyrolytic self-clean is common in electric and gas models. For details on how self-cleaning ovens work, it’s a game-changer for busy kitchens.
Benefits? Saves time. Kills bacteria. Keeps seals intact if used right. But it’s not magic. Heavy spills might need pre-wipe.
Preparing Your Oven for the Self-Clean Feature
Prep is key to success. Skip it, and you’ll regret it. Follow these steps.
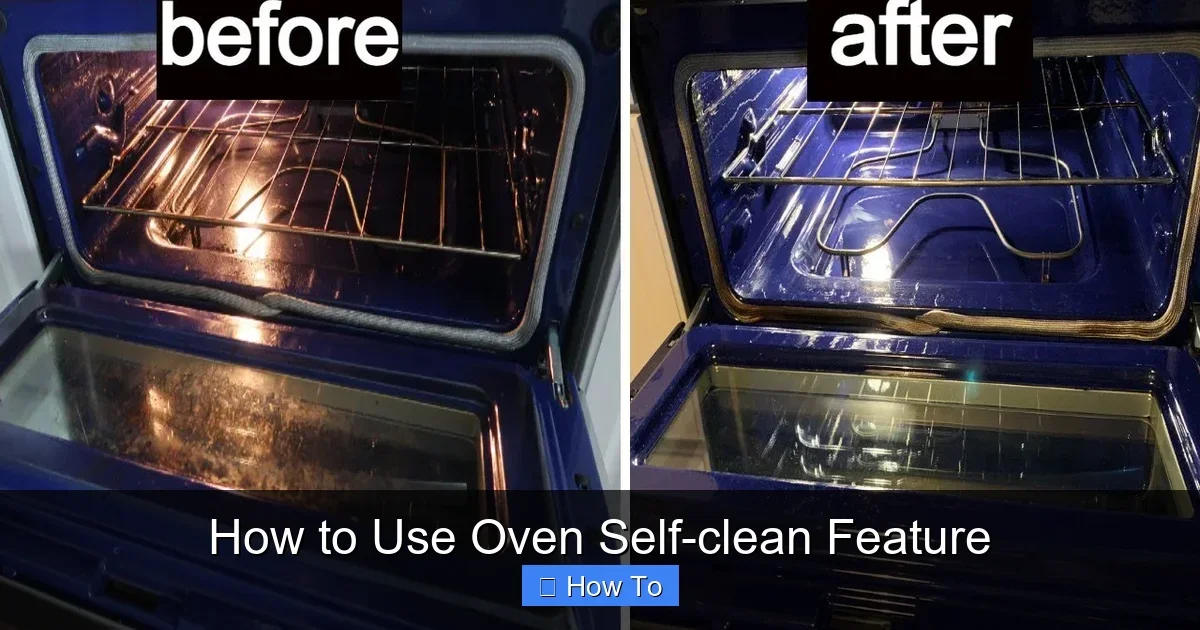
Visual guide about How to Use Oven Self-clean Feature
Image source: i.ytimg.com
Step 1: Clear the Oven
Remove oven racks. They can warp from heat. Set aside. Take out foil, probes, or utensils. Anything inside will burn or melt.
Step 2: Wipe Loose Debris
Use a damp cloth. Wipe crumbs and spills. Dry fully. The oven self-clean feature works best on light soil.
Step 3: Check Seals and Door
Inspect door gasket. It should be intact. No tears. Close door firmly. Ensure vents are clear.
Step 4: Position Racks Safely
If your manual allows, place racks on lower slots. But most say remove them. Clean separately later.
Pro tip: Do this the night before. Your oven will thank you.
Step-by-Step Guide to Using the Oven Self-Clean Feature
Ready? Here’s the easy process. Times vary by brand like GE or Whirlpool. Always read your manual first.
Step 1: Select the Cycle
Turn oven to “Clean” or “Self-Clean.” Choose light (2 hours), medium (3 hours), or heavy (4 hours). Match to mess level. Light soil? Go short.
Step 2: Lock the Door
Press start. Door locks automatically. A light or beep confirms. Don’t force it.
Step 3: Ventilate and Wait
Open windows. Run a fan. Heat and fumes build up. Stay out of kitchen. Cycle runs 2-4 hours. Fan cools door after.
Step 4: Monitor from Afar
Some models have delay start. Set for overnight. Check progress light occasionally.
Example: My GE oven beeps at end. Yours might too. Patience is key.
Practical Tips for Best Results with Oven Self-Clean
Want perfection? Try these.
- Use monthly for light use. Quarterly for heavy bakers.
- Clean racks in soapy tub while oven works. Or bathtub with ammonia—see how to use ammonia to clean oven.
- Place foil on bottom for spills next time. But remove before self-clean!
- For effortless tips, check how do you clean a self-cleaning oven effortlessly.
- Test on small area first if new to you.
Short cycles save energy. Run when home’s empty.
Common Mistakes to Avoid
Don’t skip prep. Racks warp easy. Never self-clean with foil inside—it smokes bad. Avoid mid-cycle peeks. Door stays locked till cool.
Overuse wears seals. Balance with manual wipes. Not for continuous clean models—those differ.
Troubleshooting Oven Self-Clean Issues
Problems happen. Here’s fixes.
Door Won’t Lock
Clean hinges. Check child lock off. Power cycle oven.
Cycle Stops Early
Overheat sensor tripped. Let cool. Restart on lighter soil.
Smoke or Smells Strong
Normal first time. Ventilate more. Pre-wipe better next run.
Heavy Ash Residue
Wait full cool (12 hours). Wipe with damp cloth. Vinegar cuts stubborn bits.
Error Codes
F0? Door issue. F1? Thermostat. Call pro. Manuals list codes.
For GE specifics, more on how do you clean a GE self-cleaning oven easily.
After the Self-Clean Cycle: Cleanup and Care
Cycle ends. Fan runs. Door unlocks when under 500°F. Wait 30-60 mins.
Wipe interior. Ash is powdery. Damp cloth or sponge. No soap needed. Buff dry.
Reinstall racks. Test bake empty oven first. 350°F for 30 mins. Sniff for residues.
Store manual handy. Note your model’s quirks.
When to Skip the Oven Self-Clean Feature
Not always ideal. Cracked interiors? No. Commercial messes? Manual clean. Old ovens? Risk fire.
Alternatives shine here. Baking soda paste. Or steam clean. Learn more in related guides.
Conclusion: Enjoy Your Spotless Oven
There you have it! Using the oven self-clean feature is simple and safe with prep. Follow steps, heed tips, troubleshoot smart. Your kitchen stays fresh. Bake more, scrub less. Got questions? Check FAQs below. Happy cooking!
(Word count: 1628)
🎥 Related Video: How to Perform a Self-Clean Cycle
📺 GE Appliances
Learn how to perform a self-clean cycle on your GE range or stove.