Learning how to use a wood fired oven unlocks incredible flavors in pizza, bread, and roasted meats. With the right fire management, temperature control, and cooking techniques, you can master this traditional cooking method at home.
Key Takeaways
- Start with dry, seasoned hardwood to ensure clean, efficient burning and consistent heat.
- Build and maintain a proper fire to reach optimal cooking temperatures between 650°F and 900°F.
- Use an infrared thermometer to accurately measure dome and floor temperatures for different dishes.
- Rotate food during cooking to ensure even exposure to heat, especially in ovens with hot spots.
- Clean the oven floor regularly by sweeping out ash and debris to maintain performance and flavor.
- Experiment with cooking times and zones to master pizzas, breads, meats, and desserts.
- Always prioritize safety with proper ventilation, fire extinguishers, and protective gear.
Quick Answers to Common Questions
What temperature should a wood fired oven be for pizza?
For pizza, aim for a floor temperature between 750°F and 900°F. This high heat creates a crisp crust and cooks the pizza in under two minutes.
Can you cook anything in a wood fired oven?
Yes! You can cook pizza, bread, roasted meats, vegetables, casseroles, and even desserts. The key is adjusting the heat and cooking time for each dish.
How long does it take to heat a wood fired oven?
It typically takes 45 minutes to 1.5 hours to heat a wood fired oven to pizza temperature, depending on the size and insulation.
Do you leave the fire burning while cooking?
No. Once the oven is hot, push the fire to the side or let it burn down to coals. The retained heat in the dome and floor does most of the cooking.
What wood is best for a wood fired oven?
Seasoned hardwoods like oak, maple, cherry, or apple are best. Avoid softwoods and green (wet) wood, which create smoke and burn inefficiently.
📑 Table of Contents
How to Use Wood Fired Oven: A Complete Guide
If you’ve ever tasted a wood-fired pizza with its crisp, blistered crust and smoky flavor, you know there’s something magical about cooking in a wood fired oven. These ovens have been used for centuries across the Mediterranean and beyond, and today, they’re becoming a favorite for backyard chefs and home bakers alike. But while the results are impressive, using a wood fired oven isn’t as simple as lighting a fire and tossing in a pizza.
Learning how to use a wood fired oven properly takes practice, patience, and a bit of know-how. From building the right fire to managing heat zones and timing your cook, every step matters. Whether you’re cooking your first Neapolitan-style pizza or slow-roasting a leg of lamb, this guide will walk you through everything you need to know to get started—and succeed.
Choosing the Right Wood for Your Oven
The foundation of great cooking in a wood fired oven starts with the fuel. Not all wood is created equal, and using the wrong type can lead to poor heat, excessive smoke, and even damage to your oven.
Use Only Seasoned Hardwood
Always choose dry, seasoned hardwood such as oak, maple, cherry, or apple. These woods burn hot and clean, producing consistent heat without too much smoke. Avoid softwoods like pine or cedar—they contain resins that create thick smoke and can leave a bitter taste on your food.
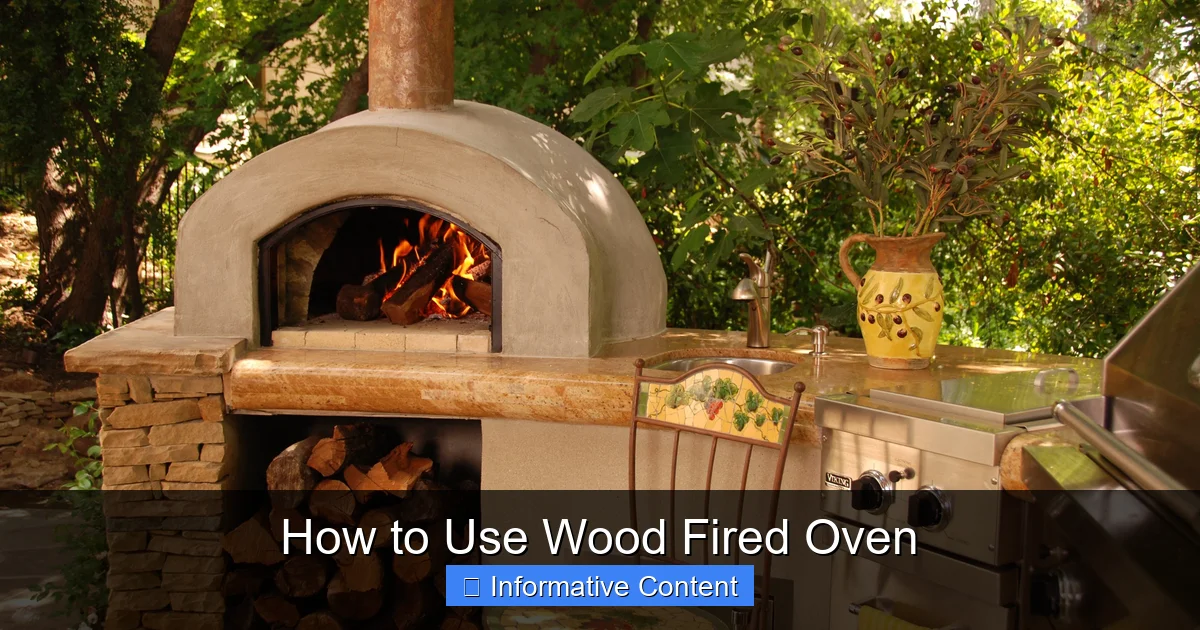
Visual guide about How to Use Wood Fired Oven
Image source: i.pinimg.com
Moisture Content Matters
Wood should have a moisture content of 20% or less. You can test this with a moisture meter, or simply look for signs like cracking ends and a grayish color. Freshly cut wood (“green wood”) contains too much moisture and will smolder instead of burn, wasting fuel and creating soot.
Cut and Store Properly
Cut your wood into pieces that fit comfortably in your oven’s firebox—typically 12 to 16 inches long. Store it in a dry, covered area off the ground to keep it seasoned. A well-stocked woodpile ensures you’re always ready for your next cook.
Building and Managing the Fire
A well-built fire is the heart of a successful wood fired oven session. The goal is to create a hot, even bed of coals that radiates heat throughout the oven dome and floor.
Start Small and Build Up
Begin with kindling—small twigs, newspaper, or fire starters—and place them in the center of the firebox. Add a few small pieces of wood on top in a teepee or log cabin shape. Light the kindling and let the fire grow gradually. This helps establish a strong draft and prevents smothering the flames.
Feed the Fire Gradually
As the fire grows, add larger pieces of wood one at a time. Avoid overloading the firebox, which can reduce airflow and cause the fire to die down. Aim for a steady burn that produces a clean flame and glowing embers.
Create a Heat Bank
Once the fire is burning well, push the flames to one side of the oven (usually the back or side wall). This creates a “heat bank” of hot coals and embers that radiate heat evenly across the floor. The dome absorbs and reflects this heat, creating the ideal environment for cooking.
Understanding Temperature and Heat Zones
One of the biggest challenges when learning how to use a wood fired oven is managing temperature. Unlike conventional ovens, wood fired ovens don’t have dials or digital readouts—so you need to rely on observation and tools.
Use an Infrared Thermometer
An infrared (IR) thermometer is essential for measuring the temperature of the oven floor and dome. For pizza, aim for a floor temperature of 750°F to 900°F. For bread, 650°F to 750°F works well. For slow roasting, you can let the oven cool to 400°F to 500°F.
Recognize Visual Cues
With experience, you’ll learn to read the oven by sight. A properly heated dome will have a light gray or white ash coating, and the floor will glow faintly red. If the floor is too dark, it’s not hot enough. If it’s bright orange, it’s too hot for most foods.
Work with Heat Zones
Wood fired ovens have natural heat zones. The center is usually the hottest, while the edges are cooler. Use this to your advantage: place pizzas in the center for a quick cook, and move them toward the edge to finish or keep warm. For larger roasts, position them in a slightly cooler zone to cook evenly without burning.
Cooking Techniques for Different Foods
Once your oven is hot and ready, it’s time to cook. Different foods require different approaches, but the principles remain the same: high heat, quick cooking, and attention to timing.
Pizza: The Classic Wood Fired Dish
Pizza is the most popular use for a wood fired oven, and for good reason. The intense heat creates a crisp, airy crust with a slight char—just like in Naples. Stretch your dough thin, add minimal toppings, and slide it into the center of the oven with a pizza peel. Rotate it every 30 seconds using the peel to ensure even cooking. Most pizzas are done in 60 to 90 seconds.
Bread: Artisan Results at Home
Wood fired ovens are perfect for baking crusty bread. Preheat the oven to 700°F, then remove any large embers. Slide in your loaf and close the door. The radiant heat and steam from the dough create a beautiful crust. Bake for 20 to 30 minutes, depending on size. For extra flavor, add a few sprigs of rosemary or thyme to the fire.
Roasting Meats and Vegetables
For roasting, let the oven cool slightly to 450°F to 500°F. Place a cast iron pan or baking dish in the center and add your meat or vegetables. Roast chicken, pork shoulder, or root vegetables until tender and caramelized. The smoky flavor from the wood enhances the natural taste of the food.
Desserts: Sweet Surprises
Don’t forget dessert! Try baking fruit crisps, pizzelles, or even s’mores in your wood fired oven. Use a lower heat zone and watch closely—desserts cook quickly and can burn fast.
Cleaning and Maintaining Your Oven
Proper maintenance keeps your wood fired oven performing at its best and extends its lifespan. A clean oven also prevents off-flavors and ensures consistent heat.
Sweep Out Ash After Each Use
Once the oven has cooled completely (usually the next day), use a metal brush or scraper to remove ash and debris from the floor. A small hand brush or dustpan works well for getting into corners. Never use water—it can damage the refractory materials.
Inspect for Cracks and Damage
Check the dome, floor, and door regularly for cracks or wear. Small cracks can be repaired with oven-safe mortar, but larger issues may require professional help. Keeping the oven covered when not in use protects it from rain and weather damage.
Season the Oven Occasionally
Some builders recommend “seasoning” a new oven by doing a few low-heat burns in the first few weeks. This helps cure the materials and prevent cracking. Follow the manufacturer’s guidelines for best results.
Safety Tips for Wood Fired Oven Use
Cooking with fire is inherently risky, so safety should always come first. A few simple precautions can prevent accidents and keep your cooking experience enjoyable.
Use Protective Gear
Always wear heat-resistant gloves when handling the peel, opening the door, or adding wood. Long sleeves and closed-toe shoes are also recommended. Keep a fire extinguisher or bucket of sand nearby, just in case.
Ensure Proper Ventilation
Wood fired ovens need good airflow to burn efficiently. Make sure the chimney or flue is clear and unobstructed. Never use your oven in an enclosed space without proper ventilation—carbon monoxide is a serious risk.
Supervise the Fire at All Times
Never leave a burning oven unattended. Keep children and pets at a safe distance, and avoid using flammable materials near the oven. When you’re done cooking, let the fire burn down completely and ensure all embers are out before leaving.
Conclusion
Mastering how to use a wood fired oven is a rewarding journey that blends tradition, skill, and creativity. From building the perfect fire to baking your first loaf of bread or pulling out a perfectly charred pizza, each cook teaches you something new. With practice, you’ll learn to read the heat, time your dishes, and make the most of this timeless cooking method.
Remember, patience is key. Don’t expect perfection on your first try—even professional pizzaiolos spent years honing their craft. Start simple, stay safe, and enjoy the process. Whether you’re hosting a backyard dinner party or cooking for your family, a wood fired oven brings people together with food that’s rich in flavor and history.
So gather your wood, fire up the oven, and let the magic begin.
Frequently Asked Questions
How often should I clean my wood fired oven?
Clean the oven floor after each use by sweeping out ash and debris. Deep cleaning, including checking for cracks, should be done a few times a year.
Can I use a wood fired oven in the rain?
It’s not recommended. Rain can cool the oven rapidly and cause thermal shock, leading to cracks. Always cover the oven when not in use.
How do I know when the oven is ready for cooking?
The oven is ready when the floor is hot (750°F+ for pizza) and the dome has a light gray ash coating. Use an infrared thermometer to confirm.
Can I use charcoal in a wood fired oven?
Yes, but it’s not ideal. Charcoal burns hotter and cleaner than wood, but it lacks the smoky flavor. Use hardwood for best results.
Why is my pizza burning in the oven?
Pizza burns if the oven is too hot or if it’s not rotated. Keep the floor below 900°F and turn the pizza every 30 seconds for even cooking.
How long does a wood fired oven stay hot?
A well-insulated oven can stay hot for 4 to 6 hours after the fire is out, making it great for multiple dishes or slow roasting.