Using silicone molds in the oven is one of the easiest ways to create perfectly shaped treats, from cupcakes to homemade soap. These flexible, non-stick molds can handle high heat, but you need to know the right techniques to get the best results. In this guide, you’ll learn everything about temperature safety, preparation, baking tips, and cleaning to make the most of your silicone molds.
If you’ve ever struggled with baked goods sticking to a pan, you already know the frustration of pulling out a cake that falls apart. That’s where silicone molds come in as a total game-changer. These flexible, colorful molds have become a staple in modern kitchens, and for good reason. They’re lightweight, naturally non-stick, and incredibly easy to use.
But here’s the thing — even though silicone molds seem simple, there are some important techniques and safety tips you should know. Using them the wrong way can lead to uneven baking, burnt edges, or even damage to the mold itself. Whether you’re making muffins, chocolate truffles, or mini cheesecakes, this guide will walk you through everything you need to know about using silicone molds in the oven like a pro. Let’s dive in.
Key Takeaways
- Temperature Safety: Most silicone molds are oven-safe up to 428°F (220°C), but always check the manufacturer’s guidelines before use.
- No Greasing Needed: Silicone molds are naturally non-stick, so you typically don’t need to grease or flour them before pouring batter.
- Use a Baking Sheet: Always place silicone molds on a sturdy baking sheet before putting them in the oven for stability and easy handling.
- Even Heat Distribution: Silicone conducts heat differently than metal, so you may need to adjust baking times and temperatures slightly.
- Easy Release: Let baked goods cool for a few minutes before gently flexing the mold to pop out the contents cleanly.
- Simple Cleaning: Silicone molds are dishwasher safe and can be cleaned easily with warm soapy water.
- Versatile Use: Beyond baking, silicone molds are great for chocolate, candy, soap, ice cubes, and even savory dishes like mini quiches.
📑 Table of Contents
- What Are Silicone Molds and Why Are They So Popular?
- Are Silicone Molds Safe for Oven Use?
- How to Prepare Silicone Molds Before Baking
- Step-by-Step Guide to Baking with Silicone Molds
- Temperature Guidelines for Silicone Molds
- Common Mistakes to Avoid When Using Silicone Molds
- Cleaning and Storing Your Silicone Molds
- Creative Ways to Use Silicone Molds Beyond Baking
- Expert Tips for Getting the Best Results
- Frequently Asked Questions
- Conclusion
What Are Silicone Molds and Why Are They So Popular?
Silicone molds are kitchen tools made from food-grade silicone, a synthetic rubber that’s flexible, heat-resistant, and non-reactive. Unlike traditional metal pans or glass dishes, silicone molds can bend and flex without breaking. This makes removing your baked goods incredibly easy — just push from the bottom and out pops your creation, perfectly intact.
Their popularity has exploded in recent years, and it’s not hard to see why. Here are some of the key benefits that make silicone molds stand out:
- Non-stick surface: Food releases naturally without greasing or parchment paper in most cases.
- Flexibility: Easy to bend and twist for effortless removal of baked goods.
- Heat resistance: Can withstand temperatures typically ranging from -40°F to 428°F (-40°C to 220°C).
- Lightweight: Much easier to handle than heavy metal pans.
- Variety of shapes: Available in countless designs, from classic cupcake shapes to intricate decorative molds.
- Dishwasher safe: Cleanup is a breeze compared to scrubbing metal pans.
You can find silicone molds designed for virtually anything — cupcakes, brownies, bread, chocolate, ice cubes, soap, and even frozen desserts. The versatility is truly impressive. That said, not all silicone molds are created equal, and understanding their limitations is just as important as knowing their strengths.
Are Silicone Molds Safe for Oven Use?
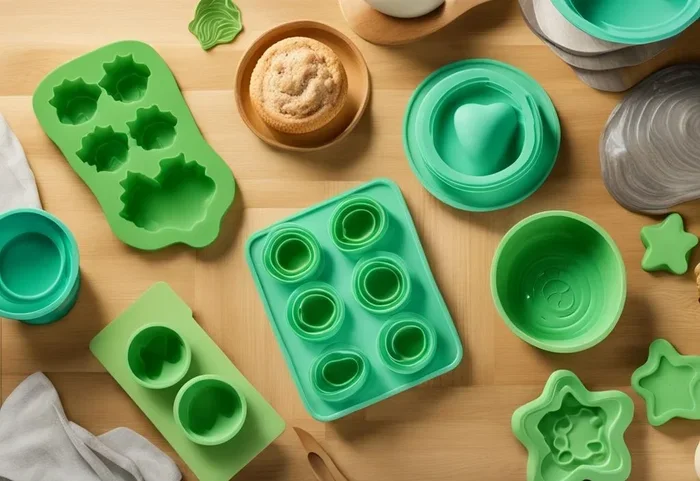
Visual guide about silicone baking molds oven
Image source: nontoxicinsider.com
This is one of the most common questions people ask, and the answer is a resounding yes — with some caveats. High-quality, food-grade silicone molds are perfectly safe for oven use. They don’t release toxic fumes, leach chemicals into your food, or break down under normal baking temperatures.
However, you need to pay attention to the maximum temperature rating of your specific mold. Most silicone molds are rated for temperatures up to 428°F (220°C), which covers the vast majority of baking recipes. Some premium brands can handle even higher temperatures. Always check the packaging or manufacturer’s website for the exact rating before you start baking.
What About BPA and Chemicals?
Many people worry about harmful chemicals like BPA in silicone products. The good news is that pure food-grade silicone is BPA-free. It’s made from a combination of silicon (a natural element found in sand) and oxygen, making it one of the safest materials for food contact. When you buy from reputable brands, you can feel confident that your silicone molds are free from harmful substances.
That said, cheap, low-quality silicone molds from unknown manufacturers may contain fillers or additives that could be problematic. A good rule of thumb is to buy from trusted kitchen brands and look for certifications like FDA approval or LFGB certification (the European standard for food-safe materials).
When Should You Avoid Using Silicone Molds in the Oven?
While silicone molds are incredibly versatile, there are a few situations where you might want to choose a different tool:
- Broiling or grilling: The intense direct heat from a broiler can damage silicone molds. If you need to brown the top of a dish, transfer it to a metal pan first. Learn more about how to use an oven broiler for the right technique.
- Extremely high temperatures: If your recipe calls for temperatures above the mold’s rating, switch to a metal or glass dish.
- Cutting or slicing: Never use sharp knives directly in a silicone mold, as this can damage the surface.
- Open flame: Silicone molds should never be used on a stovetop or over an open flame.
How to Prepare Silicone Molds Before Baking
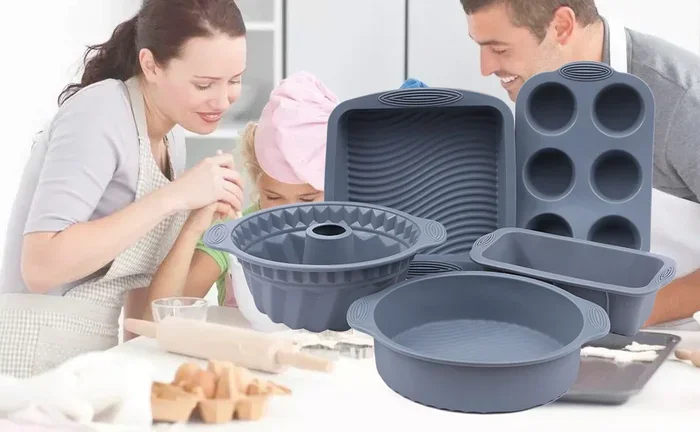
Visual guide about silicone baking molds oven
Image source: m.media-amazon.com
One of the best things about silicone molds is how little preparation they need. But a few simple steps can make your baking experience even better and extend the life of your molds.
Step 1: Wash Before First Use
Always wash new silicone molds with warm water and mild dish soap before using them for the first time. This removes any dust or residue from the manufacturing process. Rinse thoroughly and let them air dry or pat dry with a clean towel.
Step 2: Decide Whether to Grease
In most cases, you do not need to grease silicone molds. The non-stick surface is one of their biggest selling points. However, there are exceptions:
- Sticky batters: If you’re working with a very sugary or sticky recipe, a light coating of cooking spray can help.
- Intricate designs: Molds with detailed patterns may benefit from a thin layer of grease to ensure clean release.
- First-time use: If you’re trying a new mold, a little grease the first time can help you gauge how well it releases.
If you do grease, use a light, even coating of cooking spray or a small amount of butter. Don’t overdo it, as excess grease can pool in the bottom and create soggy spots.
Step 3: Place on a Baking Sheet
This step is critical and one that many beginners skip. Silicone molds are flexible, which means they can be difficult to handle when filled with batter. Always place your molds on a sturdy baking sheet before filling them. This makes it much easier to slide them in and out of the oven safely. It also provides a flat, stable surface for even baking.
Step-by-Step Guide to Baking with Silicone Molds
Now let’s get into the actual process. Here’s a complete step-by-step guide to using silicone molds in the oven for perfect results every time.
Step 1: Preheat Your Oven
Always preheat your oven to the temperature specified in your recipe. This ensures even baking from the moment the molds go in. If you’re unsure about your oven’s accuracy, consider reading our guide on how to use oven settings to make sure everything is calibrated correctly.
Step 2: Prepare Your Batter or Mixture
Mix your ingredients according to your recipe. Whether it’s cake batter, brownie mix, or chocolate for candy molds, make sure everything is well combined and smooth. Silicone molds capture fine details beautifully, so a smooth batter will give you the best results.
Step 3: Fill the Molds Properly
Pour your batter into the molds, filling each cavity about two-thirds to three-quarters full. Overfilling can cause the batter to spill over and create a mess in your oven. If you’re making layered treats, you can fill them in stages, baking each layer before adding the next.
Pro tip: Use a piping bag or squeeze bottle for precise filling, especially with smaller or intricately designed molds. This gives you better control and reduces mess.
Step 4: Remove Air Bubbles
Gently tap the baking sheet on the counter a few times to release any trapped air bubbles. This is especially important for detailed molds where air bubbles can create unwanted holes or imperfections in the final product.
Step 5: Bake According to Your Recipe
Place the baking sheet with your silicone molds in the center of the oven. The center rack provides the most even heat distribution. Now, here’s an important tip: silicone conducts heat differently than metal. Baked goods in silicone molds may cook slightly faster on the outside while staying moist inside.
You might need to reduce the oven temperature by about 25°F (15°C) compared to what your recipe suggests for metal pans, or check for doneness a few minutes earlier than the stated baking time. Keep an eye on your treats, especially the first time you use a new mold.
Step 6: Check for Doneness
Use a toothpick or cake tester to check if your baked goods are done. Insert it into the center — if it comes out clean or with just a few moist crumbs, you’re good to go. If you’re using silicone molds for something like baking cookies in the oven, look for golden edges as your indicator.
Step 7: Cool Before Removing
This is where patience pays off. Let your baked goods cool in the mold for 5 to 10 minutes before attempting to remove them. This allows them to set and firm up, making them much easier to release without breaking.
Once they’ve cooled slightly, gently flex the mold by pushing from the bottom. The baked goods should pop right out. If anything sticks, don’t force it — let it cool a bit more or run a thin spatula around the edges.
Temperature Guidelines for Silicone Molds
Understanding the right temperatures is essential for safe and effective use. Here’s a quick reference table:
| Baking Task | Recommended Temperature | Notes |
|---|---|---|
| Cupcakes and Muffins | 325°F – 350°F (160°C – 175°C) | Check 5 minutes early |
| Brownies | 325°F – 350°F (160°C – 175°C) | Edges should be set, center slightly soft |
| Cakes | 325°F – 375°F (160°C – 190°C) | Follow recipe, reduce by 25°F if needed |
| Bread | 350°F – 375°F (175°C – 190°C) | Tap to check for hollow sound |
| Chocolate/Candy | N/A (melt and pour) | No oven needed — melt chocolate separately |
| Frozen Desserts | N/A (freezer only) | Do not put frozen molds directly in hot oven |
Important Temperature Notes
- Never exceed the maximum temperature rating printed on your mold or its packaging.
- Avoid placing empty silicone molds in a hot oven, as this can cause them to warp over time.
- If your oven has hot spots, rotate the baking sheet halfway through baking for even results.
- For convection oven use, reduce the temperature by 25°F and check for doneness earlier, as convection fans circulate heat more aggressively.
Common Mistakes to Avoid When Using Silicone Molds
Even though silicone molds are beginner-friendly, there are some common mistakes that can ruin your baking experience. Here’s what to watch out for:
Mistake 1: Not Using a Baking Sheet
As mentioned earlier, placing silicone molds directly on the oven rack is a recipe for disaster. The flexible material makes it nearly impossible to handle when filled, and batter can slosh over the sides. Always use a baking sheet for stability and safety.
Mistake 2: Overfilling the Molds
It’s tempting to fill each cavity to the brim, but batter expands during baking. Overfilled molds lead to overflow, misshapen treats, and a messy oven. Stick to the two-thirds full rule for best results.
Mistake 3: Using Sharp Utensils
Never use knives, cookie cutters with sharp edges, or metal utensils directly in silicone molds. These can cut, scratch, or puncture the silicone surface, ruining the non-stick coating. Always use silicone or wooden utensils instead.
Mistake 4: Ignoring Temperature Limits
Putting a silicone mold in an oven that’s hotter than its rated temperature can cause warping, discoloration, or even melting. Always double-check the temperature rating before baking, especially at high temperatures.
Mistake 5: Not Letting Items Cool Before Removal
Removing baked goods too early is one of the most common reasons they break or lose their shape. Give them time to set. A few minutes of patience makes all the difference.
Mistake 6: Skipping the Initial Wash
New silicone molds should always be washed before first use. Skipping this step means any manufacturing residue could end up on your food. It takes just a minute and ensures a clean start.
Cleaning and Storing Your Silicone Molds
One of the biggest advantages of silicone molds is how easy they are to clean. Here’s how to keep them in great condition for years to come.
Cleaning After Use
- Warm soapy water: For most baking projects, a simple wash with warm water and dish soap is all you need. Use a soft sponge or cloth to gently clean the inside of each cavity.
- Dishwasher safe: Most silicone molds can go in the dishwasher. Place them on the top rack for best results.
- Stubborn residue: If batter or chocolate has hardened, soak the mold in warm soapy water for 15-20 minutes before washing. For baked-on stains, make a paste of baking soda and water, apply it gently, and rinse.
- Odors: Silicone can sometimes absorb strong odors. To remove them, soak the mold in a mixture of warm water and white vinegar for 30 minutes, then wash as usual.
Storing Silicone Molds
- Store molds in a cool, dry place away from direct sunlight.
- Stack similar-sized molds together to save space, but avoid placing heavy items on top that could cause them to warp.
- Keep molds away from sharp objects that could puncture or cut the silicone.
- If storing for a long period, make sure they’re completely dry to prevent any mold or mildew growth.
Creative Ways to Use Silicone Molds Beyond Baking
While most people associate silicone molds with cupcakes and brownies, their uses extend far beyond traditional baking. Here are some creative ideas to get more out of your molds:
Chocolate and Candy Making
Silicone molds are perfect for making chocolate bars, truffles, lollipops, and gummy candies. Simply melt your chocolate or candy mixture, pour it into the molds, and let it set in the refrigerator. The flexible silicone makes it easy to pop out delicate chocolate shapes without breaking them.
Homemade Soap and Bath Bombs
If you enjoy DIY projects, silicone molds are excellent for making handmade soap bars and bath bombs. The non-stick surface ensures clean release, and the flexible material makes it easy to remove even intricate designs.
Savory Dishes
Don’t limit yourself to sweet treats. Silicone molds work wonderfully for mini quiches, egg muffins, meatballs, and individual portions of jello. They’re also great for making perfectly shaped burger patties from ground meat.
Frozen Treats
Use silicone molds to make homemade ice cream bars, frozen yogurt bites, fruit popsicles, and flavored ice cubes. The flexibility of silicone means frozen treats pop out effortlessly — no running under hot water required.
Other Creative Uses
- Making wax melts for candles
- Creating resin art pieces
- Forming butter or cream cheese into decorative shapes for dinner parties
- Making homemade crayons for kids
li>Shaping rice for sushi
Expert Tips for Getting the Best Results
Here are some insider tips that will take your silicone mold baking to the next level:
- Rotate halfway through: If your oven has hot spots, turn the baking sheet 180 degrees halfway through the baking time for even browning.
- Use an oven thermometer: Oven dials aren’t always accurate. An oven thermometer helps you verify the actual temperature inside your oven.
- Don’t preheat empty molds: Always fill your molds before placing them in the oven. Empty silicone molds can warp if exposed to high heat without the stabilizing weight of batter.
- Experiment with placement: For chewier results, bake on a lower rack. For crispier tops, move to the upper rack for the last few minutes.
- Mix and match: You can use different mold shapes on the same baking sheet. Just keep in mind that different sizes may require different baking times.
- Mark your molds: If you own several similar-looking molds, use a permanent marker on the bottom to note the brand, temperature rating, or size. This saves time when you’re in the middle of a baking session.
Frequently Asked Questions
Before we wrap up, let’s address some of the most common questions people have about using silicone molds in the oven. These answers will help clear up any lingering doubts and give you the confidence to start baking.
Conclusion
Using silicone molds in the oven is one of the simplest upgrades you can make to your baking routine. They’re safe, versatile, and incredibly easy to use once you know the basics. From the initial preparation to the final cleanup, silicone molds streamline the entire baking process.
Remember the key points: always check the temperature rating, place your molds on a baking sheet, fill them about two-thirds full, and let your baked goods cool before removing them. With these tips in your back pocket, you’ll be creating perfectly shaped treats in no time.
Whether you’re baking a cake in the oven or experimenting with homemade chocolates, silicone molds give you the flexibility and convenience that traditional pans simply can’t match. So grab your favorite mold, pick a recipe, and start baking — you might just wonder how you ever managed without them.
Frequently Asked Questions
Can you put silicone molds directly in the oven?
Yes, you can put silicone molds directly in the oven as long as they are made from food-grade silicone and you stay within the recommended temperature range. Most silicone molds are safe up to 428°F (220°C). Always check the manufacturer’s guidelines for your specific mold before use.
Do you need to grease silicone molds before baking?
In most cases, no. Silicone molds have a naturally non-stick surface that allows baked goods to release easily without greasing. However, for very sticky or sugary recipes, or molds with intricate designs, a light coating of cooking spray can help ensure clean release.
Do you need to use a baking sheet with silicone molds?
Absolutely. Always place silicone molds on a sturdy baking sheet before putting them in the oven. Silicone is flexible and can be difficult to handle when filled with batter. A baking sheet provides stability, prevents spills, and makes it much easier to move the molds in and out of the oven safely.
Can silicone molds go in a convection oven?
Yes, silicone molds can be used in a convection oven. However, you should reduce the temperature by about 25°F (15°C) compared to a conventional oven setting, and check for doneness a few minutes earlier. Convection ovens circulate hot heat more aggressively, which can affect baking times.
How do you clean silicone molds after baking?
Cleaning silicone molds is simple. Wash them with warm water and mild dish soap using a soft sponge. Most silicone molds are also dishwasher safe — just place them on the top rack. For stubborn residue, soak the mold in warm soapy water for 15-20 minutes before washing.
Why do my baked goods have a rubbery smell when using silicone molds?
A rubbery smell can occur with new silicone molds or low-quality products. To prevent this, always wash new molds before first use and bake them empty at 350°F (175°C) for about 10 minutes to off-gas any residual odors. If the smell persists, soak the mold in a mixture of warm water and baking soda for 30 minutes.